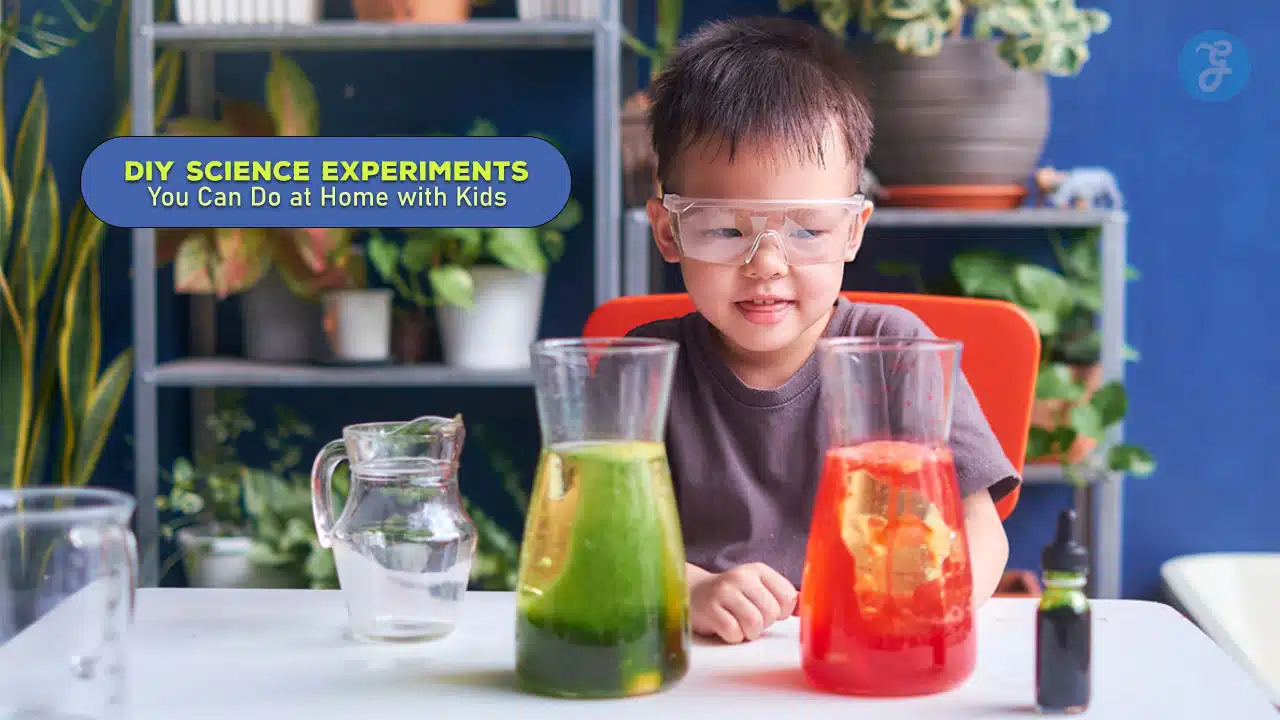
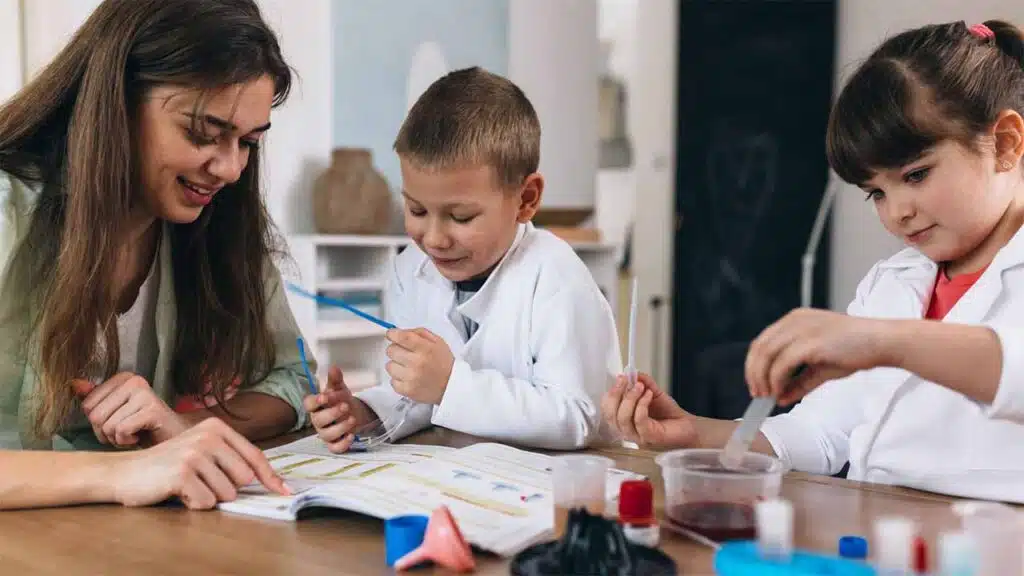
Science experiments are a fun way to learn about the world around us. They can spark curiosity and excitement in kids of all ages. You can do many cool science experiments right at home using everyday items from your kitchen or garage. These DIY projects are easy and safe and teach essential science concepts.
Kids love hands-on activities that let them explore and discover new things. Home science experiments are perfect for rainy days, weekends, or any time you want to have fun while learning.
You don’t need fancy equipment or a lab coat to be a scientist. With some simple supplies and creativity, you can turn your kitchen into a science lab and amaze your kids with fantastic reactions and demonstrations.
1. Build a Baking Soda Volcano
Want to wow your kids with an explosive science experiment? Try making a baking soda volcano! This classic project is fun and messy and teaches essential chemical reactions.
To start, you’ll need a few simple ingredients. Gather baking soda, vinegar, dish soap, food coloring, and a plastic bottle. You’ll also want materials to build your volcano shape, like sand, clay, or a mix of flour and salt.
First, create the volcano structure. Place the plastic bottle on a tray or in a pan. Mold your chosen material around it to form a cone shape. Leave the bottle opening uncovered at the top.
Next, prep your eruption mixture. Pour about 1/4 cup of baking soda into the bottle. Mix 1 cup of vinegar with a few drops of dish soap and food coloring in a separate container.
When ready for the big moment, pour the vinegar mixture into the bottle. Watch the colorful, foamy “lava” flow down your volcano!
For extra fun, try different vinegar amounts or add more baking soda to see how it changes the reaction. You can also decorate your volcano with toy dinosaurs or trees.
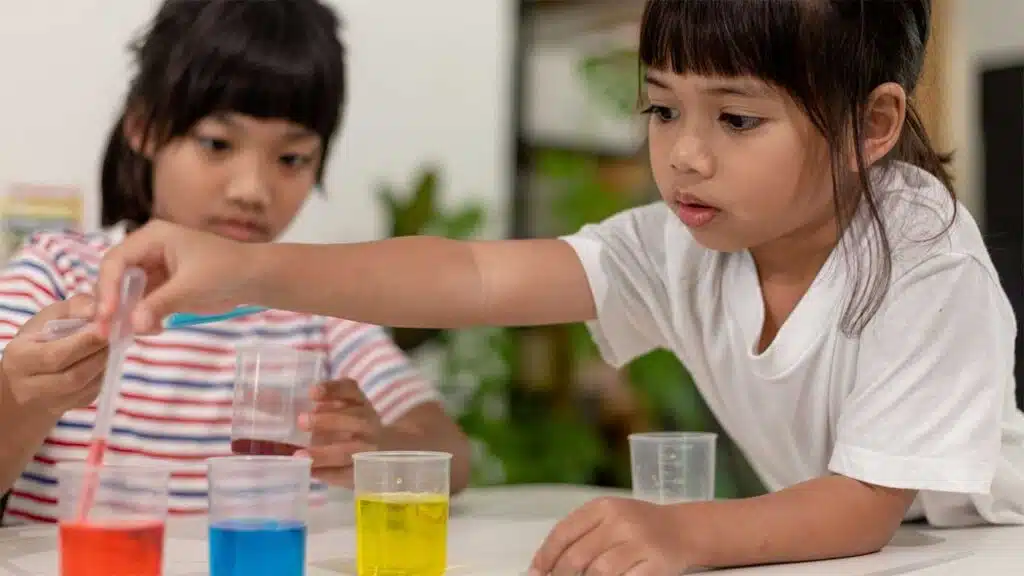
2. Create a Rainbow in a Jar
Want to make a colorful science experiment at home? Try creating a rainbow in a jar! This fun activity teaches kids about density and color mixing.
You’ll need a tall, clear jar or glass, honey, dish soap, water, food coloring, and a straw. Start by pouring honey into the bottom of the jar.
Next, mix red and blue food coloring with some honey to make purple. Carefully add this on top of the plain honey layer.
Pour blue dish soap on top of the purple layer. For the next layer, mix green food coloring with water. Use a straw to slowly drip the green water on the blue soap.
Keep adding layers of colored water, working your way through the rainbow colors. Go slow and steady to keep the layers separate.
The liquids stay in distinct layers because they have different densities. Heavier liquids sink to the bottom, while lighter ones float on top.
This eye-catching experiment is a great way to explore scientific concepts with kids. They’ll love seeing the rainbow appear right before their eyes!
3. DIY Lava Lamp
Want to make your groovy lava lamp? It’s easier than you think! This fun experiment teaches kids about density and chemical reactions.
You’ll need a clear bottle, water, vegetable oil, food coloring, salt, or an antacid tablet. Fill the bottle about 1/4 full with water and add a few drops of food coloring.
Next, pour in vegetable oil until the bottle is almost complete. Watch as the oil and water separate! Oil is less dense than water, so it floats on top.
Now for the lava effect. If using salt, sprinkle in a teaspoon and watch blobs of colored water rise and fall. The salt sinks, pulling down some colored water before dissolving.
Break an antacid tablet into pieces for a longer-lasting effect and drop them in. As they dissolve, they create gas bubbles that lift the colored water.
This colorful, bubbly display is sure to fascinate kids and adults alike. It’s a great way to spark curiosity about basic scientific concepts through hands-on play.
4. Static Electricity Balloon
Want to see science in action? Try this cool static electricity experiment with balloons! It’s easy and fun for kids of all ages.
First, blow up a balloon and tie it off. Now rub it on your hair or a wool sweater for about 30 seconds. This creates static electricity on the balloon’s surface.
Next, hold the balloon near small pieces of paper. Watch as they jump up and stick to the balloon! The static charge attracts the paper bits like magic.
You can also use the charged balloon to bend a thin stream of water from a faucet. Slowly move the balloon close to the water without touching it. The stream will bend towards the balloon.
Another neat trick is to stick the balloon to a wall after rubbing it. The static charge will hold it in place for a while.
Why does this happen? The rubbing transfers electrons, creating an imbalance of electrical charge. This causes attraction between the balloon and other objects.
Try experimenting with different materials to see what works best. Wool, hair, and synthetic fabrics often create the most vital static charge.
This simple activity shows how invisible forces can have visible effects. It’s a great way to spark curiosity about electricity and physics.
5. Invisible Ink with Lemon Juice
Want to write secret messages like a spy? Try making invisible ink with lemon juice! This fun experiment is easy to do at home.
You’ll need a lemon, water, paper, a cotton swab, and a heat source like an iron or light bulb. Squeeze some lemon juice into a small bowl and add a few drops of water.
Dip the cotton swab in the lemon juice mix. Use it to write your secret message on the paper. Let the paper dry completely. The writing will fade away, becoming invisible!
To reveal the hidden message, carefully heat the paper. You can use an iron on low heat or hold it near a light bulb. Don’t get too close, or the paper might burn!
The lemon juice will react with the heat as the paper warms up. Your secret writing will slowly appear, turning brown. It’s like magic!
This happens because lemon juice contains carbon compounds. When heated, these compounds break down and turn brown. The heat also makes the paper fibers react, creating more brown color.
Try using different fruit juices or baking soda solutions as your invisible ink. See which ones work best!
6. Homemade Slime
Homemade slime is a fun and easy science experiment you can do with kids. It’s a great way to teach about polymers and chemical reactions.
You’ll need white glue, water, food coloring, and borax solution to make basic slime. Mix 1/2 cup glue with 1/2 cup water and add food coloring if desired.
Dissolve 1/2 tablespoon of borax in 1/2 cup water in a separate bowl. Slowly pour this into the glue mixture while stirring. Watch as the slime forms!
You can change up the recipe to make different types of slime. Try adding shaving cream for fluffy slime or clear glue for transparent slime.
Want magnetic slime? Mix in some iron oxide powder. For extra sparkle, add glitter to your mixture.
Slime is more than just fun to play with. It demonstrates how chemical bonds form between molecules to create a non-Newtonian fluid.
Remember to supervise kids during this activity. While the ingredients are safe, they shouldn’t be eaten. Always wash your hands after playing with slime.
Experimenting with different ingredients can lead to discoveries. Try replacing borax with contact lens solution or liquid starch to see what happens.
Slime can be stored in an airtight container when playtime is over. This will keep it fresh for future science adventures!
7. Simple Circuit with a Battery and Lightbulb
Want to light up your kid’s eyes with a fun science project? Try making a simple circuit! This experiment teaches the basics of electricity in a hands-on way.
You’ll need a battery, a small lightbulb, two wires, and a switch. Start by connecting one wire from the battery to the lightbulb holder.
Next, attach the other wire from the battery to one side of the switch. Connect the remaining wire from the switch to the lightbulb holder.
When you flip the switch, the circuit closes, and the bulb lights up. Turn it off, and the circuit opens, cutting power to the bulb.
This setup shows how electricity flows in a loop. The battery provides power, the wires carry it, and the bulb uses it to make light.
You can get creative with your circuit. Try using foil strips instead of wires. Or add more bulbs to see how it changes the brightness.
Safety first! Always have an adult help with any electrical projects. And be careful not to short-circuit the battery.
8. Grow Crystals in a Jar
Growing crystals in a jar is a fun and easy science experiment for kids. You can make beautiful crystals using everyday items from your kitchen.
To start, you’ll need a clean glass jar, hot water, and a crystal-forming substance like Epsom salt or borax. Sugar works, too!
Mix the substance with hot water in the jar. Use about 1 part of the substance to 4 parts water. Stir until it’s fully dissolved.
Next, tie a string to a pencil and hang it in the jar. The string should not touch the bottom or sides.
Place the jar somewhere it won’t be disturbed. You’ll see tiny crystals forming on the string within a few hours.
Leave the jar for several days. The longer you wait, the bigger the crystals will grow.
You can experiment with different substances to create crystals of various shapes and colors. Try adding food coloring for extra fun!
This project teaches kids about solutions, evaporation, and crystal formation. It’s a great way to spark their interest in chemistry.
9. Make a Paper Mache Volcano
Creating a paper mache volcano is a fun and exciting science project you can do at home. This classic experiment lets you build a mini-volcano that erupts!
To start, you’ll need some basic supplies. Gather newspaper, flour, water, paint, and baking soda. You’ll also need vinegar for the eruption.
Begin by making a cone shape for your volcano. Use cardboard or a plastic bottle as a base. Cover it with strips of newspaper dipped in a flour and water paste.
Let your volcano dry completely. This may take a day or two. Once dry, paint it to look like a real volcano. Add brown and gray colors for rocks and green for plants.
Mix baking soda and red food coloring for the eruption in the volcano’s opening. When it is ready to erupt, pour in some vinegar. Watch your volcano come to life with a bubbly, fizzy “lava” flow!
This project teaches about chemical reactions and volcano formation. It’s a great way to spark interest in earth science and geology.
10. DIY Wind Turbine
Want to harness the power of the wind? You can build a simple wind turbine at home with everyday items. This fun project teaches kids about renewable energy and mechanics.
You’ll need a plastic bottle, cardboard, a wooden skewer, and other essential supplies. Cut the bottle in half and use it as the base. Make cardboard blades and attach them to the skewer.
Poke holes in the bottle to hold the skewer. Add a small weight to the end of a string and tie it to the skewer. When the wind blows, the blades spin and lift the weight.
Try different blade shapes and sizes to see what works best. Use a fan or hairdryer to test your turbine if there’s no wind outside. See how much weight your turbine can lift.
For an extra challenge, connect a small motor to generate electricity. You might even power an LED light with your homemade wind turbine. This hands-on experiment makes green energy concepts come alive.
11. Plant Dissection
Plant dissection is a fun and educational science experiment for kids. It lets you explore the inside of flowers and learn about their parts.
To start, gather some flowers from your garden or a local store. Choose flowers with significant, easy-to-see parts. Tulips, lilies, or daisies work well.
You’ll need a few simple tools. Get scissors, tweezers, and a magnifying glass. These help you see and separate the tiny flower parts.
Begin by gently pulling off the petals. Count how many there are. Look at their color and shape. Set them aside on a piece of paper.
Next, find the stamens. These are the thin, stick-like parts inside the flower. They usually have little pollen sacs on top.
Look for the pistil in the center. It’s often green and shaped like a vase. Cut it open to see the tiny ovules inside.
As you take apart the flower, draw what you see. Label each part on your drawing. This helps you remember what you’ve learned.
Try dissecting different types of flowers. Compare their parts. How are they similar or different?
This hands-on activity teaches you about plant biology. It’s a great way to learn how flowers grow and make seeds.
12. Make Butter in a Jar
Turn cream into butter with this fun and easy experiment. You’ll need heavy whipping cream, a jar with a tight lid, and some energy to shake it up.
Fill a clean jar halfway with heavy cream. Make sure the lid is on tight. Now it’s time to shake! This part takes about 15-20 minutes, so get ready for a workout.
As you shake, the cream will go through different stages. First, it becomes whipped cream. Keep shaking, and it will start to separate into butter and buttermilk.
You’ll know it’s done when you see a solid lump of butter floating in liquid. Pour out the buttermilk and rinse the butter with cold water. Knead it to remove any remaining liquid.
Add a pinch of salt, and spread your homemade butter on some bread. It’s delicious, and you made it yourself!
This experiment teaches kids about emulsions and how agitation can change the structure of food. It’s also a great way to burn off some energy on a rainy day.
13. Egg in a Bottle Trick
Want to amaze your kids with an excellent science trick? Try the egg-in-a bottle experiment! This classic demo shows air pressure in action.
You’ll need a hard-boiled egg, a glass bottle with a mouth slightly smaller than the egg, matches, and a strip of paper. Peel the egg first.
Light the paper strip and drop it in the bottle. Quickly place the egg on top. As the flame uses up oxygen, the air pressure inside drops. The higher outside pressure pushes the egg in!
Getting the egg out is tricky. Try blowing into the bottle to increase inside pressure. Or flip it upside down and let gravity help.
This experiment teaches kids about air pressure differences. It also shows how fire needs oxygen. Plus, it’s just plain fun to watch that egg squeeze through!
Be sure to supervise closely when using matches. Safety first for all kitchen science! With care, this trick will spark curiosity and lead to great discussions about air, pressure, and fire.
14. Homemade Kaleidoscope
Want to create your colorful optical illusion? Making a homemade kaleidoscope is a fun and easy science project for kids.
You’ll need a few simple materials: a cardboard tube, flexible mirror sheets, colorful beads, and clear plastic for the end cap.
Start by cutting the mirror sheet into three long strips. Fold these strips into a triangular prism shape and slide them into your cardboard tube.
Next, create the end cap by cutting a circle of clear plastic. Add colorful beads or sequins inside before sealing it onto one tube end.
Decorate the outside of your kaleidoscope with paint or stickers. Now, you’re ready to look through it and see unique patterns!
Point your kaleidoscope towards a light source for the best effect. As you rotate the tube, watch how the beads create ever-changing designs.
This project teaches kids about light, reflection, and symmetry. It’s a great way to explore optics while making a cool toy.
15. Balloon-Powered Car
Want to see Newton’s laws in action? Build a balloon-powered car! This fun experiment teaches kids about energy and motion.
You’ll need a plastic bottle, straws, wooden skewers, bottle caps, tape, and a balloon. Cut the bottle for the car body. Attach straws underneath the axles.
Thread skewers through the straws and add bottle cap wheels. Tape a balloon to a straw on the back of the car. Blow up the balloon through the straw.
Put your car on a smooth surface. Let’s go and watch it zoom! As the air rushes out, it pushes the vehicle forward.
Try different balloon sizes or wheel types. How do they change your car’s speed and distance? Can you make your car go farther or faster?
This project shows how stored energy becomes motion. It’s a great way to learn about forces and have fun building something cool.
16. Erupting Soap with Ivory Soap Experiment
Prepare for a fun and easy science experiment that amazes kids and adults alike. The Erupting Soap experiment uses a bar of Ivory soap and a microwave.
Start by placing the Ivory soap on a microwave-safe plate. Put it in the microwave and turn it on high for 1.5 to 2 minutes. Watch closely as the soap begins to grow and expand.
The soap will transform into a fluffy, cloud-like mass. This happens because Ivory soap is whipped with air during manufacturing. The air pockets expand when heated, causing the soap to puff up.
After the microwave stops, let the soap cool for a minute before touching it. Be careful, as some parts may still be hot. You can break off any unexpanded chunks and microwave them again for more erupting fun.
This experiment is quick, simple, and messy in a good way. Kids will love watching the soap grow and playing with the resulting foam. It’s a great way to introduce concepts like heat and gas expansion.
The best part? The expanded soap is still usable. You can crumble it up for bath time or use it for hand washing. It’s a science experiment that’s practical too!
17. DIY Microscope with a Water Drop
Want to see tiny things up close? You can make a simple microscope at home using just water! This remarkable experiment lets you peek into a miniature world.
To start, you’ll need a few essential items. Grab clear tape, a piece of cardboard, and a dropper or straw. You’ll also want a flashlight and some small objects to look at.
Put a strip of clear tape over a hole in the cardboard. Then, add a tiny drop of water to the tape. The water acts like a lens to make things look more prominent.
Place your small object under the water drop. Shine the flashlight from below. Look through the water drop from above. You’ll see the object magnified!
Try different-sized water drops to change how much things are magnified. More significant drops make things look even more significant. You can see unique details this way.
This simple DIY microscope is a fun way to explore the tiny world around you. It’s perfect for looking at salt crystals, flower parts, or even small bugs.
18. Oobleck Slime
Oobleck slime is a fun and easy science experiment you can do at home with kids. You only need two main ingredients: cornstarch and water.
Mix 2 cups of cornstarch with 1 cup of water in a bowl to make oobleck. Stir until it forms a thick, gooey substance. You can add food coloring if you want to make it colorful.
Oobleck is unique because it acts like both a liquid and a solid. When you squeeze it, it feels hard. But when you let go, it flows like a liquid. This makes it a non-Newtonian fluid.
Try these incredible things with your oobleck:
- Poke it quickly with your finger. It will feel solid.
- Slowly dip your hand in. It will feel like liquid.
- Roll it into a ball. When you stop, it will melt in your hands.
You can also try walking on a large batch of oobleck. Fill a shallow plastic pool or bin with a big batch. Step on it quickly, and you’ll stay on top. Stand still, and you’ll sink!
Oobleck is named after a Dr. Seuss book called “Bartholomew and the Oobleck.” It’s a great way to learn about states of matter while having messy fun.
19. Homemade Rainbow
Want to make a rainbow at home? You can do it with just a few simple items. This fun experiment teaches kids about light and color.
You’ll need a glass of water, white paper, and sunlight. Place the glass on a sunny windowsill. Hold the paper behind it at different angles.
Watch as a rainbow appears on the paper! The water acts like tiny prisms, splitting sunlight into its color components.
Try using different-shaped containers. A round fishbowl or a rectangular vase can create unique rainbow effects. You can also use a mirror in a water bowl for a similar result.
For a portable rainbow, fill a clean spray bottle with water. On a sunny day, spray a fine mist into the air. Look for the rainbow that forms in the water droplets.
Another option is to make a rainbow with candy. Line up colorful candies like Skittles in a circle on a plate. Add warm water to the middle and watch the colors spread in a rainbow pattern.
These simple rainbow experiments are a great way to explore the science of light and color with kids. They’re easy to set up and provide excellent visual results.
20. Build a Catapult
Building a catapult is a fun way to learn about physics and engineering. You can make one at home with simple materials.
Gather some popsicle sticks, rubber bands, and a plastic spoon to start. These will be the main parts of your catapult.
Stack seven popsicle sticks and wrap rubber bands around both ends. This forms the base of your catapult.
Take two more popsicle sticks and stack them. Wrap a rubber band around one end. This will be the arm of your catapult.
Place the arm on top of the base. Secure it with another rubber band. Make sure the arm can move up and down freely.
Attach the plastic spoon to the end of the arm with a rubber band. This is where you’ll put your projectile.
Your catapult is ready! Try launching soft objects like marshmallows or pom-poms. See how far they go!
You can experiment with different designs. Try changing the arm length or adding weight to the base. See how these changes affect how far your projectile flies.
This project teaches kids about energy, force, and motion. It’s a hands-on way to explore these science concepts.
Safety First: Preparing for DIY Science Experiments
Before starting any experiments, setting up a safe environment is crucial. The right gear and supervision can prevent accidents and make science fun for kids of all ages.
Essential Safety Equipment
You’ll need essential safety items during experiments to protect yourself and your kids. Safety goggles are a must to shield eyes from splashes or debris. Keep a first aid kit nearby for minor cuts or burns. Wear gloves when handling chemicals or hot objects.
A fire extinguisher is essential for experiments involving heat or flames. Make sure you know how to use it. Keep paper towels or a spill kit handy for quick cleanups.
Use proper containers for mixing and storing materials. Avoid glass when possible to prevent breaks. Label all containers clearly. Have a designated area for experiments away from food prep spaces.
Supervision and Age Appropriateness
You should always supervise kids during science activities. Younger children need constant watching. Older kids may work more independently but still need an adult nearby.
Match experiments to your child’s age and abilities. Simple color mixing is great for preschoolers. Older kids can handle more complex tasks like building circuits.
Read all the instructions before starting. Explain safety rules clearly to kids. Show them how to use equipment properly. Don’t let kids eat or drink during experiments.
Be ready to step in if things go wrong. Know what to do in the event of spills or accidents. Have emergency numbers handy, just in case.
Gathering Materials and Setting Up
Getting ready for science experiments is easy and fun. You’ll need everyday items from around your house and an excellent workplace.
Common Household Items
Look in your kitchen and bathroom for supplies. You’ll find many things you can use:
- Water, salt, sugar, and baking soda
- Food coloring and vinegar
- Plastic cups, plates, and spoons
- Paper towels and napkins
- Rubber bands and balloons
Check your recycling bin, too. Empty bottles and jars work great for experiments. Don’t forget to ask an adult for help finding things.
Organizing Your Workspace
Pick a good spot for your experiments. The kitchen table or a desk works well. Cover it with newspaper or a plastic tablecloth to keep it clean.
Get all your items ready before you start. Put them in groups so they’re easy to find. Keep paper towels nearby for spills.
Make sure you have enough space to move around. Clear off extra stuff you don’t need. Good lighting helps you see what’s happening in your experiments.
Understanding the Scientific Method
The scientific method helps kids think like natural scientists. It teaches them to ask questions and find answers through experiments. Let’s explore the essential steps.
Formulating Hypotheses
A hypothesis is your guess about what will happen in an experiment. It’s like making a prediction. You use what you already know to come up with an idea.
To make a reasonable hypothesis:
- Ask a question about something you want to learn
- Think about what might happen
- Write it down in an “If…then…” statement
For example: “If I water a plant more, it will grow taller.”
Conducting Experiments
Experiments test your hypothesis. They help you find out if your guess was right or wrong.
Steps for a good experiment:
- Gather materials
- Set up your test
- Change only one thing at a time
- Experiment more than once
Remember to stay safe! Always ask an adult for help when using tools or chemicals.
Recording Observations
Writing down what you see is super important. It helps you remember details and spot patterns. Good scientists take lots of notes.
Ways to record observations:
- Use a notebook
- Draw pictures
- Make charts or graphs
- Take photos or videos
Be specific in your notes. Instead of “The plant grew,” write “The plant grew 2 inches in 1 week.”
Try to observe with all your senses. What do you see, hear, smell, or feel?
Enhancing Learning Through Science
Science experiments spark curiosity and connect ideas to the real world. They make learning fun and memorable for kids.
Encouraging Curiosity and Questions
Hands-on experiments let kids explore and ask questions. When you do experiments at home, give your child time to think. Ask them what they see and why they believe it happens. Let them make guesses before you explain.
Try this: Before each experiment, have your child write down what they think will happen. Afterward, talk about whether their guess was right or wrong. This helps them learn to make predictions and test ideas.
Praise their questions and ideas, even if they’re not correct. This builds confidence and keeps them excited about learning.
Connecting Experiments to Real-World Concepts
Link each experiment to things your child sees every day. This helps them understand why science matters.
For example:
- The baking soda and vinegar volcano shows how some chemicals react
- A plant-growing experiment teaches about what living things need
- Making slime can explain states of matter
Point out science in daily life:
- Cooking is chemistry
- Riding a bike uses physics
- Weather changes are earth science in action
This helps your child see that science isn’t just in books or labs. It’s all around us, making the world work.
Summary
engaging in DIY science experiments at home with your kids is a fantastic way to inspire curiosity, foster learning, and have fun together. These activities provide hands-on experiences that make scientific concepts more relatable and exciting.
Whether you’re building a baking soda volcano, creating a rainbow in a jar, or constructing a homemade wind turbine, each experiment offers a unique opportunity to explore the wonders of science in a safe and enjoyable environment.
By encouraging your child to ask questions, make predictions, and observe outcomes, you’re helping them develop critical thinking skills that will serve them well throughout their lives.
The beauty of these experiments lies in the knowledge they impart and the shared moments of discovery and wonder that you and your child will cherish.