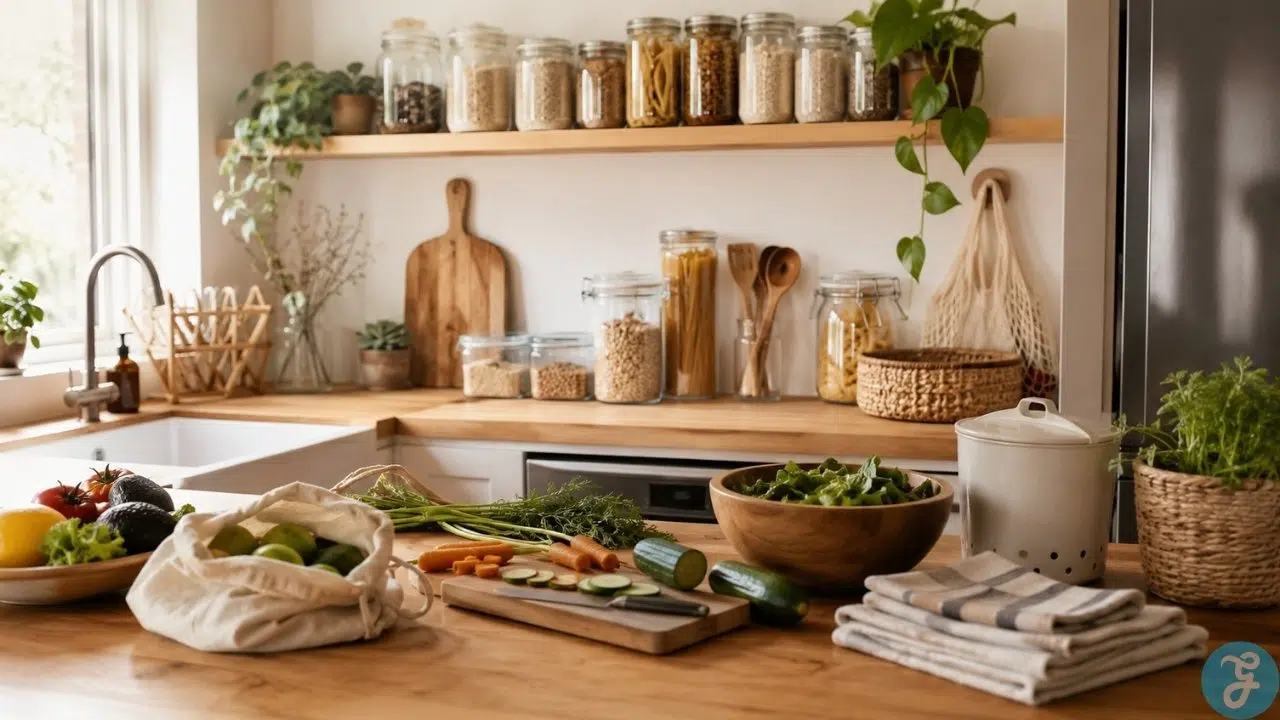
A zero waste kitchen setup does not begin with bamboo jars, matching labels, and a guilt trip every time a wrapper enters the house. It begins with a quieter question: where is your kitchen leaking waste every week?
For most homes, the answer is not dramatic. Food spoils in the back of the fridge. Plastic bags collect under the sink. Half-used sauces expire because nobody remembers buying them. Takeout containers multiply. Paper towels disappear faster than anyone admits. The trash bin fills with a mix of food scraps, packaging, and things that were bought with good intentions but no real plan.
That is why a good zero waste kitchen setup needs less aesthetic pressure and more household logic. The goal is not to build a perfect plastic-free kitchen overnight. The goal is to create a sustainable kitchen that wastes less food, depends less on single-use plastic, and makes everyday cooking easier instead of more annoying.
This eco kitchen guide takes the practical route. No purity test. No “throw everything away and buy new sustainable products” nonsense. A low-waste kitchen should save money, reduce clutter, and help you cook with more control. If the setup makes your life harder, it will not last.
Why a Zero Waste Kitchen Setup Works Best When It Starts Small
A kitchen creates waste through habits, not just products. That means a drawer full of reusable wraps will not fix much if groceries still get overbought, leftovers still get forgotten, and meal planning still happens five minutes before everyone gets hungry.
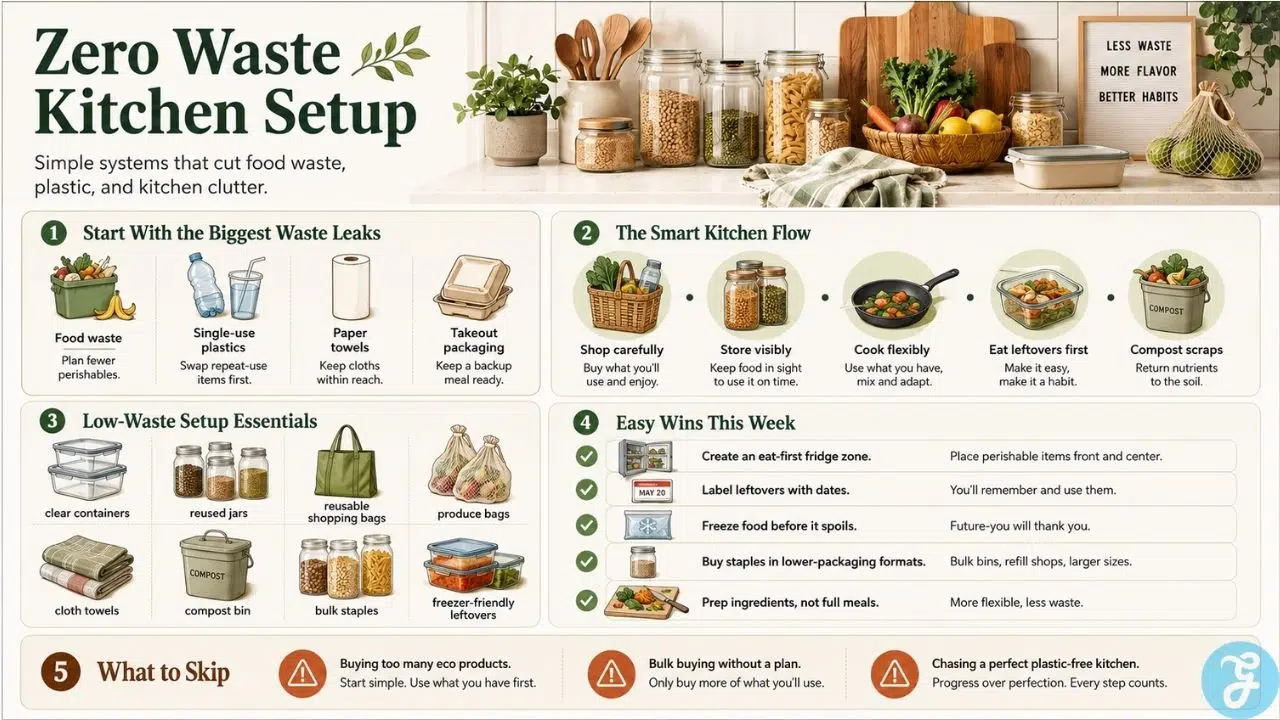
Start with the biggest leaks first. In many homes, that means food waste, packaging, and cleaning disposables. These three areas shape most of the daily trash leaving the kitchen.
A realistic zero waste kitchen setup should answer four simple questions:
What food do we waste most often?
Which single-use items do we reach for without thinking?
Which packaging enters the kitchen every week?
What system would make the better choice easier?
That last question matters most. People do not stick with sustainable habits because they sound noble. They stick with them because the better option becomes the easier option.
Step 1: Audit Your Kitchen Before Buying Anything
The worst way to build a sustainable kitchen is to shop first. Many people buy jars, produce bags, beeswax wraps, wooden brushes, compost bins, and glass containers before they understand what problem they are solving. Then the “eco” products become another layer of clutter.
Spend one week watching what your kitchen actually throws away. Do not judge it yet. Just notice.
Look at what fills the bin. Food scraps? Plastic packaging? Paper towels? Disposable coffee pods? Snack wrappers? Takeout boxes? Spoiled produce? Half-eaten leftovers?
Then check your fridge and pantry. Look for duplicate items, expired sauces, wilted greens, forgotten grains, stale snacks, and freezer containers nobody can identify. This is where the real setup begins.
Use this quick breakdown to decide where to focus first:
| Waste problem | What it usually means | First fix |
|---|---|---|
| Spoiled produce | You buy more fresh food than your week can handle | Buy fewer fresh items and prep fragile produce first |
| Leftovers thrown out | Food has no visible system after cooking | Create an “eat first” area in the fridge |
| Too much plastic packaging | Shopping habits rely on packaged staples | Switch one staple at a time to refill, bulk, or larger-format buying |
| Paper towel overuse | Reusables are not easy to grab | Keep clean cloths where paper towels used to sit |
| Takeout container buildup | Busy nights have no backup meal | Keep two low-waste emergency meals ready |
This audit keeps the setup honest. Your kitchen does not need every zero waste swap on the internet. It needs the swaps that solve your household’s actual mess.
Step 2: Build a Food Storage System That Prevents Waste
Food storage is the spine of a zero waste kitchen setup. If food stays visible, labeled, and easy to use, less of it ends up in the trash.
Start with the fridge. Most waste hides in the places people avoid: deep shelves, cloudy containers, overloaded drawers, and mystery leftovers. The fix is not fancy. It is visibility.
Create three zones.
First, make an “eat first” area. Use a tray, small bin, or front shelf for leftovers, opened dips, cut fruit, cooked grains, and anything close to its best quality. This area should be impossible to miss.
Second, keep produce where it makes sense. Delicate greens need attention early. Hardier produce like carrots, cabbage, apples, and potatoes can wait longer. If your household forgets produce in drawers, keep some items in clear containers at eye level.
Third, label cooked food. A small piece of masking tape with the date is enough. You do not need a Pinterest label system. You need to know whether the rice is from Monday or last month.
A sustainable kitchen often runs better when containers are standardized. Choose a few sizes that stack well. Glass containers work for leftovers, but reused jars are excellent for sauces, dressings, chopped herbs, dry goods, and freezer portions. The most sustainable container is usually the one already in your cupboard.
Step 3: Create a Plastic-Free Kitchen Without Replacing Everything
A plastic-free kitchen sounds clean and decisive, but most real kitchens cannot remove plastic in one weekend. Food systems still depend heavily on plastic packaging. Budgets matter. Access to bulk shops varies. Some plastic containers still work perfectly and should not be thrown away just because they are not pretty.
The smarter move is gradual replacement.
Use what you already own until it wears out. Then replace the most wasteful single-use items first. Plastic wrap, zip bags, produce bags, disposable cutlery, bottled water, and individually packaged snacks usually offer easy wins.
Here are practical swaps that actually earn their space:
| Instead of | Use |
| Plastic wrap | Plates over bowls, silicone lids, wax wraps, or containers |
| Disposable zip bags | Washable snack bags, jars, or lunch containers |
| Plastic produce bags | Mesh bags, cloth bags, or no bag for sturdy produce |
| Bottled water | Filter pitcher, faucet filter, or refillable bottle |
| Single-serve snacks | Larger packs portioned into containers |
| Disposable cutlery | A small travel cutlery set or spare home cutlery |
Do not replace durable plastic items just for the image of a plastic-free kitchen. If a plastic mixing bowl, storage tub, or spatula still works and stays safe for its purpose, keep using it. Zero waste is not a shopping style. It is a use-it-well style.
Step 4: Set Up a Low-Waste Grocery Routine
Your kitchen waste begins before food reaches the counter. A low-waste grocery routine matters because it controls packaging, food quantity, and impulse buying.
Start with a short meal plan, not a fantasy menu. Plan three or four real meals, not seven perfect ones. Leave space for leftovers, busy nights, and whatever is already in the fridge.
Before shopping, check perishables first. Build meals around what needs using. A half cabbage, cooked lentils, soft tomatoes, and a tub of yogurt can become slaw, soup, curry, sauce, or wraps. This habit saves more waste than buying a new eco product.
A good zero waste grocery kit can stay simple:
- Reusable shopping bags
- Produce bags
- A few jars or containers if your store allows refills
- A bread bag or clean cloth bag
- A list based on meals and current inventory
Bulk buying helps only when it matches how your household eats. Buying five kilos of oats is low-waste only if people actually eat oats. Otherwise, it is just future compost in a larger package.
For a plastic-free kitchen, focus on repeat purchases. If you buy rice, lentils, flour, coffee, tea, oats, pasta, nuts, or spices every month, those are good candidates for refill shops, bulk bins, larger bags, or lower-packaging brands. You do not need to solve every product at once. Start with the staples that enter your home most often.
Step 5: Make Food Prep Work for Waste Reduction
Food prep does not need to mean rows of identical containers filled with identical meals. For a zero waste kitchen setup, the better version is ingredient prep.
Wash greens when you bring them home if that helps your household use them. Chop sturdy vegetables for quick cooking. Cook one grain, one protein, and one sauce that can turn into several meals. Freeze bread before it goes stale. Portion leftovers for lunches before they become a sad container nobody opens.
The goal is to reduce friction. If vegetables are washed, sauces are visible, and leftovers are easy to grab, people eat what is already there.
Keep a “use soon” cooking rhythm:
- Soft fruit becomes smoothies, compote, oatmeal topping, or freezer fruit.
- Wilting herbs become pesto, herb oil, chutney, or frozen cubes.
- Stale bread becomes croutons, breadcrumbs, French toast, or bread pudding.
- Cooked rice becomes fried rice, soup thickener, rice cakes, or stuffed vegetables.
- Vegetable scraps become broth if you will actually make broth.
That last part matters. Saving scraps for broth is only useful if the freezer bag does not become a frozen guilt archive. A sustainable kitchen needs habits you finish.
Step 6: Compost What You Cannot Eat
Even careful kitchens create peels, coffee grounds, eggshells, tea leaves, and scraps. Composting gives those materials somewhere better to go than the trash.
The right compost setup depends on your home. A house with outdoor space can use a backyard compost bin, tumbler, or pile. An apartment can use a countertop collection bin paired with municipal compost pickup, a community garden drop-off, a bokashi system, or a worm bin if the household is willing to manage it.
Start with the collection habit. Keep a small container where food prep happens. If it smells or attracts pests, the system is too slow or too open. Use a lid, empty it often, or keep scraps in the freezer until drop-off day.
Common compostable kitchen materials include fruit and vegetable scraps, coffee grounds, tea leaves, eggshells, and some plain paper products depending on your compost program. Meat, dairy, oily foods, and cooked leftovers may not belong in basic home compost because they can smell, attract pests, or break down poorly. Local rules matter, so follow the system available in your area.
A compost bin does not excuse overbuying food. It is the backup plan, not the main plan. Eating the food still beats composting it.
Step 7: Replace Paper Towels With a Cloth System That Works
Paper towels disappear because they are convenient. A cloth system works only if it is just as easy.
Do not hide reusable cloths in a drawer across the kitchen. Put them where paper towels used to sit. Keep a small basket for clean cloths and another bin or bag for dirty ones. Wash them with towels or cleaning rags.
Use different cloths for different jobs if that helps avoid the “gross rag” problem. For example, keep soft cloths for hands and counters, tougher rags for spills, and old towels for floor messes. Color coding can help, but do not overcomplicate it.
For greasy messes, raw meat cleanup, or anything unsafe, paper towels may still have a place. A zero waste kitchen does not need fake purity. It needs fewer disposables where reusable options make sense.
Step 8: Rethink Dishwashing and Cleaning Supplies
A sustainable kitchen should also reduce waste around cleaning. This does not mean replacing every cleaner with a homemade vinegar mixture. It means choosing fewer products that work well and create less packaging.
Start with dish soap. Refill shops, concentrated dish soap, solid dish soap bars, or larger-format bottles can reduce packaging. For scrubbing, try compostable sponges, natural fiber brushes with replaceable heads, washable dishcloths, or durable scrubbers.
Keep cleaning simple. Most kitchens need a dish soap, a surface cleaner, baking soda for scrubbing, vinegar for some mineral buildup, and a disinfectant when food safety requires it. More bottles do not always mean a cleaner kitchen.
Be careful with “natural” claims. A product can look eco-friendly and still be overpackaged, overpriced, or unnecessary. Choose cleaning tools based on durability, refillability, and whether they actually do the job.
Step 9: Build a Better System for Leftovers
Leftovers fail when they become invisible, unlabeled, or boring. A zero waste kitchen setup needs a leftover plan before the food cools.
Put leftovers into clear containers. Label the date. Store them at eye level if they need to be eaten soon. Keep one weekly leftover meal where everyone eats what is already cooked. It does not need a cute name. It just needs to happen.
Make leftovers easier to remix:
- Roasted vegetables become wraps, omelets, grain bowls, or soup.
- Cooked beans become dips, tacos, curries, or salads.
- Pasta becomes baked pasta, frittata filling, or lunch boxes.
- Cooked chicken becomes sandwiches, fried rice, soup, or quesadillas.
- Sauces become the bridge between leftovers and a meal people actually want.
If your household hates eating the same meal twice, freeze single portions early. Do not wait until everyone is tired of it. Frozen leftovers work best when they still feel like future convenience, not punishment.
Step 10: Choose Durable Tools Over Trendy Eco Products
The zero waste market can get ridiculous fast. There is always another “must-have” kitchen swap, and many of them solve problems you may not have.
A durable setup needs fewer, better tools:
- Sharp knife
- Cutting board
- Stackable containers
- Jars
- Cloth towels
- Reusable bags
- Compost container
- Durable pan
- Basic repairable appliances where possible
- Freezer-safe containers
Before buying a new sustainable product, ask three questions.
- Will I use this every week?
- Does it replace something disposable?
- Can I clean, repair, refill, or reuse it easily?
If the answer is no, skip it. A sustainable kitchen is not built by collecting eco objects. It is built by reducing the churn of buying, wasting, replacing, and buying again.
Step 11: Make the Kitchen Easy for Everyone in the Home
A zero waste kitchen setup fails when only one person understands it. If the compost rules feel like a secret exam, people will throw scraps in the trash. If the reusable bags are hidden, people will forget them. If the leftover system depends on one person remembering everything, food will still spoil.
Make the setup obvious.
Put labels where they help. Keep bags near the door. Store lunch containers together. Place compost where chopping happens. Keep the “eat first” area visible. Put clean cloths in reach. Use clear bins in the pantry.
The goal is not to make the kitchen look perfect. The goal is to make the low-waste choice hard to miss.
For families, roommates, or shared kitchens, start with the least annoying changes. Cloth towels, visible leftovers, reusable shopping bags, and a simple compost bin usually work better than strict rules about every package.
Step 12: Keep an Emergency Meal Shelf
Busy nights create waste. When there is no plan, takeout packaging enters the kitchen fast. A low-waste emergency shelf helps prevent that.
Stock meals that require little effort:
- Pasta and jarred sauce
- Rice and lentils
- Canned beans
- Frozen vegetables
- Eggs
- Tortillas
- Soup ingredients
- Noodles
- Shelf-stable curry paste or sauce
- Frozen leftovers
This is not about never ordering food. It is about not letting exhaustion make the decision every time. A sustainable kitchen needs backup meals because real life does not care about your meal plan.
A Practical Place to Start With Sustainable Kitchen Choices
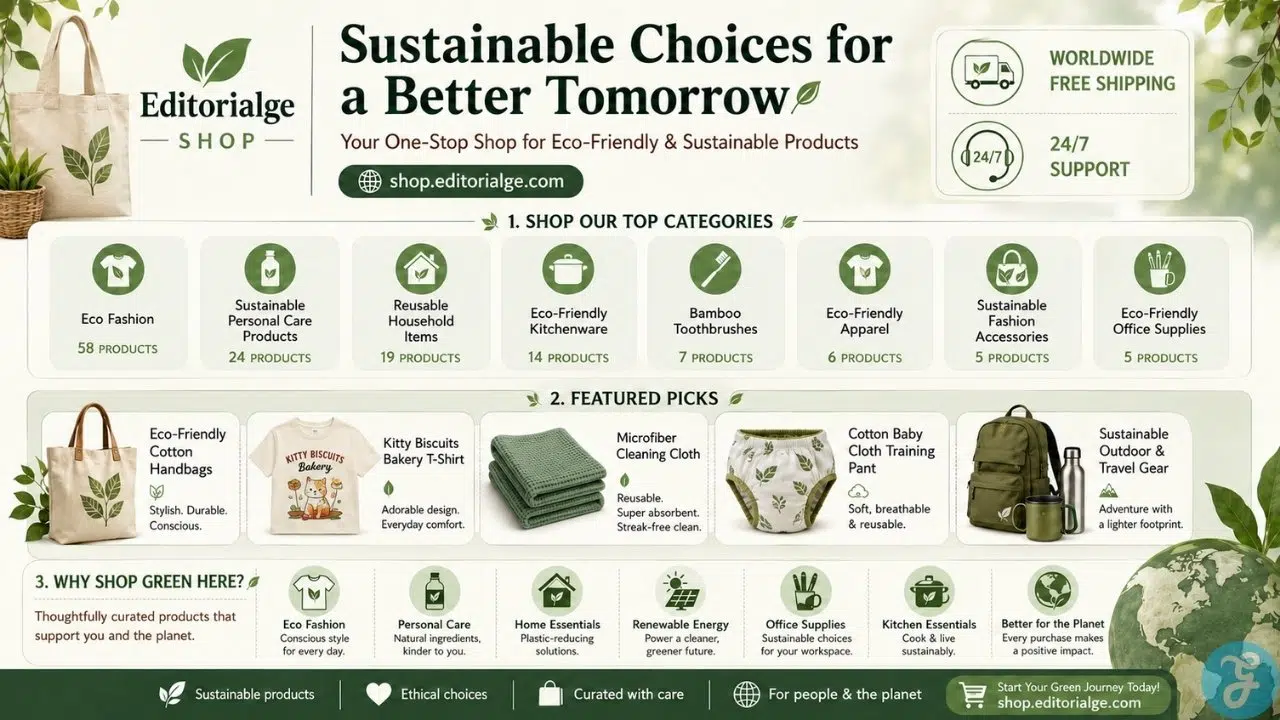
A zero waste kitchen setup becomes easier when the products around it support the habit. At Editorialge Eco Shop, we focus on everyday sustainability through reusable household items, eco-friendly kitchenware, personal care products, and lower-waste lifestyle essentials. The goal is not to push a perfect green-home image. It is to make better choices feel practical, repeatable, and easier to fit into real routines.
For anyone building a sustainable kitchen, that mindset matters. A reusable bag, a durable storage container, a bamboo brush, or a simple cleaning cloth may look small on its own, but these small swaps reduce the disposable items that pass through a home every week. Waste reduction works best when it becomes normal, not when it feels like a performance.
A Simple 30-Day Eco Kitchen Guide
A 30-day setup works better than a weekend overhaul because it gives habits time to settle.
Days 1 to 7: Watch the waste. Track what gets thrown away, what spoils, and what packaging repeats.
Days 8 to 14: Fix food visibility. Add an “eat first” area, label leftovers, and plan meals around what you already have.
Days 15 to 21: Reduce disposables. Replace paper towels, plastic wrap, bottled drinks, or snack bags, whichever creates the most waste in your kitchen.
Days 22 to 30: Add compost and improve shopping. Set up a scrap system, build a grocery kit, and switch one regular item to refill, bulk, larger-format, or lower-packaging buying.
This slower pace avoids the classic eco-kitchen burnout. You are not trying to become a different person in 30 days. You are making the room work better.
Zero Waste Kitchen Setup Checklist
Use this checklist as a practical starting point:
- Audit one week of kitchen trash.
- Create an “eat first” fridge area.
- Label leftovers with dates.
- Move clean cloths into easy reach.
- Set up a compost container or scrap collection system.
- Build a reusable grocery kit.
- Replace one single-use plastic item at a time.
- Store dry goods in visible containers or reused jars.
- Plan three or four meals before shopping.
- Keep one emergency meal shelf.
- Freeze food before it becomes waste.
- Avoid buying eco products that do not solve a real problem.
The best checklist is the one you can repeat. Start with five items if twelve feels like too much.
Common Mistakes That Make a Sustainable Kitchen Harder
The first mistake is buying too much too soon. A kitchen full of new jars can still waste food. Fix habits before aesthetics.
The second mistake is chasing a perfectly plastic-free kitchen. Some plastic will still enter most homes. Reduce the repeat offenders first.
The third mistake is overcomplicated composting. If the bin smells, leaks, or confuses everyone, the system needs adjusting.
The fourth mistake is bulk buying without a plan. Bulk waste is still waste.
The fifth mistake is treating zero waste as an individual moral performance. Food systems, packaging systems, store access, time, money, and local composting options all shape what people can do. Do what is practical, then improve the system when you can.
Budget-Friendly Zero Waste Kitchen Setup
A low-waste kitchen does not have to cost much. In fact, the cheapest version often starts with using what you already own.
Save jars from sauces, pickles, jam, and nut butter. Turn old cotton shirts into cleaning rags. Use plates as bowl covers. Reuse bread bags for freezer storage. Keep takeout containers if they are sturdy and safe to reuse. Use a regular bowl for food scraps if you do not have a compost caddy yet.
Spend money only where it changes a repeated habit. A good lunch container can reduce takeout packaging. A freezer-safe container can save leftovers. A durable water bottle can cut bottled drinks. A small compost bin can make scraps easier to collect.
The budget rule is simple: buy the thing only when the habit is ready for it.
Keeping a Zero Waste Kitchen Setup Going
A zero waste kitchen setup should make the kitchen calmer, not more fragile. If the system depends on perfection, it will break the first week someone gets sick, busy, tired, or hungry at the wrong time.
Keep the habits that reduce the most waste with the least drama. For most homes, that means buying food more carefully, storing it where people can see it, eating leftovers before cooking more, reducing the most common plastic packaging, and composting scraps that cannot be used.
The point is not to own the prettiest plastic-free kitchen. The point is to waste less, cook smarter, and build a sustainable kitchen that still works on an ordinary Tuesday night.
A good eco kitchen guide should leave room for real life. Some weeks will include takeout. Some groceries will come wrapped in plastic. Some leftovers will still go bad. That does not mean the setup failed.
It means the next meal is another chance to use what you have before buying more.