Water damage and mold can ruin a shower. If water seeps behind tiles, it can harm your bathroom’s structure. This leads to costly repairs and frustration for homeowners.
Proper waterproofing solves this issue. By sealing surfaces with waterproof membranes, grout, and silicone sealants, you protect against leaks. This guide will show you simple steps to ensure your shower stays watertight for years.
Ready to protect your bathroom? Keep reading!
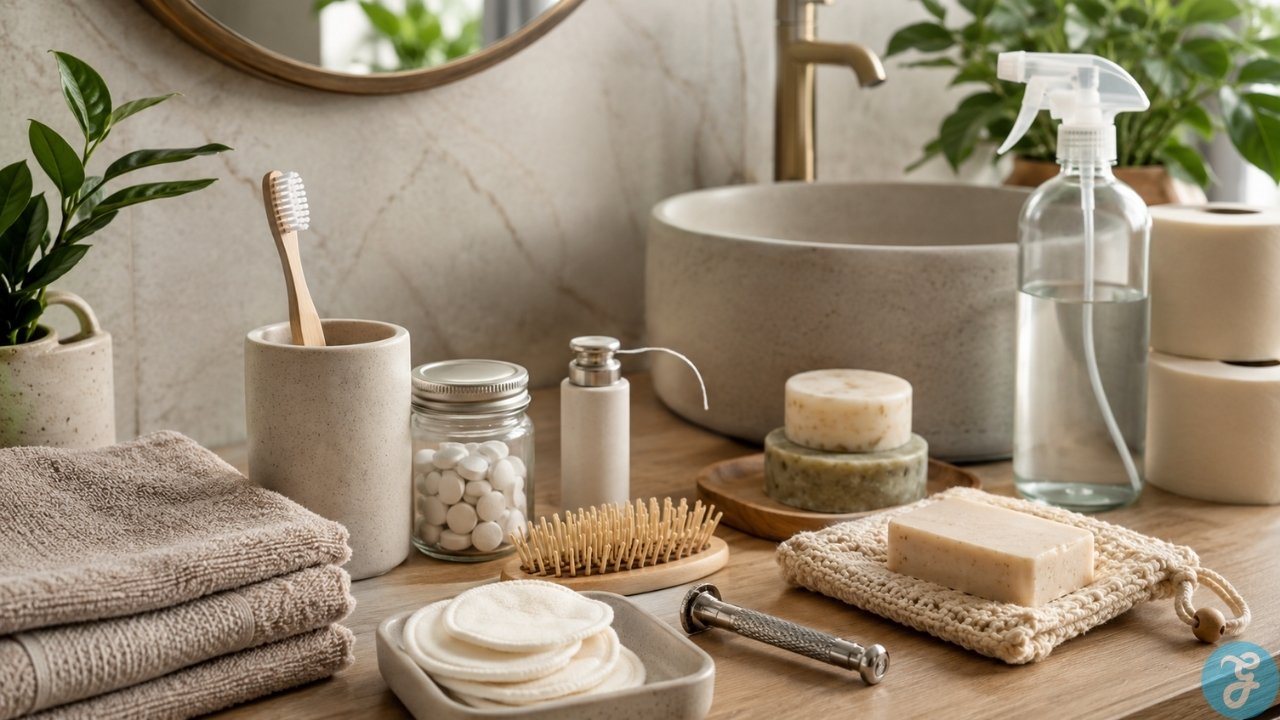
Gather the Right Materials
You need the right materials to waterproof your shower properly. Having everything ready makes the process smoother and ensures better results.
- Get a waterproofing membrane like Schluter Kerdi. This creates a strong barrier against moisture.
- Use thin-set mortar to attach the membrane securely.
- Purchase high-quality silicone sealant for sealing corners and joints tightly.
- Have a waterproof primer to prepare your surfaces for coating.
- Pick up tools like a caulking gun, trowel, and paintbrush for application tasks.
- Choose ceramic or porcelain tiles since they resist water damage well.
- Include vapor barriers if walls need extra protection from water vapors.
Prepare the Shower Area

Getting the shower area ready is crucial for proper waterproofing. A clean and dry surface ensures better adhesion of all materials.
- Remove old tiles, grout, and caulking from the shower walls and floor. Use a scraper or chisel to get rid of loose debris.
- Clean the surface thoroughly with a degreaser or mild detergent. This helps eliminate dust, oils, and soap residue that can affect adhesion.
- Inspect for any cracks or damage on cement board or wall boards. Replace broken sections to maintain structural integrity.
- Sand rough patches gently using sandpaper for a smooth base. This prevents uneven application of primer or membranes.
- Wipe down the area with a damp cloth to remove any leftover particles after sanding. Allow it to air dry completely before proceeding.
- Check plumbing fixtures like shower heads and drains for leaks or corrosion. Fix these issues now to avoid more problems later.
- Test the subfloor’s stability by walking on it firmly. Reinforce weak spots if needed using plywood sheets.
- Ensure there are no gaps in corners, edges, or around pipes sticking out of walls to prevent moisture buildup later on.
All these steps lay the groundwork for strong shower waterproofing results!
Apply a Waterproof Primer
Using a waterproof primer is a key step to protect your shower. It creates a water-resistant layer and helps other materials bond better.
- Clean the shower walls and floor first. Remove dust, dirt, or grease to ensure smooth application.
- Choose a high-quality waterproof primer made for bathrooms. Popular options work well with plasterboard, concrete, or masonry walls.
- Use a paint roller or sprayer to apply the primer evenly. Cover every inch of the surface for full moisture protection.
- Wait for the primer to dry completely before moving on. Most types dry within 2 to 4 hours in good ventilation.
- Apply a second coat if needed for added water resistance. This makes sure the base is strong against leaks and dampness.
This step sets up a solid foundation for other waterproofing layers like membranes or grout.
Install a Waterproofing Membrane
Installing a waterproofing membrane is key to protecting your shower from water damage. It keeps moisture out and helps prevent mold growth.
- Clean the shower area thoroughly. Make sure it is dry and dust-free before applying any products for proper adhesion.
- Choose the right type of waterproof membrane. Liquid membranes are easy to apply, while sheet membranes like Schluter Kerdi offer strong moisture protection.
- Apply liquid membranes with a roller or brush in even layers. Use at least two coats for better thickness and strength.
- For sheet membranes, cut them to fit the size of your shower walls and floor. Overlap edges slightly to create a watertight seal.
- Stick the sheets in place using thin-set mortar for a firm hold. Press down evenly to remove air bubbles or wrinkles.
- Seal all edges carefully where the membrane meets corners or joints. High-quality silicone sealant ensures no water leaks occur later.
- Let everything dry as directed by the product instructions before moving forward with tiling or grouting tasks.
Seal Joints and Corners
Sealing joints and corners is key to keeping your shower waterproofed. Water often sneaks into these spots, causing mold growth or damage.
- Clean all joints and corners. Make sure the area is dry and free of dust or debris.
- Apply high-quality silicone sealant along every joint and edge. This creates a watertight seal and stops leaks.
- Use a caulking gun for smooth application. Move steadily to avoid uneven lines or air gaps.
- Check for missed spots after sealing. Fill any gaps immediately to ensure full moisture protection.
- Let the sealant dry completely before using the shower. Follow the product’s drying time instructions, usually 24–48 hours.
- Inspect the edges regularly as part of bathroom maintenance to prevent issues over time.
Waterproof the Shower Floor
A waterproof shower floor is key to stopping leaks and damage. Use the right steps to protect the area from water.
- Clean the shower base thoroughly. Make sure it is free of dirt, dust, or grease before starting.
- Apply a waterproofing primer to the floor. This helps the membrane stick better and creates an extra moisture barrier.
- Install a waterproof membrane over the floor. Use sheet membranes or liquid ones like Schluter Kerdi membrane for strong protection.
- Smooth out any air bubbles in the membrane using a trowel or roller. This step creates an even seal across the surface.
- Overlap all edges by at least 2 inches where membranes meet walls or other joins. This prevents gaps where water can seep through.
- Seal around any weep holes, drains, or pipes with high-quality silicone sealant for added protection.
- Check that everything is securely installed before moving on to tiling or other finishes.
Use High-Quality Grout and Seal It Properly
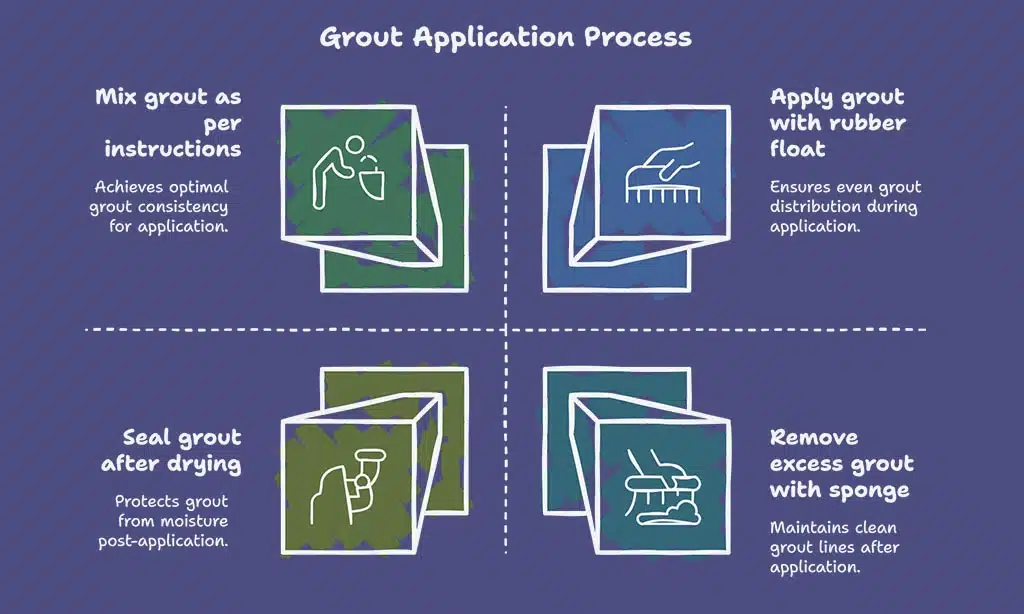
Using quality grout and sealing it correctly will keep your shower strong and waterproof. It also helps prevent mold growth and tile damage.
- Choose a high-quality grout made for bathroom renovations. Look for products that resist moisture and last long.
- Ensure the grout matches your tile type, whether ceramic or porcelain tile, for better results.
- Mix the grout as per instructions to get the correct consistency for easy application.
- Apply the grout between tiles using a rubber float at a 45-degree angle, covering all gaps properly.
- Remove excess grout quickly with a damp sponge but avoid over-wiping to keep lines neat.
- Let the grout dry fully before moving on, usually about 24 hours or as recommended by the manufacturer.
- Seal the grout once it’s dry to protect it from water vapor and stains, ensuring moisture protection in your shower area.
- Use a reliable silicone sealant along corners where tiles meet walls or floors for extra waterproofing.
Apply Waterproof Caulking
Applying waterproof caulking creates a strong seal. It protects your shower from water leaks and damage.
- Choose high-quality silicone caulking for the best results. Silicone is flexible and resists mold growth.
- Clean the area where you will apply the caulk. Make sure it is dry, free of dust, and old adhesive.
- Cut the tip of the caulking tube at a 45-degree angle for best control. This helps you make smooth lines.
- Use a steady hand to apply caulk along all seams and edges in the shower. Focus on corners, joints, and gaps around the shower base or tiles.
- Smooth out the freshly applied caulk with your finger or a smoothing tool. This ensures a tight bond without air bubbles or gaps.
- Let the caulking cure completely before using the shower again. Curing may take up to 24-48 hours depending on product instructions.
- Inspect your work after curing for an airtight finish. Reapply if needed to fix missed spots or thin areas.
- Use this method when sealing gaps near fixtures like faucets and shower doors too.
- Repeat this step as part of regular maintenance every few years to maintain moisture protection over time!
Test for Leaks and Fix Any Issues
Testing for leaks ensures your shower is waterproof and safe. Fixing problems early prevents water damage and mold growth.
- Fill the shower base with water to check for leaks. Let it sit for 24 hours to spot any moisture seeping out.
- Inspect corners, joints, and edges for wet spots. Use a flashlight to identify hidden issues.
- Look closely at the grout lines between ceramic or porcelain tiles. Tiny cracks can lead to big problems over time.
- Check around all pipes and fittings using a silicone sealant to seal gaps if needed. A watertight seal protects these vulnerable spots.
- Observe walls and floors for any uneven surfaces or bubbles in waterproof membranes. These may signal improper application or damage.
- Use a moisture meter, if available, on nearby areas like cement blocks or timber for hidden dampness signs.
- Fix minor leaks with additional caulking or thin-set mortar immediately to avoid further issues.
- Replace damaged sections of the membrane in wet areas like the shower floor instead of patching just one area.
- Reseal areas with worn silicone every year for strong moisture protection that lasts longer.
- Call home inspectors if severe leaks persist despite DIY fixes—they can ensure stability and structural integrity.
Regular Maintenance for Longevity
Check for cracks or mold in grout and caulking every three months. Reseal joints and corners with high-quality silicone sealant, ensuring a watertight seal. Inspect the waterproof membrane if you notice damp spots or water damage.
Clean tiles regularly to prevent dirt buildup and avoid degradation of grout. Keep your shower area ventilated with a proper ventilation system to reduce moisture build-up, which can lead to mold growth.
A routine home inspection ensures the structural integrity of your bathroom stays intact over time.
Takeaways
Waterproofing your shower is smart and simple with the right steps. A clean surface, good materials, and careful sealing make all the difference. These tips protect against water damage, mold, and costly repairs.
Using high-quality products ensures long-lasting results for your bathroom. Start today to keep your shower durable, safe, and leak-free!
FAQs
1. What is the best way to waterproof a shower?
The best way to waterproof a shower is by using a waterproof membrane, such as Schluter Kerdi membrane, combined with thin-set mortar for proper installation. This ensures moisture protection and creates a watertight seal.
2. Can I do DIY shower waterproofing during bathroom renovations?
Yes, you can use products like sheet membranes or silicone sealant for DIY shower waterproofing. Follow expert tips carefully to protect structural integrity and prevent mold growth.
3. Why is it important to use high-quality materials in bathroom waterproofing?
Using quality materials like polymers, composites, or solid surfaces helps maintain durability and prevents water damage over time. These products also reduce the risk of leaks and ensure long-lasting results.
4. How does underfloor heating affect shower waterproofing?
Underfloor heating requires careful planning during bathroom renovation because improper insulation can compromise moisture barriers like vapour barriers or membranes.
5. What are common mistakes when applying caulked seals in showers?
Common mistakes include not cleaning surfaces properly before application or failing to let the area dry completely before sealing with silicone sealant or other glues.
6. Should I hire experts for complex projects like wet rooms?
Yes, hiring professionals—such as those recommended on shows like “Holmes on Homes”—is ideal for advanced tasks involving rain-screens, ceiling installations, or areas prone to heavy water exposure like wet rooms and bathtubs.