
Your Google Account may hold far more than your email. It can provide access to photos, saved passwords, documents, contacts, and other services. If someone steals your password, those accounts and files could be exposed.
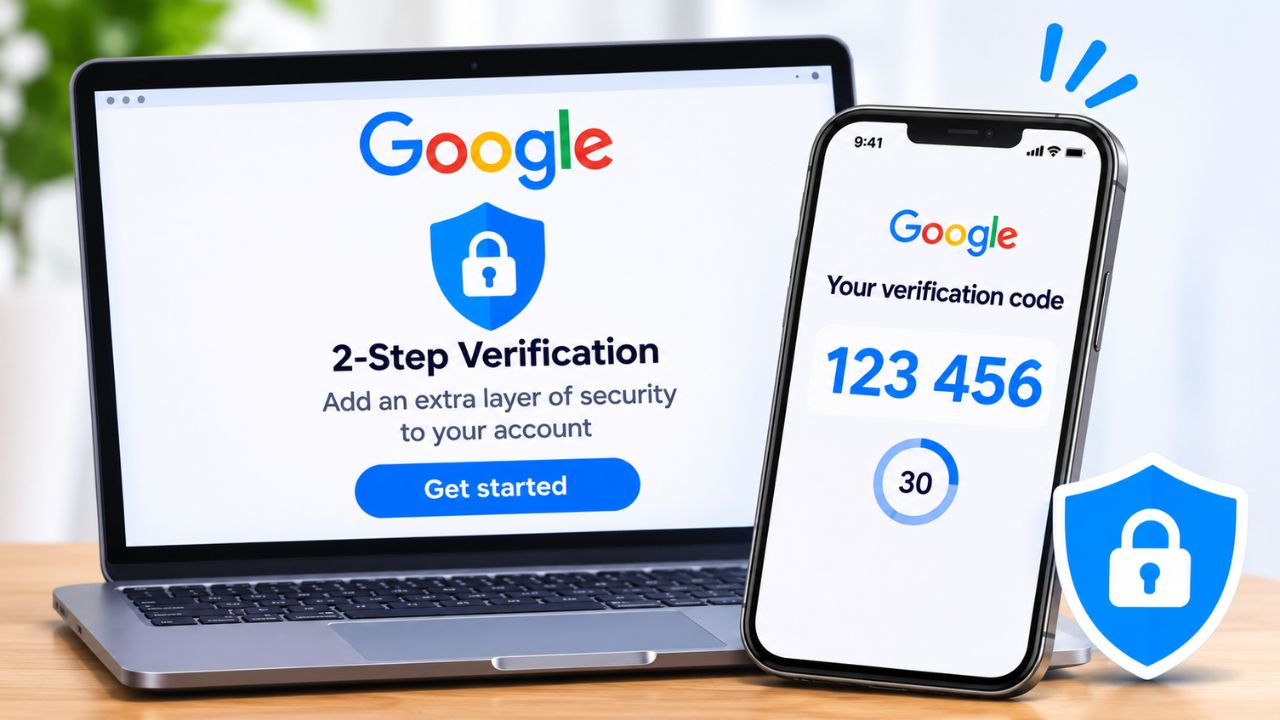
Google’s 2-Step Verification (2SV) adds another check to the sign-in process. Instead of relying only on a password, Google can ask you to approve a notification, enter a verification code, or use another supported security method.
You can turn it on through your Google Account settings. The important part is choosing a method you can use reliably—and setting up a backup before you need one.
How to Turn On Two-Factor Authentication on a Computer
You can enable 2-Step Verification from any supported desktop browser, including Chrome, Safari, Firefox, or Edge.
Step 1: Open your Google Account settings
Visit myaccount.google.com and sign in to the account you want to protect.
If you manage several Google Accounts, check the profile icon to make sure you’re changing the correct one.
Step 2: Open Security & sign-in
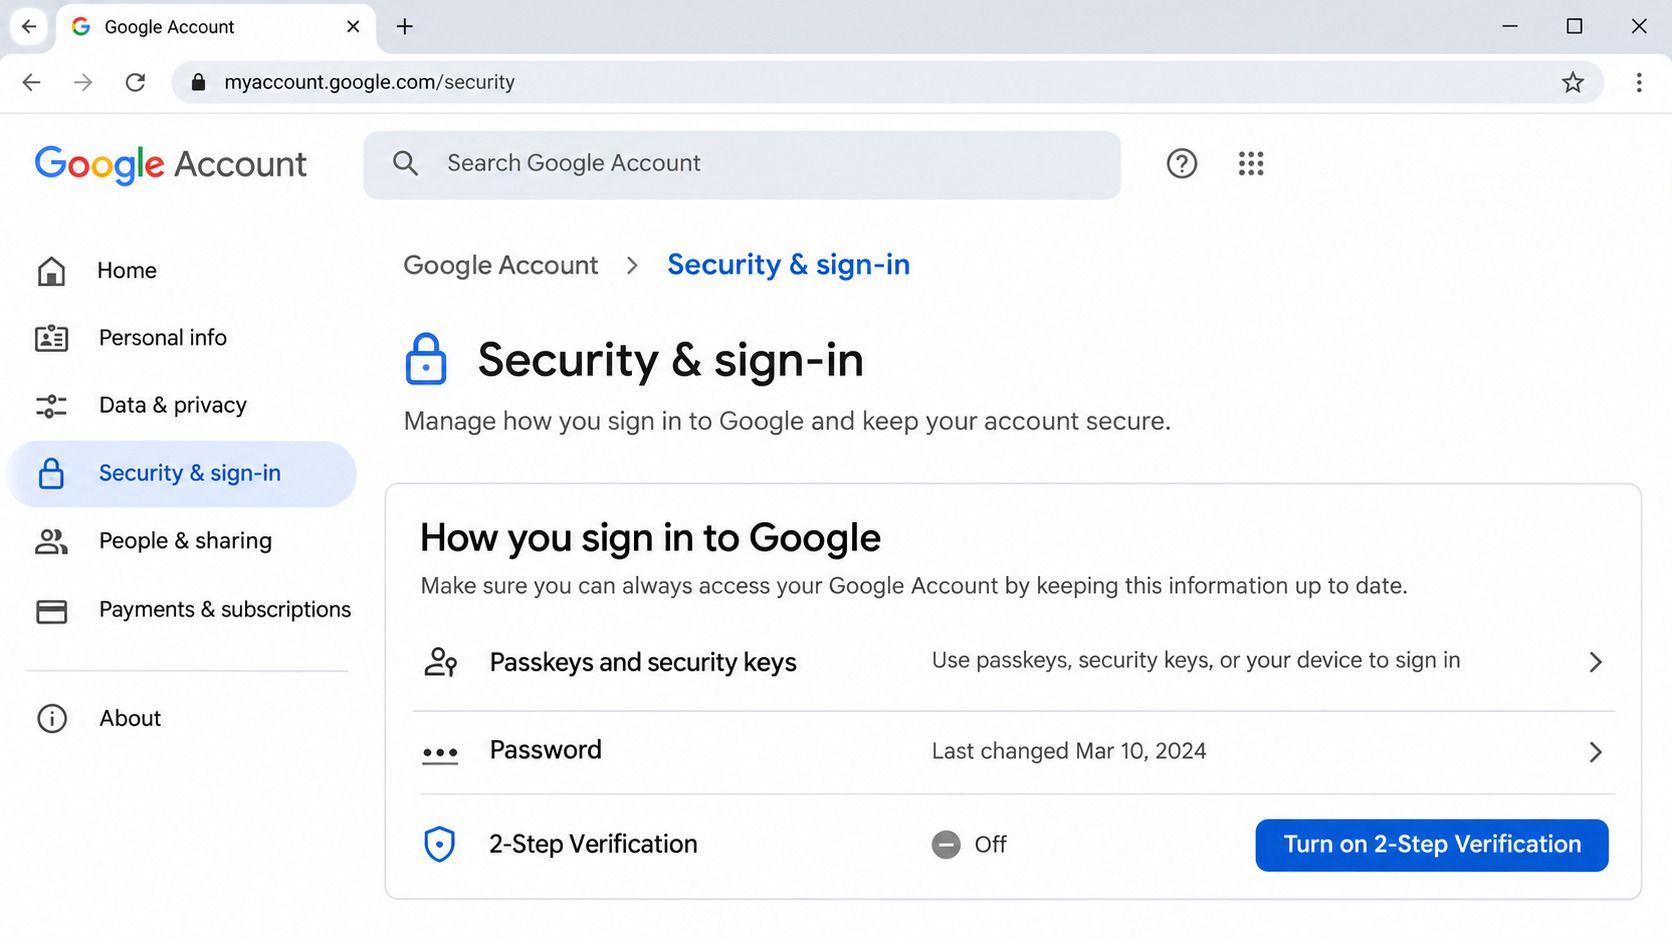
In your account settings, select Security & sign-in.
Find the section labeled How you sign in to Google. This is where Google manages passwords, passkeys, two-step verification, and other sign-in options.
Step 3: Turn on 2-Step Verification
Select Turn on 2-Step Verification and follow the instructions displayed on the screen.
Google may ask you to verify your identity or confirm a supported verification method. The options and sequence can differ depending on the devices and security methods already connected to your account.
If 2-Step Verification is already active, open its settings to review or add authentication methods instead.
Step 4: Complete the verification process
Follow Google’s instructions until the setup is confirmed. If you’re asked to approve a sign-in on your phone, check that you initiated the request before accepting it.
Once enabled, Google can require another verification step when you sign in using your password.
You can check the current procedure in Google’s official 2-Step Verification guide.
How to Enable 2-Step Verification on Android
You don’t need a computer to protect your Google Account. On Android, you can reach the same settings from your phone.
- Open your phone’s Settings app.
- Find Google and select Manage your Google Account. The exact route can vary by device.
- Open Security & sign-in.
- Under How you sign in to Google, select Turn on 2-Step Verification.
- Follow the instructions to confirm your identity and finish setup.
You can also open myaccount.google.com in your mobile browser if your Android settings look different.
If Google prompts are enabled, a sign-in request may appear automatically on an eligible Android phone already signed in to the same account.
How to Enable 2-Step Verification on iPhone or iPad
The process on iOS uses Google’s account settings rather than Apple’s own two-factor authentication settings.
- Open the Gmail app and tap your profile picture.
- Select Manage your Google Account. Alternatively, visit myaccount.google.com in Safari or another browser.
- Go to Security & sign-in.
- Find How you sign in to Google.
- Select Turn on 2-Step Verification and complete the instructions.
Google prompts can appear on supported iPhones signed in to the account through Gmail, Google Photos, YouTube, or the Google app.
If you use an account provided by your employer or school, some settings may be controlled by a Google Workspace administrator.
Which Google Two-Factor Authentication Method Should You Choose?
Enabling 2-Step Verification is only part of the decision. Google supports several verification methods, and they don’t all offer the same protection or convenience.
Google Prompts: Convenient for Everyday Sign-Ins
Google recommends prompts when you use a password rather than a passkey.
When you attempt to sign in, Google can send a notification to an eligible phone connected to your account. You review the request and approve or reject it.
The notification may show information about the device and location. Google can also ask for additional confirmation, such as matching a number displayed on the sign-in screen.
A prompt is convenient because you don’t need to copy a code from a message. It also avoids some risks associated with SMS verification.
However, never approve a prompt you didn’t initiate. An unexpected request may indicate that someone is trying to access your account.
Google Authenticator: Useful Without Mobile Service
Google Authenticator generates one-time verification codes on your device. These codes can work even when you have no mobile signal or internet connection.
To add it to your Google Account:
- Install Google Authenticator from the official app store.
- Open your Google Account’s 2-Step Verification settings.
- Select Set up authenticator, or Get Started if that appears.
- Follow the instructions to connect the app to your account.
- Complete any verification Google requests.
Google notes that a newly configured Authenticator may take up to seven days to become available as a sign-in option in some circumstances. Keep another working sign-in method during that period.
Authenticator codes can also be synchronized through a Google Account. This may simplify moving to a replacement phone. If you choose to use Authenticator without an account, the codes remain on the device unless you manually transfer them.
That distinction matters if your phone is lost or damaged. Editorialge’s authenticator app recovery guide explains how recovery differs between apps and backup configurations.
Passkeys: Stronger Protection Against Phishing
A passkey allows you to sign in using a device unlock method, such as your fingerprint, face recognition, or screen-lock PIN.
Unlike a traditional password and verification code, a passkey uses cryptographic authentication designed to resist phishing.
You can create one from Google’s Passkeys settings on a compatible device.
Google normally switches to a passkey-first sign-in experience when you create a passkey, though you can change that preference.
There is an important distinction: when you sign in with a passkey, Google doesn’t normally ask for a separate second authentication step. The passkey itself verifies possession of the device.
Creating a passkey doesn’t automatically delete your existing password or recovery methods.
Only create passkeys on devices you personally own and control. Anyone who can unlock a device holding your passkey may be able to access your Google Account.
Physical Security Keys: An Option for Higher-Risk Accounts
A compatible hardware security key provides another phishing-resistant method.
These devices may connect through USB or NFC, depending on their design and your device’s capabilities.
Security keys can be particularly useful for people whose accounts are more attractive targets, including administrators, journalists, and users handling sensitive organizational information.
Keep a second compatible key or another approved recovery method available. Losing your only working authentication device without a backup can make recovery difficult.
SMS Verification: Useful, but Less Secure
Google can also send verification codes through text messages or voice calls when the option is available.
SMS is generally preferable to relying on a password alone, but it has weaknesses. A phone number can be targeted through SIM-swap fraud or other number-based attacks.
Google recommends prompts over SMS when a passkey isn’t being used. A passkey or compatible security key offers stronger phishing protection.
For a broader comparison, see Editorialge’s guide to two-factor authentication methods and their security differences.
Save Your Google Backup Codes Before You Lose Your Phone
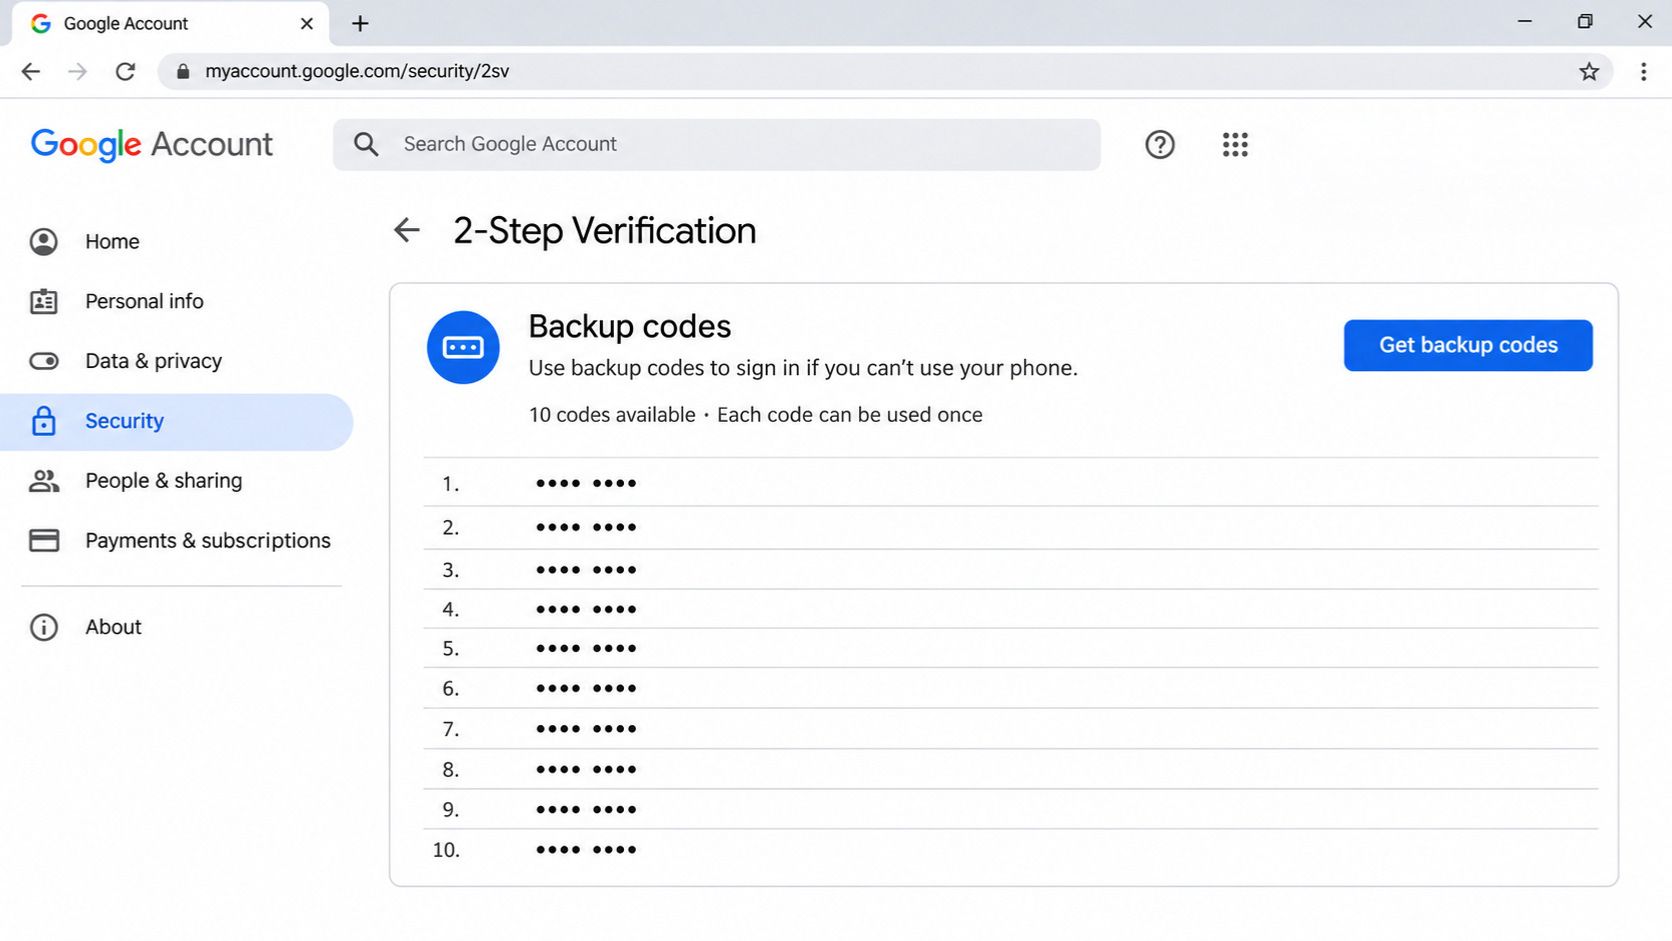
Your verification method could stop working at an inconvenient moment. A phone can be stolen, its battery can fail, or you might change devices before transferring your Authenticator codes.
Google backup codes provide an emergency way to complete the second sign-in step.
To create them:
- Visit your Google Account settings and open Security & sign-in.
- Select 2-Step Verification under How you sign in to Google.
- Find Backup codes and select Continue.
- Choose Get backup codes, then save or print the generated codes.
Google provides a set of 10 eight-digit backup codes. Each code can be used once. Generating a new set invalidates the previous set.
Store these codes somewhere secure and separate from the device you normally use to sign in. A printed copy in a locked location or a properly secured password-manager vault can be appropriate.
Avoid keeping your only copy in the same Gmail inbox or Google Drive account that the codes are supposed to help you recover.
If someone obtains your backup codes, generate a new set to invalidate the old ones. Never share them with callers, email senders, or people claiming to provide Google support.
Google’s backup code instructions explain how to create, replace, and use them.
Check Your Recovery Information
Backup codes aren’t the only preparation worth making.
While you’re still signed in, review your recovery email address and phone number. Make sure both belong to you and remain accessible.
Google provides recovery settings under your account’s personal and security information. Its account security guidance explains how to add recovery contact information.
Ideally, your recovery email should be an account you can access independently of the phone you’re protecting.
You should also review old devices connected to your Google Account and remove access for devices you no longer control.
What Happens If You Lose Your Phone?
Losing the phone that receives verification prompts doesn’t automatically mean losing access to Google.
The available recovery methods depend on what you configured beforehand.
At the sign-in screen, choose Try another way when available. Google may allow you to verify your identity using a saved backup code, another signed-in device, an eligible security key, a passkey on another device, or another configured method.
If you regain access, sign out of the missing device through your Google Account settings. Change your password if the device was stolen or you suspect unauthorized access.
If no working authentication methods remain, use Google Account Recovery. Google may need additional time to establish that the account belongs to you.
Don’t pay strangers who claim they can bypass Google’s verification requirements or guarantee account recovery.
Troubleshooting Google 2-Step Verification
You’re Not Receiving a Google Prompt
Make sure your phone is connected to the internet and signed in to the correct Google Account.
If needed, turn off Do Not Disturb, check for required Google app or Play services updates, and try Resend on the sign-in screen.
If a prompt still doesn’t arrive, select Try another way and use another available verification method.
Your SMS Verification Code Doesn’t Arrive
Check your phone’s reception and whether your mobile plan can receive verification texts.
Google may sometimes send a prompt instead of an SMS code. It may also restrict certain verification options when it detects unusual sign-in conditions.
If you request several codes, use the newest one.
Google Authenticator Codes Aren’t Working
Check that you’re using the code for the correct Google Account and that your phone’s date and time are set correctly.
Google Authenticator version 7.0 and later relies on the operating system’s time settings rather than a separate time-correction option.
If you recently changed phones, check whether your codes were synchronized or transferred successfully. Don’t remove a working Authenticator setup from the old phone until you’ve established that the replacement works.
You Can’t Find the Option to Turn On 2-Step Verification
First, check whether verification is already enabled.
If the account belongs to a business, school, or another organization, its administrator may manage authentication requirements. Contact that administrator rather than attempting to work around the policy.
If an older email app stops working after 2-Step Verification is enabled, check its supported authentication methods. Google says some applications may require a separate app password, though modern secure sign-in methods are preferable when supported.
Google maintains an official 2-Step Verification troubleshooting guide for these situations.
How to Confirm Your Google Account Is Protected
Return to Security & sign-in and open your 2-Step Verification settings.
Confirm that the feature is enabled and review the authentication methods connected to your account.
You should have a sign-in method that works on your usual devices and at least one independent way to regain access if your main device is unavailable.
If you test the sign-in process from another browser or device, keep an existing trusted session open until you know the new method works. There’s no benefit in accidentally locking yourself out while checking your security settings.
Finally, remember that two-factor authentication doesn’t replace a unique password, software updates, or caution around suspicious links. Verification codes can still be stolen through phishing. Passkeys and compatible security keys provide stronger protection against that particular threat.
The most useful security setup is one that protects your account without leaving you dependent on a single phone.