Building a PC for gaming and streaming is one of the best investments for gamers and content creators. Whether you want to stream on Twitch, YouTube, or Facebook Gaming, or simply enjoy high-quality gaming, having the right setup is crucial.
However, high-end gaming PCs can be expensive, making it essential to find a balance between performance and budget.
With the right components and smart buying decisions, you can build a high-performing PC that won’t drain your savings.
In this guide, we will walk you through how to build a PC for gaming and streaming without spending a fortune. From choosing cost-effective components to assembling and optimizing your system, this comprehensive guide ensures you get the best value for your money.
We’ll also include comparison tables, practical examples, and the latest market trends to help you make informed decisions.
Setting Your Budget: How Much Should You Spend?
Before purchasing components, you must define a realistic budget based on your gaming and streaming needs. Here’s a quick breakdown of cost estimates and what you can expect from each category:
| Build Type | Estimated Budget | Expected Performance |
| Entry-Level (1080p Gaming, Basic Streaming) | $500 – $800 | Smooth gameplay at medium settings, capable of 720p-1080p streaming |
| Mid-Range (1440p Gaming, Smooth Streaming) | $800 – $1,500 | High FPS gaming at 1440p, smooth 1080p-1440p streaming with minimal lag |
| High-End (4K Gaming, Professional Streaming) | $1,500+ | Ultra-settings gaming at 4K, seamless multi-streaming, future-proof components |
Additional Cost Considerations:
- Peripherals (Monitor, Keyboard, Mouse, Headset, Microphone): Can add an extra $200-$500 to the budget.
- Operating System: Windows 11 license costs around $100 unless using free alternatives like Linux.
- Streaming Software & Subscriptions: OBS Studio is free, but some premium features (e.g., Streamlabs Prime) require a subscription.
Essential Components for How to Build a PC for Gaming and Streaming
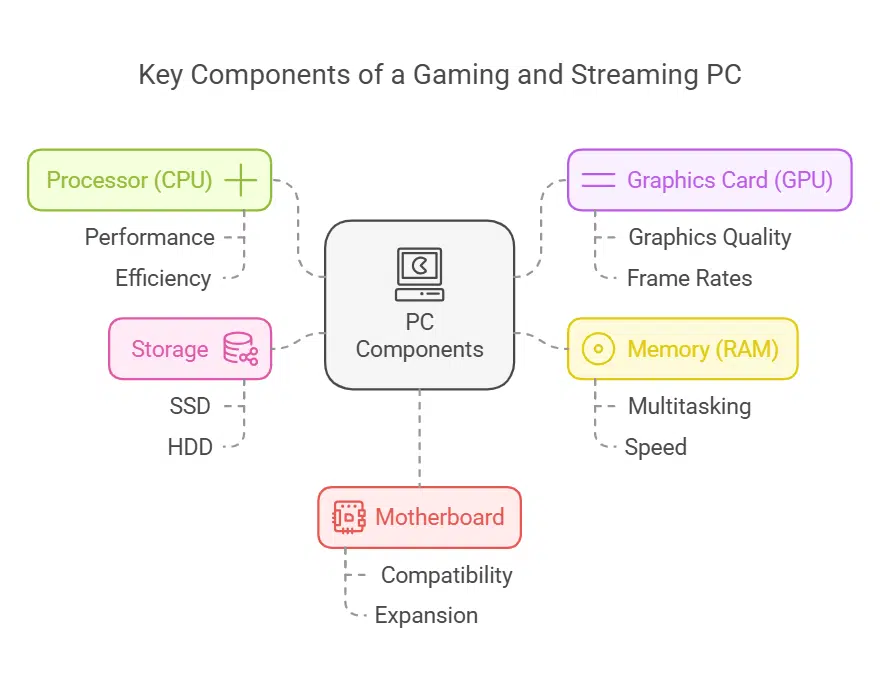
Before diving into the selection of specific components, it’s important to understand how each part contributes to the overall performance of a gaming and streaming PC.
A balanced system ensures smooth gameplay while handling streaming tasks efficiently. Let’s break down the key components you’ll need.
Choosing the Right Processor (CPU) for Performance
The CPU plays a crucial role in both gaming and streaming. A good processor ensures your games run smoothly while encoding your stream without lag.
The best CPUs for budget-conscious gamers should balance core count, clock speed, and efficiency.
| Budget | Recommended CPU | Cores/Threads | Base/Boost Clock Speed |
| Low | AMD Ryzen 5 5600G | 6C/12T | 3.9GHz / 4.4GHz |
| Mid | Intel Core i5-12600K | 10C/16T | 3.7GHz / 4.9GHz |
| High | Ryzen 7 5800X | 8C/16T | 3.8GHz / 4.7GHz |
Key considerations:
- Get a CPU with at least 6 cores and 12 threads for smooth multitasking.
- AMD Ryzen CPUs often provide better value for streaming, while Intel CPUs excel in raw gaming performance.
- Avoid bottlenecks by pairing your CPU with an appropriate GPU.
Graphics Card (GPU): Balancing Price and Performance
The GPU is the most important component for gaming. For streaming, Nvidia’s NVENC encoder offers better performance than software-based encoding. Your choice should depend on the resolution and refresh rate you aim for in gaming and streaming.
| Budget | Recommended GPU | VRAM | Best For |
| Low | Nvidia GTX 1660 Super | 6GB | 1080p Gaming & Streaming |
| Mid | Nvidia RTX 3060 Ti | 8GB | 1440p Gaming & Streaming |
| High | Nvidia RTX 4070 | 12GB | 4K Gaming & High-FPS Streaming |
Key considerations:
- Prioritize VRAM; at least 6GB is recommended for modern gaming.
- Nvidia’s RTX 3000 and 4000 series GPUs have superior streaming capabilities with NVENC encoding.
- AMD offers good alternatives like the RX 6700 XT, but lacks NVENC’s efficiency.
RAM: Finding the Right Balance for Gaming & Streaming
RAM affects both gaming and streaming performance. Here’s what you need:
| Budget | Recommended RAM | Type | Best Use Case |
| Low | 16GB (2x8GB) | DDR4 3200MHz | Basic gaming and single-task streaming |
| Mid | 32GB (2x16GB) | DDR4 3600MHz | Multitasking, higher-resolution streaming |
| High | 32GB (2x16GB) | DDR5 4800MHz+ | Future-proofing and high-end performance |
- Always opt for dual-channel RAM for better performance.
- If you plan to edit videos alongside streaming, 32GB is recommended.
Step-by-Step Guide to How to Build a PC for Gaming and Streaming
Building a PC from scratch may seem overwhelming, but breaking it down into manageable steps makes the process easier.
Follow this comprehensive guide to assemble a powerful gaming and streaming PC efficiently.
Step 1: Gather Your Components and Tools
- Ensure you have all required components: CPU, GPU, RAM, motherboard, power supply, storage, case, and cooling system.
- Have necessary tools: Phillips screwdriver, anti-static wrist strap, and thermal paste (if required).
- Prepare a clean workspace with ample lighting to make installation easier.
- Double-check that all components are compatible using the motherboard manual and manufacturer specifications.
Step 2: Install the CPU
- Open the motherboard’s CPU socket by lifting the retention arm.
- Carefully align the CPU with the socket’s notches to ensure correct placement.
- Gently place the CPU into the socket without applying force.
- Secure the CPU by lowering the retention arm.
- Apply a pea-sized amount of thermal paste on top of the CPU (if not pre-applied).
- Install the CPU cooler, ensuring proper contact and airflow.
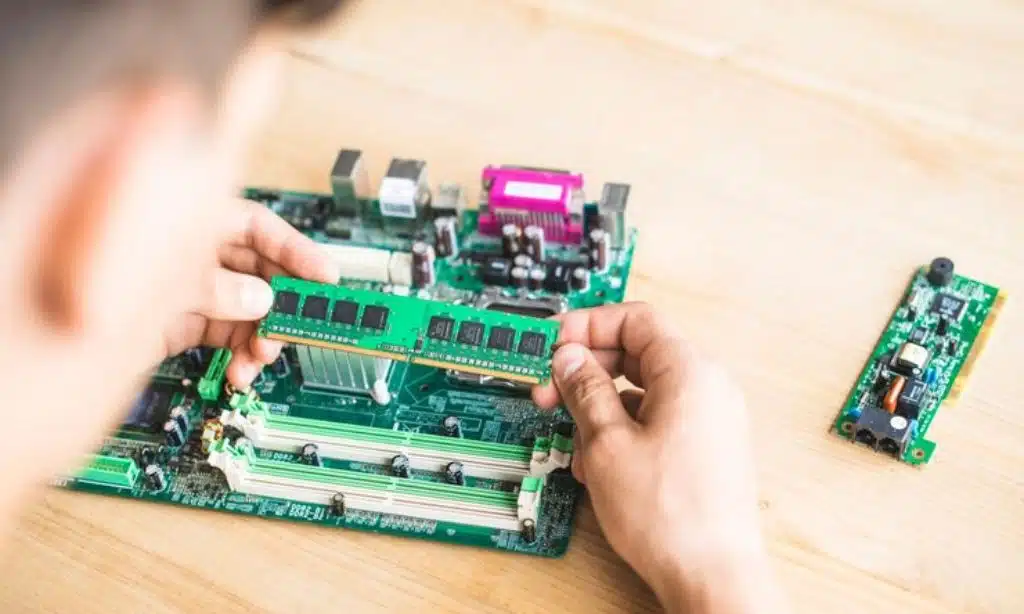
Step 3: Install RAM
- Locate the RAM slots on the motherboard.
- Check the motherboard manual to determine the optimal slots for dual-channel performance.
- Hold the RAM sticks by the edges and align them with the slot’s notch.
- Firmly press down until the latches click into place.
Step 4: Mount the Motherboard into the Case
- Place the motherboard inside the case and align it with the mounting holes.
- Use the included standoffs to elevate and secure the motherboard in place.
- Carefully tighten screws but avoid over-tightening, which can damage the board.
- Connect the 24-pin and 8-pin power cables from the PSU to the motherboard.
Step 5: Install Storage Devices
- If using an NVMe SSD, insert it into the designated M.2 slot and secure it with a screw.
- If using a SATA SSD or HDD, mount it in the storage bay and connect it to the motherboard via SATA cable.
- Attach the power connector from the PSU to each storage device.
Step 6: Install the Power Supply (PSU)
- Mount the PSU in its designated location, typically at the bottom or rear of the case.
- Ensure the fan faces the correct direction for proper ventilation.
- Secure the PSU with screws and connect the necessary power cables.
- Route cables neatly to improve airflow and ease of maintenance.
Step 7: Install the Graphics Card
- Locate the PCIe x16 slot on the motherboard.
- Remove the necessary PCIe slot covers from the case.
- Insert the GPU into the slot, ensuring a secure connection.
- Screw the GPU bracket into the case to prevent sagging.
- Connect the required PCIe power cables from the PSU to the GPU.
Step 8: Connect Cables and Manage Wiring
- Connect front panel connectors (power switch, USB ports, audio, and reset button) to the motherboard.
- Attach additional case fans and connect them to the motherboard or a fan hub.
- Use zip ties or cable management channels in the case to organize cables and improve airflow.
- Double-check that all connections are secure before proceeding.
Step 9: Power On and Install the Operating System
- Plug in the monitor, keyboard, and mouse.
- Turn on the PC and enter the BIOS by pressing the designated key (usually DEL or F2) at startup.
- Check that all components are detected in the BIOS.
- Adjust boot order to prioritize USB if installing an OS via a flash drive.
- Install Windows or Linux using a bootable USB drive.
- Download and install motherboard and GPU drivers to ensure optimal performance.
- Install essential software such as OBS Studio, Discord, and game launchers.
Step 10: Optimize System for Gaming and Streaming
- Update Windows and BIOS firmware to the latest versions.
- Adjust GPU settings in Nvidia Control Panel or AMD Adrenalin software.
- Configure streaming software like OBS Studio for the best performance.
- Run benchmark tests to ensure stable temperatures and performance.
- Customize fan curves for efficient cooling and quieter operation.
Takeaways
Building a PC for gaming and streaming on a budget is entirely possible with smart component choices.
A well-balanced system ensures smooth gameplay, high-quality streams, and future upgrade potential.
By following this guide, you’ll have a cost-effective yet powerful gaming and streaming setup without breaking the bank.
Now, it’s time to build your dream PC! Are you ready to take your gaming and streaming to the next level?