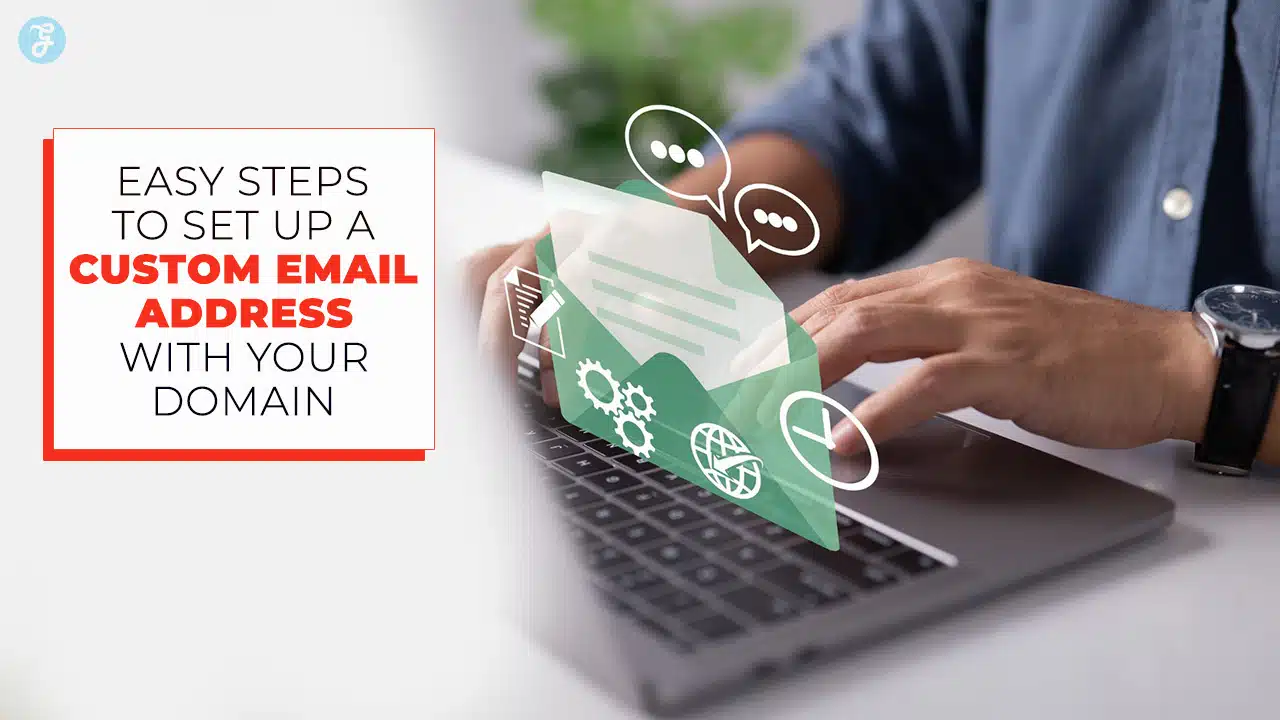
Do you send emails from a free address that ends in gmail.com or yahoo.com? You might lose credibility with customers. A generic email address can look unprofessional and hurt your brand.
A custom email domain can boost business credibility. In these Steps To Set Up A Custom Email Address With Your Domain, we will show you how to register your domain. Then we will help you pick an email hosting service, update DNS records and MX records, and set up your email client.
Read on.
Key Takeaways
- Register your domain with a registrar like Namecheap ($6.49/yr) or Shopify ($9/yr), add privacy protection, set auto‐renewal, and wait up to 48 hours for activation.
- Choose an email host: Google Workspace or Microsoft 365 at $7.20/month, Proton Mail at $7.99/month, Zoho Mail free (paid from $12/yr), or DreamHost at $1.99/month.
- Verify your domain by adding a TXT record or uploading a file, then enter your provided MX records in the DNS panel and wait 24–48 hours.
- Create mailboxes with consistent naming (FirstName@, FirstInitialLastName@), enable two‐factor authentication, set aliases (support@, billing@), and configure IMAP (port 993 SSL) and SMTP (port 587 TLS).
- Add SPF, DKIM, and DMARC DNS records to block spoofing, enable SSL/TLS in your host console, then send test emails to confirm full functionality.
Register Your Domain Name
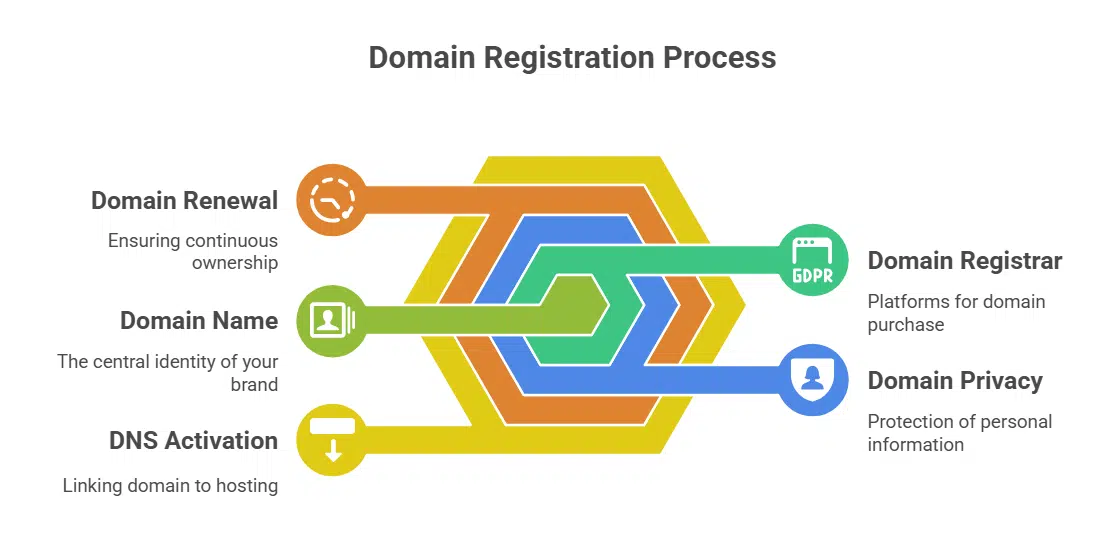
Choose a catchy domain name that matches your brand. Use .com TLDs for business credibility. Use a domain registrar’s search tool to check availability. Registrars like Shopify, GoDaddy, Namecheap list options.
Expect to pay $12 to $20 per year for .com domains. Shopify offers about $9 yearly, and Namecheap starts at $6.49 with free privacy protection.
Add domain privacy protection to hide personal data; Bluehost charges $11.88 and HostGator $14.95 for this service. Lock in your site host by activating DNS entries as soon as you verify via email link.
Set auto‐renewal to stop domain lapses. You can own a domain up to ten years under ICANN rules. Activation may take up to 48 hours.
Choose an Email Hosting Provider
Cloud email services vary by price and features for custom email domains. Google Workspace starts at $7.20 per month with 30 GB of storage. Microsoft 365 also costs $7.20 per month and offers 1 TB of email space.
Proton Mail runs at $7.99 per month and adds 15 GB of encrypted mail. Zoho Mail has a free plan, with paid tiers from $12 per year for 5 GB of storage. DreamHost costs $1.99 per month and gives 25 GB of email storage.
Reliable uptime and 24/7 support boost business credibility. Strong spam filtering and SSL TLS protect inboxes. Two-factor authentication raises email security. An intuitive control panel eases creation of email aliases.
Scalable plans suit small teams or large enterprises. Corporate email hosting often uses Microsoft or Workspace suite for email accounts.
Set Up Email Hosting
You link your domain name to email servers. This step unlocks business communication with a custom email domain.
- Pick HostPapa or Google Workspace and sign in to your email hosting console to start.
- Prove ownership of your domain by adding a TXT record or uploading a verification file to your site root.
- Obtain MX records from the host and open your domain registrar’s DNS panel.
- Input each MX record with the provided priority values and save changes in the DNS settings.
- Activate SSL/TLS in the hosting console to secure your email traffic and block unauthorized access.
- Wait 24 to 48 hours for DNS propagation and check status with an MX lookup tool.
- Send a test message from info@yourdomain.com and confirm receipt to verify full functionality.
Create Custom Email Accounts
Set each team member up with a business email address on your custom email domain. Check your email hosting plan for mailbox limits and storage space.
- Pick a naming format like FirstName@, FirstName.LastName@ or FirstInitialLastName@ for consistency.
- Log in to your admin console from Google Workspace or Office 365 so you can add a new mailbox.
- Create the mailbox in the email hosting panel and assign a strong, unique password plus two-factor authentication for extra security.
- Add role-based aliases such as support@ or billing@ and forward them to main mailboxes for smooth business communication.
- Set up auto-responders and forwarding rules in your email clients like Outlook or Apple Mail to manage customer replies.
- Assign group rights in your directory service so staff see shared inboxes and send from department addresses safely.
- Enable POP or IMAP sync for cross-device access and monitor storage quotas to avoid mail delivery issues.
Configure Email Settings in Your Email Client

Open your email client. Keep your server details handy.
- Gather your IMAP and SMTP details, including server names, port numbers, SSL or TLS, and your login credentials.
- Launch Microsoft Outlook, Google Workspace Mail, or Apple Mail and click Add Account to begin.
- Enter your custom domain address as the username and grab the password from your password manager.
- Pick IMAP for incoming mail, type the hostname for your mail exchanger, and select port 993 with SSL.
- Choose SMTP for outgoing mail, type your outgoing server address, select port 587 with TLS, and enable authentication.
- Configure DNS records in your domain name system, add SPF, DKIM, and DMARC entries to block spoofing and boost deliverability.
- Create forwarding rules or email aliases in the client to handle your business email address or grow an email list.
- Trigger a test message to and from your custom address, check email storage and sync, then double-check server addresses, port details, and your internet connection if errors appear.
- Turn on two-factor authentication in your mail app for better email security and business credibility.
Update DNS Records for Your Domain
Update DNS records to link your mail system to your domain. Use your domain registrar’s console to add the DNS entries.
- Access your DNS dashboard at your domain registrar. Log in at GoDaddy, Namecheap, or a similar service to find the DNS zone for your custom email domain.
- Add MX records from your email service provider. Copy the mail exchanger entries exactly as given by G Suite or your paid email host.
- Create an SPF record string. List the authorized sending servers in this TXT record to block email spoofing and boost email security.
- Paste DKIM public keys into your DNS zone. Use the host’s exact selector and key text to sign messages with cryptographic authenticity.
- Implement a DMARC policy record. Set the policy to none, quarantine, or reject and add reporting tags for authentication failure alerts.
- Enter all records exactly as provided. Match the host’s samples for MX, SPF, DKIM, and DMARC to prevent setup errors.
- Save changes and allow propagation. DNS updates can take 24, 48 hours to spread across the internet before mail flows smoothly.
- Consult HostPapa’s setup guide or your registrar’s support docs. Many providers automate DNS setup for email hosting services.
- Activate WHOIS protection if you prefer privacy. Hide your registration data from public lookup to shield personal details.
Test Your Custom Email Address
Your new custom email address needs a real world test. Confirm you can both send and receive messages without hiccups.
- Send test emails from your inbox to your new custom email domain, note how Google Mail, Apple Mail or Outlook handle them.
- Send replies back to your main account, then check if messages land in the primary tab or spam folder, watch deliverability rates.
- Track open rates, click-through numbers and conversion stats in your email marketing dashboard, compare results across campaigns.
- Replace old domain name links on your website, social media profile and printed brochure with your new business email address.
- Alert clients and vendors through a broadcast, update online directories and listings, avoid broken contact points.
- Enable auto-responders and set up mail forwarding in your DNS settings, so no client question slips through the cracks.
- Order fresh business cards and revise your marketing flyers to feature the custom business email address, boost brand credibility.
- Divide your mailing list into segments and craft personalized messages for each, that lifts deliverability and engagement.
Takeaways
This guide helped you set up a custom email domain step by step. Readers learn steps for domain registration, DNS record updates, MX records, and SPF, DKIM, DMARC checks. Picking an email hosting provider and setting up Google Workspace takes minutes.
You can craft a business email address and boost trust. A clear naming style and a solid inbox setup save hours later. Feel free to send a test message or call a friend for a quick check.
Now, send emails that shine and make your brand stand out.
FAQs
1. What tools do I need to start setting up a custom email domain?
Grab a domain name from a domain registrar, sign up with an email provider, open your DNS settings, add MX records, then you can send and receive business email addresses.
2. How do I connect Google Workspace to my custom domain?
Log in to Google Workspace, add your custom domain, verify it with a TXT record in DNS, then add MX records for mail exchanger records. Google will activate your business communication address in minutes.
3. How do I set up email security and authentication?
Create a sender policy framework record for SPF, add a domainkeys identified mail key for DKIM, and publish a DMARC policy for domain-based message authentication, reporting, and conformance. This combo fights spoofing and spam.
4. How do custom email addresses boost my credibility?
An email address at your own domain name shows you mean business. It strengthens your online presence, uplifts search engine rankings, and helps your email marketing and user engagement.
5. How can I handle storage, aliases, and forwarding?
Pick an email provider that offers email storage in the cloud, set up email aliases for sales or info, use email forwarding to manage incoming mail, and keep an email archiving plan or sync with Active Directory.
6. Can I integrate my business email with my website and other tools?
Yes, you can link your email to website integration, plug into email marketing platforms, schedule conference calls through email messages, and even push alerts to connected televisions or streaming boxes.