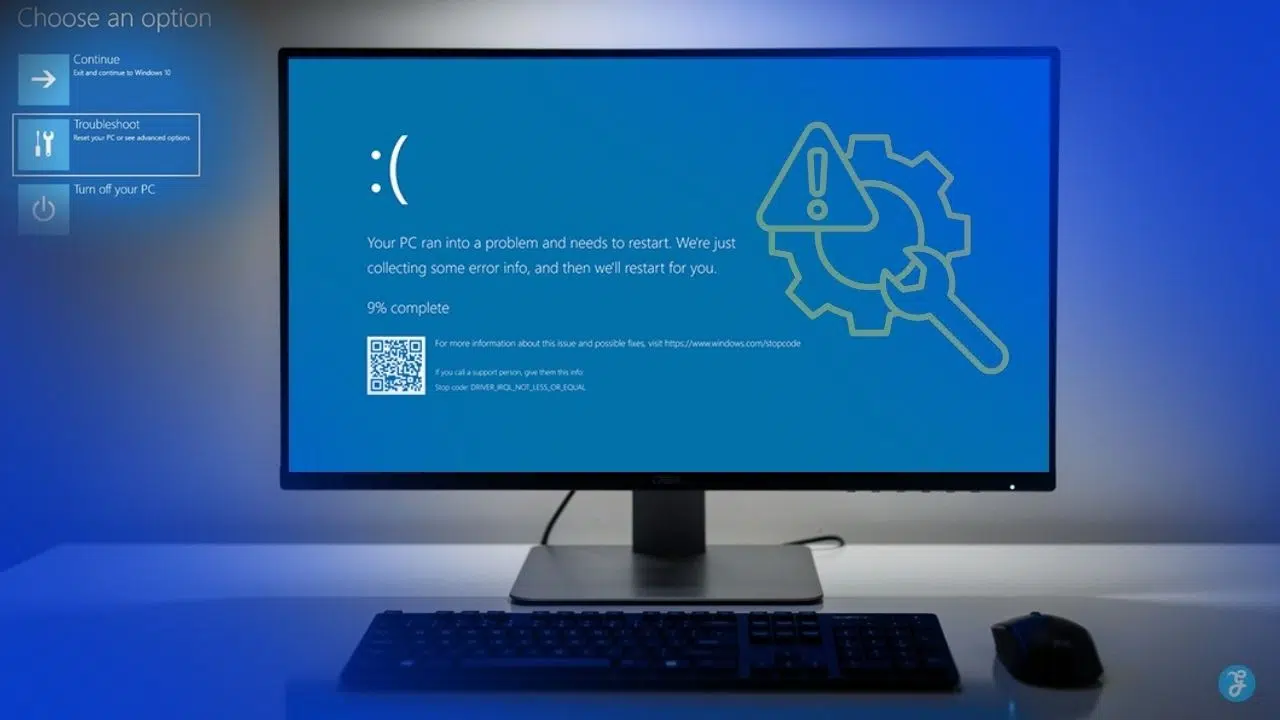
Have you ever felt your heart drop when your computer screen suddenly goes dark? A bright blue screen appears, flashing white text and strange error codes. You have no idea what just happened, and your PC completely ignores every single button you press. This system crash happens when Windows finds a serious problem it cannot fix on its own. Your operating system shuts down immediately to protect your files and hardware from permanent damage.
The good news is that you can fix this Windows Blue Screen of Death problem yourself. You do not need an advanced computer science degree to get things running smoothly again.
I am going to walk you through the common causes and fixes, and I think you will be surprised at how easy it can be. Grab a cup of coffee, and let’s go through it together.
Identifying Common Causes of the Windows Blue Screen of Death
Your computer throws a crash screen for very specific reasons. Finding the culprit is the most important step. Different problems trigger this dreaded crash, so you will want to know exactly what caused yours.
Interestingly, Microsoft updated this famous error screen in late 2025 for Windows 11 version 24H2. It is now technically a black screen, and they officially removed the frowning face. Still, the underlying problems remain the exact same.
Update Faulty or Outdated Drivers
Drivers act like a digital bridge between your physical hardware and Windows. Old or broken drivers cause system crashes and confusing error messages. Your graphics card driver or network adapter driver might simply be out of date. These outdated software components fail to communicate properly with your operating system.
This miscommunication leads to hardware failure and massive memory dump errors. Updating drivers fixes compatibility issues and patches dangerous security holes.
“A computer is like air conditioning. It becomes useless when you open Windows,” according to Bill Gates.
Here are the most common driver culprits you should check first:
- Graphics Cards: NVIDIA and AMD display drivers need frequent updates to prevent crashing.
- Network Adapters: Wi-Fi drivers cause major software conflicts behind the scenes.
- Chipsets: Motherboard drivers control how every single part communicates.
Replace Failed Hardware Components
Your computer hardware wears out over time, just like a car engine. RAM modules fail, hard drives crash, and power supplies eventually quit working. These hardware failures trigger unexpected shutdowns.
You can spot a failing component by watching for patterns in your error messages. If your machine keeps freezing right before the crash, your RAM might be the problem. Testing your memory with a free tool like MemTest86 is a great starting point. If you find a bad memory, replacing it is your only real option.
Be aware that hardware prices fluctuate wildly in the US market. For example, a standard 32GB DDR5 memory kit that cost around $100 in late 2025 shot up to over $350 by early 2026 due to extreme market shortages. Buy replacement parts that match your system specifications exactly to avoid overspending.
Resolve Overheating Issues
Your computer temperature climbs quickly under heavy computing loads. Dust clogs your cooling fans, blocking vital airflow and trapping hot air inside your machine.
This severe overheating triggers a system crash to prevent a total meltdown. You can fix this by simply cleaning out the dust from vents and fans with a can of compressed air.
Modern processors generate incredible amounts of heat. Using a free monitoring tool like HWMonitor helps you track these dangerous temperature spikes in real time.
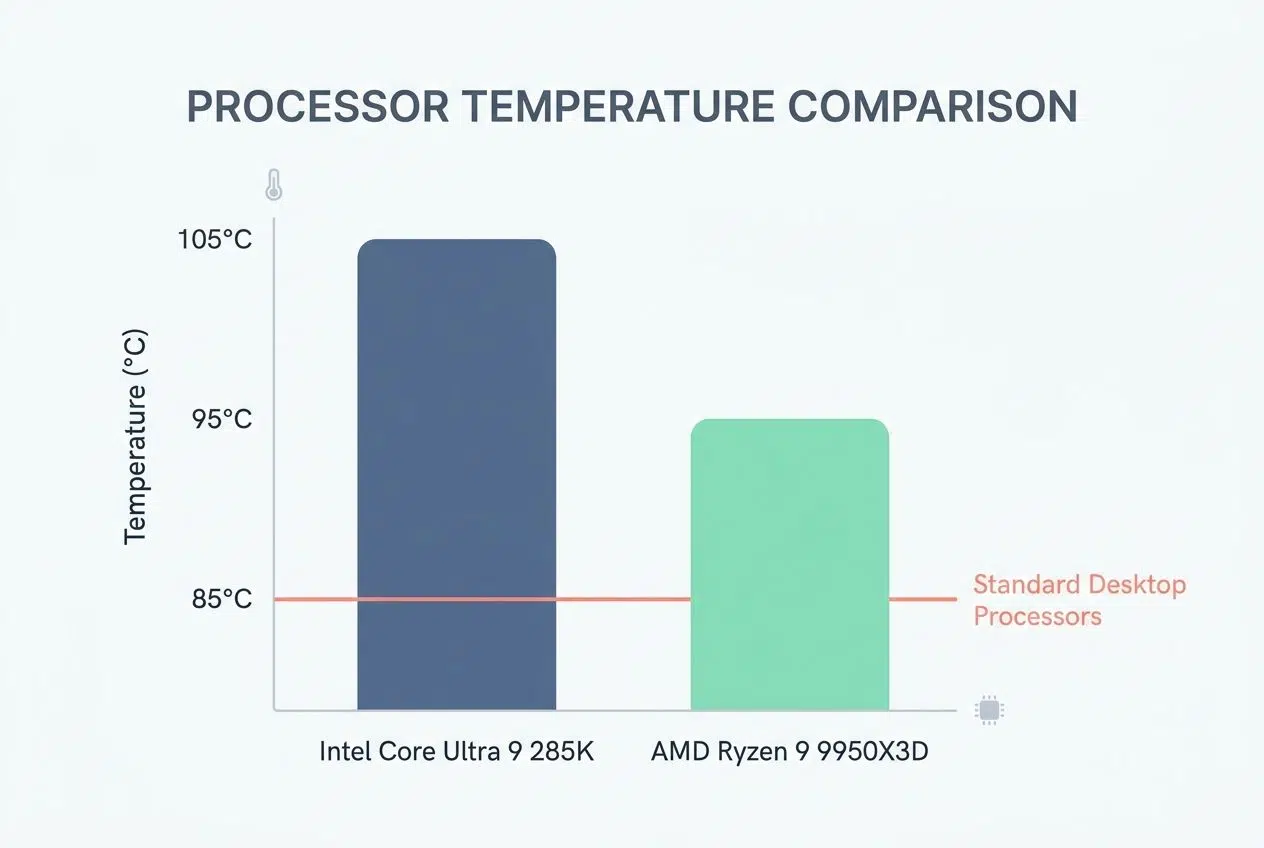
Here are the maximum operating temperatures before popular 2026 CPUs will throttle or shut down:
| Processor Model | Maximum Safe Temperature |
|---|---|
| Intel Core Ultra 9 285K | 105°C (221°F) |
| AMD Ryzen 9 9950X3D | 95°C (203°F) |
| Standard Desktop Processors | 85°C (185°F) |
Repair Corrupted System Files
Corrupted system files act like broken gears in a machine. They cause your Windows operating system to crash repeatedly. File corruption usually happens when power failures strike without warning.
Running the System File Checker tool, often called SFC, scans your entire system. It fixes these common software conflicts completely automatically.
Sometimes the SFC tool cannot fix everything on its own. The Deployment Image Servicing and Management tool, known as DISM, steps in to repair the deeper files that SFC missed. These built-in diagnostic tools save you hours of manual frustration.
Remove Malware and Virus Infections
Malware and viruses sneak into your system very quietly. These nasty programs corrupt your files, steal your data, and make your operating system highly unstable.
You need to scan your entire hard drive with a trusted tool like Microsoft Defender. Run the scan in safe mode, which physically limits what the malware can do during the cleaning process.
Security flaws can impact absolutely anyone, even massive global corporations. A faulty security update famously crashed over eight million Windows machines around the world in 2024.
A corrupted system is like a house with a cracked foundation. You must fix the root problem before anything else matters.
Step-by-Step Fixes for the Windows Blue Screen of Death
You can tackle this frustrating problem by following straightforward steps. These fixes range from simple updates to more involved system repairs. I will walk you through exactly what to do. Take these one at a time, and test your computer after each step.
Using Automatic Driver Updates
Outdated drivers leave your computer stuck in a frustrating crash loop. Automatic updates fix most system failure issues quickly.
- Open Device Manager by right-clicking the Windows Start button and selecting the tool.
- Look for yellow exclamation marks next to your hardware components.
- Right-click on the flagged device and choose the update option from the menu.
- Select the option to search automatically for updated driver software.
- Allow the system to securely download and install the new files.
- Restart your computer after the installation completes to apply the changes.
Manual Driver Installation Methods
Sometimes Windows Update fails to find the correct files. You must take matters into your own hands.
- Visit the hardware manufacturer’s website directly if automatic updates fail.
- Download the correct driver version specifically built for your operating system.
- Run the downloaded installer file and follow the clear on-screen instructions.
Troubleshooting Persistent Driver Issues
If new drivers cause even more problems, you need to isolate the exact software conflict.
- Uninstall problematic drivers entirely by right-clicking the device and selecting “Uninstall device.”
- Restart your computer in Safe Mode to load only essential files.
- Check your memory dump files to see which specific driver triggered the failure.
- Roll back to previous driver versions if a recent update ruined your system stability.
- Create a system restore point before making any major driver changes.
Running Basic Hardware Diagnostics
Hardware can fail completely unexpectedly. Identifying the broken part requires systematic testing.
- Check your RAM first using the built-in Windows Memory Diagnostic tool.
- Listen for unusual clicking or grinding sounds coming from an older mechanical hard drive.
- Feel the temperature around your computer case to check for overheating internal parts.
- Inspect all internal cables inside your tower to ensure nothing vibrates loose.
- Test your power supply by checking if your computer shuts down during heavy gaming tasks.
Safely Replacing Failing Components
Once you locate the bad hardware, replacing it is your only permanent solution.
- Remove each RAM stick one at a time and run your system to isolate the bad module.
- Replace any hardware component that fails your diagnostic tests immediately.
- Consult your computer manual to find the exact replacement parts for your model.
- Ground yourself with an anti-static wrist strap before touching delicate internal components.
- Install replacement hardware carefully while following the manufacturer’s instructions.
Running the Built-in SFC Scan
A system file check scans your core files and repairs any hidden corruption automatically.
- Open Command Prompt as an administrator by right-clicking the Start menu.
- Type “sfc /scannow” into the terminal and press the Enter key.
- Allow the scan to run completely without any interruption.
- Wait for the completion message to see exactly what the tool successfully repaired.
- Restart your computer after the scan finishes to apply the underlying fixes.
- Run the scan a second time if the error persists.
Using Advanced DISM Repair Tools
If the basic scan fails, the DISM tool offers a much more powerful repair option.
- Check Event Viewer logs to identify which specific system files the initial checker flagged.
- Use the DISM tool by typing “DISM /Online /Cleanup-Image /RestoreHealth” in Command Prompt.
- Download Windows installation media on another computer if local repairs fail entirely.
- Boot into Safe Mode before running these checks to reduce active software conflicts.
- Document any error messages the terminal displays for future reference.
Performing a Deep System Scan
Malware corrupts your operating system daily. Scanning your system protects your precious data.
- Download a trusted antivirus program like Norton, McAfee, or use Windows Defender.
- Install the antivirus software and restart your device to activate full protection.
- Open your antivirus application and select the comprehensive full system scan option.
- Let the scan run completely across your entire hard drive.
- Review the detailed scan results carefully to see what the software detected.
- Quarantine all infected files by moving them to an isolated, secure folder.
Maintaining Long-Term Antivirus Protection
Removing the virus is only half the battle. You must prevent them from ever coming back.
- Delete the quarantined files permanently to remove the threat from your computer.
- Update your antivirus definitions regularly to recognize brand-new virus strains.
- Schedule automatic system scans to run weekly in the background.
- Avoid downloading any files from suspicious or unverified websites.
- Use a strong firewall alongside your antivirus software to block unauthorized access.
- Check your browser extensions and remove any unfamiliar add-ons.
Rolling Back Problematic Windows Updates
Recent system updates can trigger severe crashes. Rolling back these specific changes is often the fastest fix.
- Open the Settings app on your computer and click on “System” from the menu.
- Navigate directly to the “Recovery” section.
- Select the option to go back to the previous version of Windows.
- Choose your primary reason for going back, such as system instability.
- Click “Next” and follow the on-screen instructions to start the rollback.
- Keep your computer plugged in while it restarts multiple times.
Reversing Faulty Driver Updates
A single bad hardware driver update can take down your entire machine instantly.
- Access Device Manager by right-clicking the Start button.
- Find the exact hardware device that you recently updated.
- Select “Properties” from the right-click menu and navigate to the “Driver” tab.
- Click the “Roll Back Driver” button to reverse the recent faulty update.
- Restart your computer after rolling back to test your system stability.
Utilizing Windows System Restore
System Restore acts like a magical time machine for your computer software settings.
- Open Control Panel and search for “System Restore” using the top search box.
- Select the tool to access your primary computer recovery options.
- Choose the option to restore your computer to an earlier time.
- Pick a calendar date from before the unexpected crashes started occurring.
- Confirm your selection and allow the automated process to finish completely.
Booting into the Safe Mode Environment
Safe Mode helps you figure out if a third-party app is causing the massive headache.
- Restart your computer and tap the F8 key repeatedly before Windows loads.
- Select “Safe Mode” from the list of advanced boot options.
- Wait for your system to load with minimal drivers running.
- Open Device Manager to check if any hardware devices show yellow error symbols.
- Look closely for recently installed drivers that might be problematic.
- Uninstall any suspicious software that you added right before the crashes started.
Running Diagnostics in Safe Mode
The isolated environment of Safe Mode makes finding the root cause much simpler.
- Run your antivirus program in Safe Mode to scan for stubborn malware infections.
- Check your hard drive for corrupted files by running “sfc /scannow” in Command Prompt.
- Test your RAM by running memory diagnostic tools safely.
- Disable unnecessary startup programs by accessing the Task Manager.
- Restart your computer normally after completing your troubleshooting steps.
- Note exactly which changes you made so you can carefully track your progress.
Advanced Techniques to Troubleshoot the Blue Screen of Death
When your computer keeps crashing constantly, you might need to pull out the heavy tools. These advanced methods dig deeper into the actual code of your operating system.
Do not let these steps intimidate you. Following the instructions carefully will help you find exactly what is breaking your system.

Analyze Crash Dump Files for Clues
Crash dump files hold incredibly valuable clues about what caused your system failure. Your computer creates these files automatically when a crash occurs, capturing a snapshot of your system memory.
You can usually find these diagnostic files located in the “C:\Windows\Minidump” folder on your hard drive. Reading them requires special software, as they look like pure gibberish in a standard text editor.
I highly recommend downloading the free WinDbg Preview app directly from the Microsoft Store. It is a powerful tool built specifically for this complicated job.
Here is a quick look at how you analyze a dump file:
- Open the WinDbg Preview app on your desktop.
- Click “File” and select the “Open Crash Dump” option.
- Navigate to your Minidump folder and select the most recent file.
- Type the command “!analyze -v” into the bottom input bar and press Enter.
The app will process the file and clearly highlight the specific driver or process that triggered the failure. This takes all the blind guessing out of your entire troubleshooting process.
Configuring Safe BIOS Boot Settings
Your BIOS controls how your physical hardware talks to Windows. Tweaking these low-level settings fixes stubborn crashes quickly.
- Access your BIOS menu by pressing the correct key (Delete, F2, or F12) during startup.
- Verify that your primary hard drive appears first in the boot sequence.
- Disable any unnecessary hardware devices in the BIOS that you do not actively use.
- Confirm your SATA mode setting matches your specific drive configuration.
- Disable fast boot temporarily to allow Windows more time during the startup process.
- Monitor your CPU and GPU temperatures directly in the BIOS diagnostic screen.
Updating and Resetting Firmware
Sometimes you need to reset the entire board or apply a manufacturer patch to stop a boot failure.
- Enable XMP or DOCP profiles if your memory supports them, but ensure they remain stable.
- Update your firmware to the latest version available from your motherboard manufacturer’s website.
- Reset the BIOS to default settings if recent changes caused your system to crash.
- Never adjust voltage settings unless you are a highly experienced builder.
- Save your changes and exit the BIOS properly using the designated save option.
Preparing for a Clean Windows Install
A clean Windows installation wipes away all corrupted files. It is the ultimate reset button for your PC.
- Back up all your important files and personal data securely to an external drive.
- Download the Windows ISO file from Microsoft onto a USB flash drive.
- Insert the USB drive into your computer and restart the machine.
- Press the appropriate key during startup to access your boot menu.
- Select the USB drive as your primary boot device to launch the installer.
- Follow the on-screen prompts to launch the Windows Setup wizard.
Finalizing Your Fresh Operating System
Once the installer runs, you just need to configure your brand new setup.
- Select your primary drive and delete the existing partitions to completely clear the disk.
- Choose your preferred Windows version and accept the license agreement.
- Install all necessary drivers for your motherboard immediately after Windows finishes.
- Run Windows Update to download the absolute latest security patches.
- Restore your backed-up files and reinstall your applications one at a time.
- Disable unnecessary startup programs to keep your fresh system running fast.
Strategies to Prevent the Blue Screen of Death
You can stop these frustrating crashes before they ever happen. A little bit of proactive maintenance goes a very long way. By treating your computer well, you drastically extend its lifespan. Here are the best daily habits to adopt immediately.
Keep Your System Updated
Microsoft releases software patches and security updates constantly. These updates fix bugs, close security holes, and improve how your system runs. Skipping updates leaves your computer vulnerable to sudden crashes. Set your system to download and install updates automatically at night.
Keeping your drivers fresh is just as critical. Here is a simple maintenance checklist to follow:
- Monthly: Run Windows Update and check for optional driver patches.
- Quarterly: Visit your graphics card manufacturer’s website for major display driver releases.
- Yearly: Check your motherboard manufacturer’s site for critical BIOS updates.
Ensure Adequate Hardware Cooling
Your computer generates immense heat when it runs. Dust builds up inside your machine over time, acting like a thick blanket over your sensitive parts.
This trapped heat forces your processor to work harder, pushing it to dangerous temperatures. If you use your machine for gaming or heavy work, proper airflow is absolutely mandatory.
Consider replacing the thermal paste between your CPU and cooler every few years. High-quality pastes, like Arctic Silver, help transfer heat away from the processor much more efficiently.
Taking a few minutes to clean your fans every few months saves you from dealing with expensive hardware failure later.
Steer Clear of Unverified Software
Downloading software from sketchy websites opens the door to serious trouble. Malware hides inside unverified programs like wolves in sheep’s clothing.
These intruders damage system files and trigger the blue screen without any warning. Stick to official websites and trusted app stores when you need new tools.
Pirated software and cracked games pose massive risks to your operating system’s health. Hackers frequently bundle malicious kernel-level code into these free downloads.

Never sacrifice your computer security to save a few dollars on cracked software. The cost of replacing corrupted hardware is always much higher.
Final Note
Your computer crashing does not have to ruin your entire day. Most of these system failures stem from simple driver issues or common overheating problems.
Taking action right now prevents data loss and keeps your machine running perfectly. Start with the easiest fixes first, like updating drivers or running a quick malware scan.
A little bit of simple maintenance today stops major error messages tomorrow. If you understand the Windows Blue Screen of Death: Common Causes and Fixes, you will never have to panic when your screen goes dark again. Stay proactive, keep your software updated, and enjoy a fast, reliable computer.
Frequently Asked Questions (FAQs) on Windows Blue Screen Of Death
1. Why does my computer show the Windows Blue Screen of Death?
Your computer hits the brakes with a BSOD when it encounters a critical error it can’t recover from. Most times, faulty hardware like bad RAM or overheating components causes the crash, though buggy drivers and software conflicts can trigger it too.
2. What are the most common causes for getting a blue screen on Windows?
Faulty RAM tops the list, followed closely by overheating processors and failing hard drives. Outdated drivers and sudden power interruptions round out the usual suspects.
3. How do I fix the Blue Screen of Death on my PC?
Start with a simple restart to clear temporary glitches, then check for driver updates through Windows Update or your device manufacturer’s site. If blue screens keep popping up, run Windows Memory Diagnostic by typing mdsched.exe in the search bar to test your RAM for errors.
4. Can I prevent future blue screens from happening again?
Yes! Keep your drivers and Windows updated, clean dust from your PC’s fans every few months to prevent overheating, and back up your files regularly, just in case.