Listen to the Podcast:
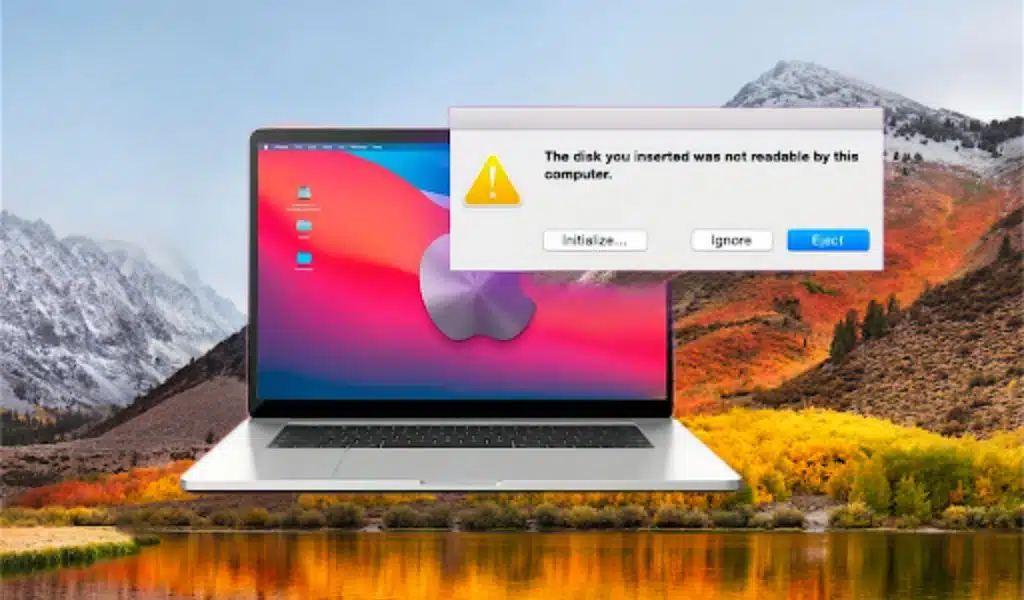
If you’ve ever encountered the error message ‘The Disk You Attached Was Not Readable By This Computer‘, you know how frustrating it can be. In fact, many macOS users often ask questions about issues like ‘disk not readable mac‘ on social media or online forum. They are urged to find effective ways to fix this problem for regaining access to their storage devices.
Don’t worry!! From now on, you will never worry about the issue like ‘disk not readable’. In this article, we’ll explore some common causes of this error and provide feasible methods for resolving it effortlessly.
Overview of The Disk You Attached Was Not Readable By This Computer
Meaning of the ‘disk not readable’ error
The ‘the disk you attached was not readable by this computer’ error is a message that appears on a Mac when it is unable to read data from a connected external storage device such as an external hard drive, USB flash drive, or SD card. It can occur due to various problems. The error message may vary slightly depending on the version of macOS being used, but it indicates the same problem of the Mac being unable to read the data on the disk.
Common causes of the ‘disk not readable’ error
There are several common causes for this error, including:
- File System Incompatibility: The external storage device may be formatted with a file system that is not compatible with the Mac.
- Physical Damage: The external storage device may be physically damaged, which can prevent the Mac from being able to read it.
- Virus or Malware: The external storage device may be infected with a virus or malware, which can prevent the Mac from being able to read it and could also potentially harm the Mac if the device is inserted.
In most cases, the issue can be resolved by formatting the external storage device with a compatible file system. However, physical damage may require professional data recovery services or replacement of the external storage device.
Solve The Disk You Attached Was Not Readable By This Computer
The following four methods to fix the error ‘disk not readable mac’ have been proved to be effective.
Solution A:Basic Check
It is recommended to perform basic troubleshooting before selecting any of the given options. Here are some basic checks you need to do:
-
Check the file system: A common cause of Mac not being able to read a drive is that the drive is formatted as NTFS. Since macOS doesn’t have built-in support for reading and writing to NTFS, you’ll need to convert the drive to a compatible format.
- Encrypte disk: If the drive is encrypted with BitLocker, macOS will display the message “The disk you inserted is not readable by this computer” unless the BitLocker for Mac tool is installed.
Usually these two checks can solve the error with a high probability. If this check doesn’t help, read on to check for other possible methods.
Solution B:Format The Drive and Recover Data
Preparation before erase your drive
Formatting your drive involves erasing all data on the disk and configuring it for use with your Mac. However, you can format the disk only to find out that you forgot to back up important files. Don’t worry, Tenorshare 4DDiG can help you get back your lost files in a short time.
Follow the steps given below to recover your lost data:
Step1:Connect your drive and Launch 4DDiG
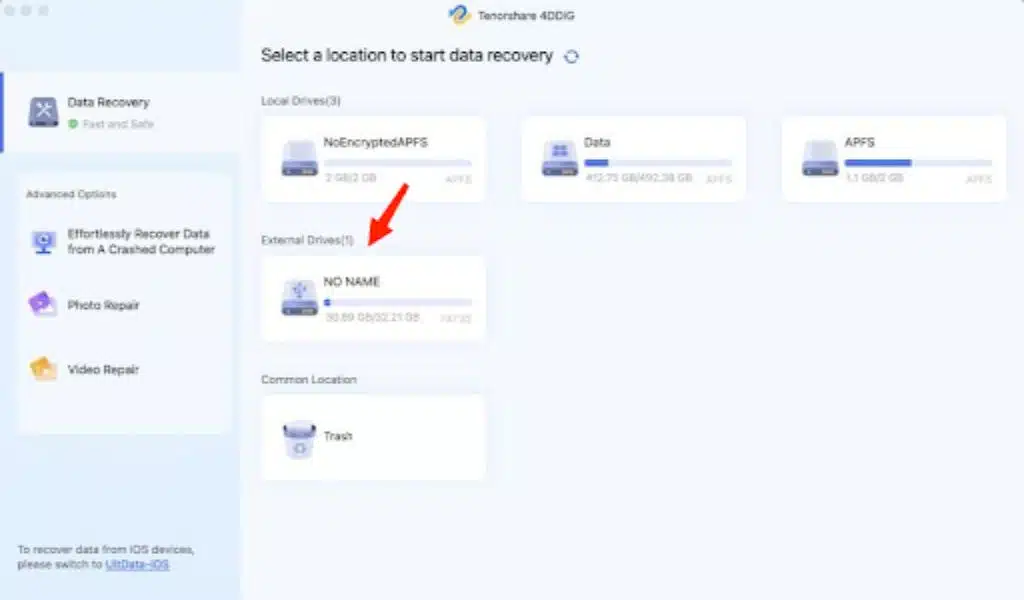
To begin using Tenorshare 4DDiG on your Mac, launch the program and connect your external hard drive to your Mac. Next, select the external hard drive from the program’s interface and click on the “Start” button.
Step 2:Scan the drive and preview
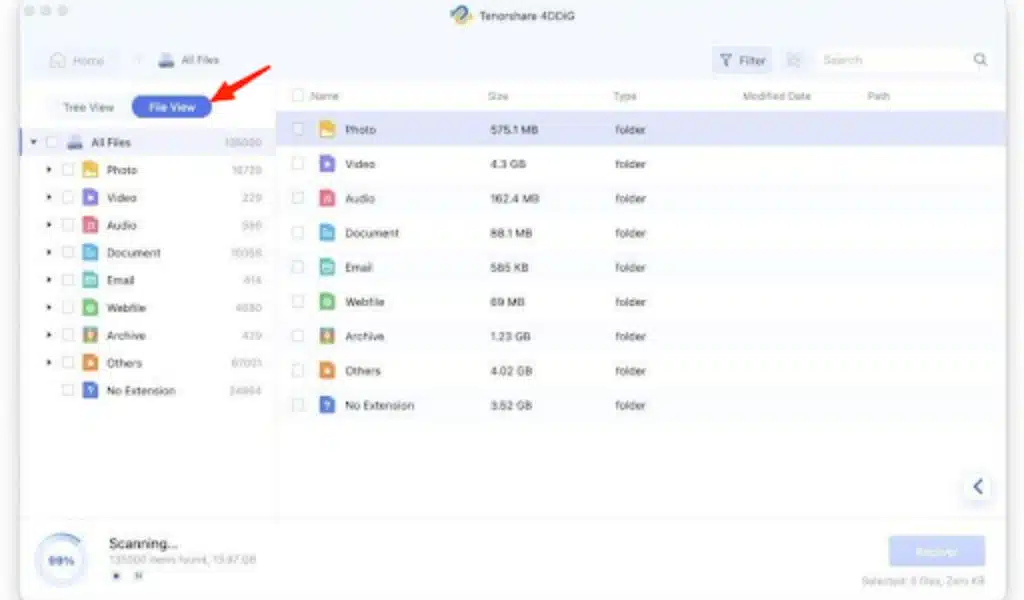
After the scanning process is complete, you can click on each file type to view more details. Alternatively, you can preview the files in a tree view.
Step 3:Choose and Recover
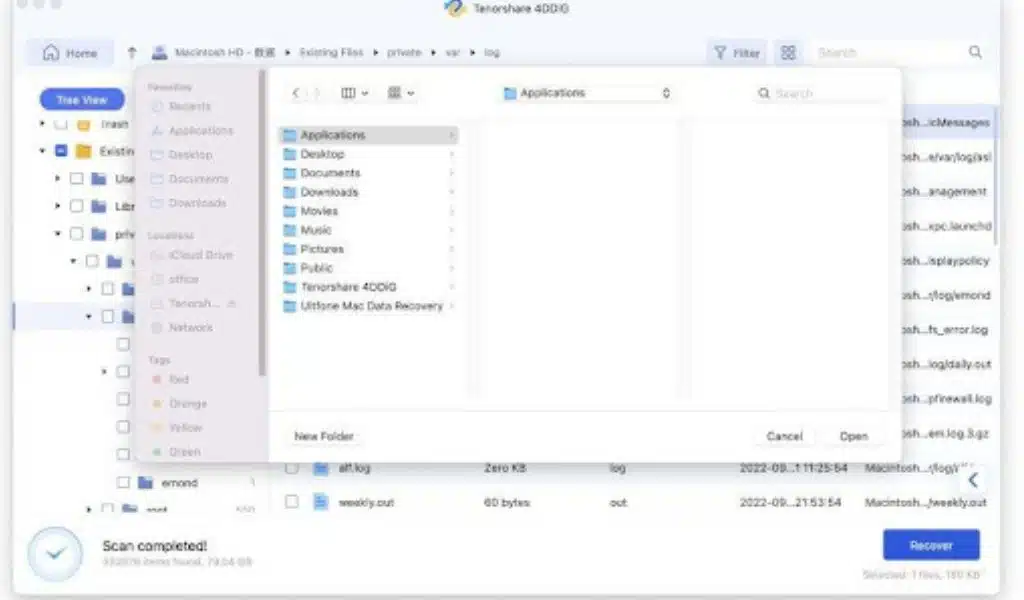
It is recommended to select a different location to save the recovered files. After selecting the files you want to restore, click on the “Recover” button and you can get back important data.
How to format your drive?
Here are the steps to format a drive on a Mac:
Step 1:Lauch the Disk Utility app, which can be found in the Utilities folder within the Applications folder.
Step 2:Select the drive that you want to format from the list of disks on the left-hand side of the window.
Step 3:Click on the “Erase” button at the top of the window.In the Erase window, you can choose the name for the drive, the format, and the scheme.
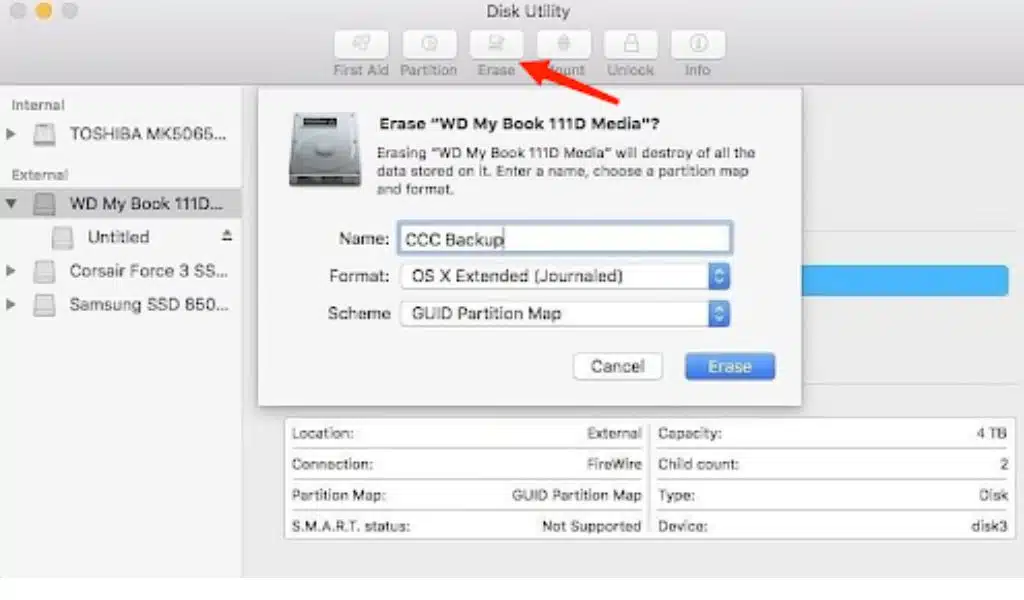
Note:Once a drive is formatted, it may not be compatible with other operating systems or devices. For most cases, you should choose “Mac OS Extended (Journaled)” for the format and “GUID Partition Map” for the scheme.
Step 4:Click on the “Erase” button to begin the formatting process.
It’s important to note that formatting a drive will permanently erase all data on the disk, so make sure to download a reliable data recovery tool like 4DDiG before proceeding.
Solution C:Use First Aid to Fix The Error “Disk Not Readable”
If you’re experiencing the error ‘the disk you inserted was not readable by this computer’ on your Mac, one potential solution is to use the First Aid tool in the Disk Utility app to repair any errors on the disk. Here’s how you can do it:
Step 1:Open the “Disk Utility” app, which can be found by using Spotlight search.
Step 2:In the Disk Utility window, select the disk that is showing the “Disk Not Readable” error.
Step 3:Click on the “First Aid” button at the top of the window amd Click on the “Run” button to start the process.
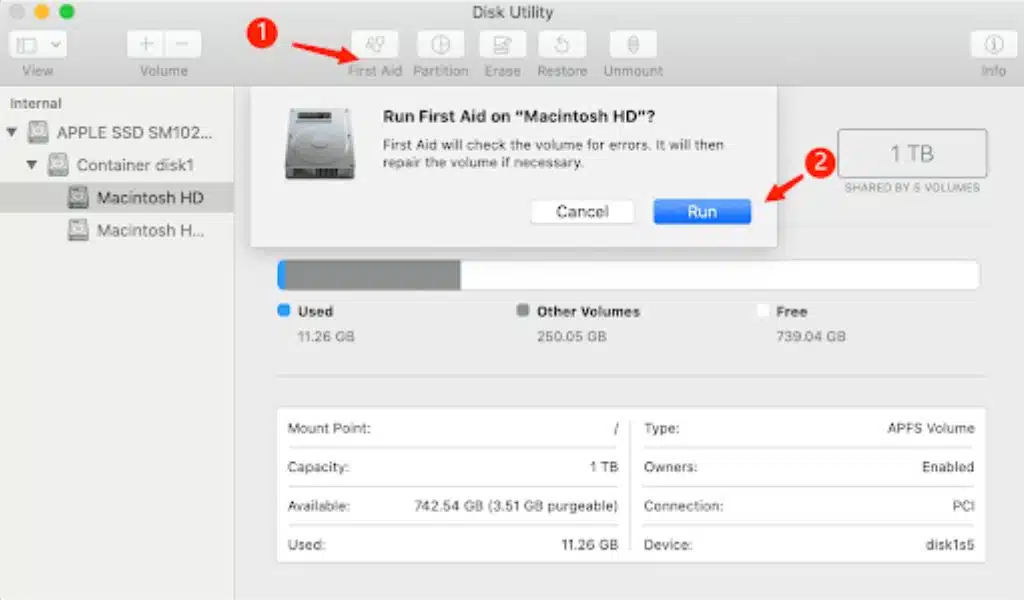
Step 4:The process may take several minutes to complete. Once the First Aid process is complete, you will see a message indicating whether any errors were found and whether they were repaired.
If any errors were found and repaired, you may be able to access the disk without encountering the ‘Disk Not Readable’ error.
Solution D:Update the drivers
In fact, an outdated driver on a Mac can also result in the error message ‘The disk you attached is not readable by this computer.’. Here are the step-by-step instructions to check for updates and update drivers on a Mac:
Step 1:Click on the “APPLE” icon and then, choose “System Preferences”
Step 2:Click on “Software Update“. Your Mac will check for available updates.
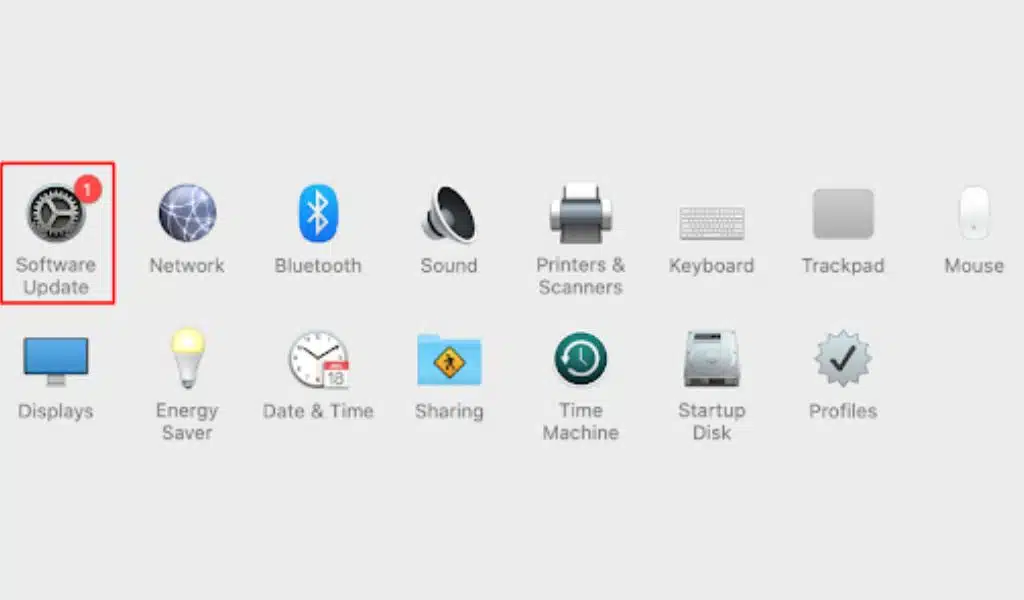
Step 3:If there are any updates available for your system or applications, click on the “Update” button.
Tips for Avoid The ‘Disk Not Readable‘ Error
If you don’t want to see any error message like “the disk you inserted was not readable by this computer” in the future, here are some tips to avoid it:
- Always eject the external drives properly before unplugging them from the Mac.
- Keep your Mac and the external drives free from malware and viruses by running regular scans.
- Keep your Mac and external drives updated with the latest software updates and patches.
- Keep your external drives free from physical damage or wear and tear.
- Keep your Mac’s ports clean and free from dust and debris by using compressed air to blow them out occasionally.
By following these tips, you can avoid encountering the ‘Disk Not Readable’ error and prevent data loss.
F&Q About The Disk You Inserted Was Not Readable By This Computer
Q:Why won’t my Mac recognize my disk?
A:There are several reasons why a Mac may not recognize a disk, including connectivity issues such as improperly plugged-in cables or damaged connection cables, problems with the Mac’s hardware such as a faulty power supply or bad USB port.
Q:What does it mean if hard drive is unreadable?
A:If a hard drive is unreadable, it means that the computer or device connected to the hard drive is unable to access the data stored on the drive. If you are a macbook user, you can use effective ways including formatting the drive or using First Kid. Alternatively, If you are a Windows user, you can use the tool named Command Prompt to fix the error ‘the disk you attached was not readable‘.
Q:How do I make my USB readable only?
A:The write protection switch can help safeguard the files stored on your drive from malware when accessing them on a public computer. By toggling the switch to the “Lock” position, all files and the device will be set to read-only mode, thereby preventing any modifications.
Conclusion
In conclusion, this guide explains the issue of ‘The Disk You Attached Was Not Readable By This Computer’ on a Mac, including its causes, solutions, and preventive measures. If formatting becomes necessary, we recommend using reliable data recovery software like 4DDiG before formatting the hard disk to avoid losing any data. If you have already solved this problem, please go help those users who are still asking questions like ‘disk not readable mac’ on the Apple forum!