Looking to refresh your bedroom? A new headboard can make a big difference. It’s a simple way to change the look and feel of your space without spending a lot.
You don’t need to buy an expensive headboard to get great results. With some creativity and basic tools, you can make your own unique headboard at home.
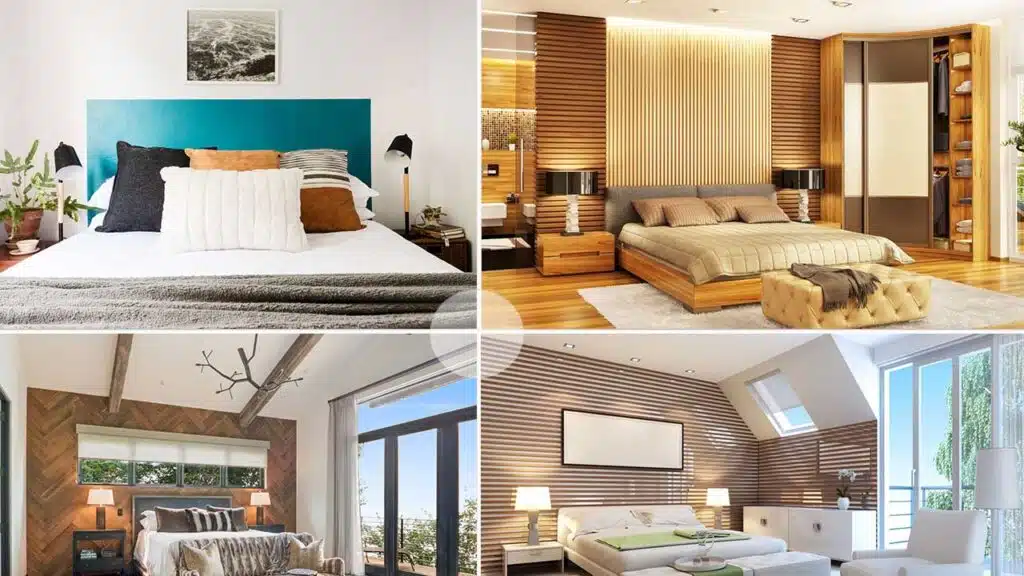
DIY headboards let you customize the style, size, and materials to fit your exact needs and tastes.
1) Rustic Wooden Pallet Headboard
A rustic wooden pallet headboard can give your bedroom a cozy, farmhouse-inspired look. You can easily make one using reclaimed wood pallets from local businesses or online marketplaces.
Start by cleaning the pallets thoroughly. Sand them down to remove any rough spots or splinters. This will make the wood smooth and safe to touch.
Next, decide on the size and shape of your headboard. You can leave the pallets whole or cut them to fit your bed size. Arrange the pallets in a pattern you like.
Secure the pallets together using screws or nails. Make sure the structure is sturdy and won’t wobble. You can add support beams at the back for extra stability.
Once assembled, you can stain or paint the headboard. Choose a color that matches your bedroom decor. A clear varnish will protect the wood and bring out its natural grain.
To mount the headboard, attach it to your bed frame or directly to the wall. Use strong brackets to ensure it stays in place. Add some soft lighting or hanging plants for extra charm.
This DIY project is budget-friendly and customizable. You can make it as simple or elaborate as you want. It’s a great way to add character to your bedroom without breaking the bank.
2) Tufted Velvet Headboard
A tufted velvet headboard can add a touch of luxury to your bedroom. This DIY project is easier than you might think. You’ll need plywood, foam, velvet fabric, buttons, and some basic tools.
Start by cutting the plywood to your desired size. Cover it with a layer of foam for cushioning. Next, wrap the foam-covered board with batting to smooth out any bumps.
Now comes the fun part – covering it with velvet fabric. Choose a color that matches your bedroom decor. Stretch the fabric tightly over the board and staple it to the back.
To create the tufted look, mark evenly spaced points on the back of the board. Push long upholstery needles through these points from the back to the front.
Thread buttons onto the needles and pull them tight. This creates the signature dimpled effect of a tufted headboard. Secure the buttons in place at the back of the board.
Finally, attach the finished headboard to your bed frame or wall. Your new tufted velvet headboard will transform your bedroom into a cozy, elegant retreat.
3) Vintage Shutter Headboard
Old shutters can make a unique and charming headboard for your bedroom. You can find vintage shutters at flea markets, antique stores, or salvage yards. Look for shutters with an interesting design or color that matches your room’s style.
Clean the shutters thoroughly before use. Sand them lightly if needed, but keep some of the weathered look for character. You can paint them to match your decor or leave the original finish for a more rustic feel.
To create the headboard, arrange the shutters side by side. Attach them together using hinges or wood strips on the back. Make sure the shutters are securely fastened to prevent wobbling.
Mount the shutter headboard to your wall using heavy-duty brackets or hooks. Position it at the right height for your bed. You can add extra support by attaching it to wall studs for stability.
For a softer look, consider padding the shutters with foam and fabric. This adds comfort if you like to sit up in bed to read. You can also hang string lights or garlands on the shutters for a cozy touch.
A vintage shutter headboard adds texture and visual interest to your bedroom. It’s a budget-friendly option that brings a bit of history and charm to your space.
4) Repurposed Door Headboard
An old door can make a unique and eye-catching headboard for your bedroom. Look for a vintage door at flea markets, salvage yards, or antique shops. Choose one that fits your bed size and room style.
Clean the door thoroughly and sand it if needed. You can keep its original paint for a rustic look or repaint it to match your decor. Consider distressing the paint for a shabby chic effect.
To install the door, attach it securely to the wall behind your bed. Use sturdy brackets or a French cleat system for proper support. Make sure it’s level and at the right height for your bed.
Add some personal touches to your door headboard. Hang fairy lights around it for a cozy glow. Place small shelves on top to display photos or plants. You can also add hooks to hang decorative items.
A repurposed door headboard brings character and history to your bedroom. It’s a budget-friendly option that makes a big impact. Plus, you’ll have a one-of-a-kind piece that tells a story.
5) Fabric Upholstered Headboard
A fabric upholstered headboard can give your bedroom a cozy and stylish look. You can make one yourself with some basic materials and tools.
Start by cutting a piece of plywood to your desired headboard size. Cover it with a layer of foam padding for comfort.
Next, wrap the foam-covered board with batting to smooth out any bumps. Choose a fabric you love and stretch it tightly over the batting, securing it on the back with a staple gun.
For a tufted look, mark evenly spaced spots on the fabric before attaching it. Use buttons and a long upholstery needle to create the tufts after the fabric is in place.
You can customize your headboard further by adding decorative nailhead trim around the edges. This adds a touch of elegance to the finished product.
Mount your new headboard to the wall or attach it to your bed frame. You’ll have a unique, personalized focal point for your bedroom that reflects your style.
6) Reclaimed Barn Wood Headboard
A reclaimed barn wood headboard adds rustic charm to your bedroom. You can make one yourself with some old barn wood and basic tools.
Start by finding weathered barn wood planks. Look for pieces with character and interesting grain patterns. Clean the wood thoroughly to remove dirt and debris.
Measure your bed to determine the size of your headboard. Cut the planks to fit, leaving extra length for mounting.
Arrange the planks in a pattern you like. You can create a simple horizontal design or try a more complex herringbone pattern.
Attach the planks to a sturdy backing board using wood glue and screws. This gives your headboard stability and makes it easier to mount.
Sand any rough edges for safety. You can leave the wood natural or apply a clear sealant to protect it.
Mount your new headboard to the wall or bed frame. Use strong brackets to ensure it’s secure.
This project lets you bring a piece of history into your bedroom. Each headboard will be unique, reflecting the story of the wood used to create it.
7) Painted Pegboard Headboard
A painted pegboard headboard can add a fun and functional touch to your bedroom. This DIY project is easy to make and can be customized to fit your style.
Start by measuring your bed and cutting a pegboard to size. Sand the edges for safety. Choose a paint color that matches your room’s decor. Apply primer first, then add 2-3 coats of paint for even coverage.
Once dry, attach the pegboard to your wall using screws and wall anchors. Make sure it’s securely fastened above your bed.
Now comes the fun part – decorating your pegboard! Use hooks to hang small plants, artwork, or decorative items. You can also add shelves for books or knick-knacks.
Change up your display as often as you like. This versatile headboard allows you to switch things around whenever you want a fresh look.
A painted pegboard headboard is both stylish and practical. It gives you extra storage space and lets you show off your personality. Plus, it’s an affordable way to update your bedroom decor.
8) Bookshelf Headboard
A bookshelf headboard combines style and function in your bedroom. It gives you extra storage space while adding a unique look to your bed.
You can build a bookshelf headboard using basic materials like wood planks and brackets. Start by measuring the width of your bed to determine the size of your headboard.
Cut the wood to size and assemble the frame. Add shelves at different heights to create varied storage options. You can paint or stain the wood to match your room’s decor.
Install the headboard securely to the wall behind your bed. Make sure it’s sturdy enough to hold books and other items safely.
Once installed, you can fill the shelves with books, plants, or decorative objects. This creates a personalized display that reflects your interests and style.
A bookshelf headboard is perfect for book lovers or those who need extra storage. It’s a great way to save space in smaller bedrooms.
You can adjust the design to fit your needs. Add lighting for nighttime reading or include closed cabinets for hidden storage.
This DIY project can be completed in a weekend with basic tools and skills. It’s a cost-effective way to upgrade your bedroom and add character to your space.
9) Mirrored Panel Headboard
A mirrored panel headboard can make your bedroom look bigger and brighter. It reflects light and adds a touch of glamour to your space. You can create this eye-catching headboard with a few simple materials.
Start by measuring the width of your bed. Cut a large piece of plywood to match this width. Make sure it’s tall enough to stand out above your mattress.
Next, buy mirror panels from a home improvement store. Glue these panels onto the plywood using a strong adhesive. Leave small gaps between each panel for a more interesting look.
Be careful when handling the mirror panels. Wear gloves to protect your hands from sharp edges. Work slowly and carefully to avoid breaking the mirrors.
Once all the panels are in place, let the adhesive dry completely. Then, attach the headboard to your bed frame or wall. You can use brackets or picture hangers for this step.
Your new mirrored headboard will create a stunning focal point in your bedroom. It will also make the room feel more open and spacious. This project is a great way to add some shine to your sleeping space.
10) Woven Leather Strap Headboard
A woven leather strap headboard adds a touch of rustic elegance to your bedroom. This DIY project is both stylish and practical. You can customize it to fit your bed size and personal taste.
To create this headboard, you’ll need wooden boards, leather straps, and basic tools. Start by building a simple wooden frame to fit your bed. Sand and stain the wood to your liking.
Next, cut leather straps to size. You can buy pre-made straps or cut them from leather hides. Attach the straps to the frame, weaving them in an over-under pattern. This creates an eye-catching design.
The leather straps can be left their natural color or dyed to match your decor. For a softer look, add padding beneath the straps. This makes the headboard more comfortable to lean against.
You can adjust the tightness of the weave to change the look. A looser weave creates a more relaxed feel, while a tighter weave looks more structured. Play around with different patterns to find what you like best.
This project is great for beginners and experienced DIYers alike. It’s a fun way to add texture and warmth to your bedroom. The result is a unique headboard that reflects your personal style.
11) Macramé Headboard
A macramé headboard can add a bohemian touch to your bedroom. This DIY project uses knotted cords to create a unique and eye-catching design. You can customize the pattern and size to fit your bed perfectly.
To start, you’ll need a sturdy rod or wooden dowel. This will serve as the base for your macramé work. Choose a cotton rope or cord in your preferred thickness and color.
Begin by cutting your cords to the desired length. Remember to account for the knots and fringe. Attach the cords to the rod using lark’s head knots.
Next, follow a macramé pattern of your choice. Square knots and diagonal clove hitch knots are popular options for headboards. You can find many free patterns online or create your own design.
As you work, keep the tension consistent to maintain a neat appearance. Adjust the spacing between knots to achieve your desired look.
Once you’ve completed the knotting, trim any excess cord. You can leave the ends loose for a fringe effect or add beads for extra flair.
Hang your finished macramé headboard on the wall above your bed. Use sturdy hooks or brackets to ensure it’s secure. Your new headboard will add texture and interest to your bedroom decor.
12) Rattan Headboard
Rattan headboards bring a natural, tropical vibe to your bedroom. They’re lightweight and easy to install, making them perfect for DIY projects.
To create a rattan headboard, start by measuring your bed’s width. Add a few extra inches on each side for a fuller look. Purchase a rattan panel or screen from a home decor store or online marketplace.
Attach the rattan panel to a wooden frame for stability. You can build the frame yourself using lumber from a hardware store. Sand and paint the frame to match your decor before attaching the rattan.
Mount the finished headboard to your wall using sturdy brackets. Make sure it’s securely fastened to prevent accidents. You can also attach it directly to your bed frame if you prefer.
For extra flair, weave fairy lights through the rattan. This creates a cozy, magical atmosphere in your bedroom. You can also hang plants or small decorations from the rattan for a personalized touch.
If you want a more rustic look, leave the rattan in its natural state. For a modern twist, paint it white or a bold color that matches your room’s palette.
Remember to dust your rattan headboard regularly to keep it looking fresh. A soft brush or vacuum attachment works well for this task.
13) Framed Wallpaper Headboard
A framed wallpaper headboard is a great way to add style to your bedroom. It’s easy to make and can be customized to fit your taste. You can use any wallpaper pattern you like, from bold florals to subtle textures.
To create this headboard, start by choosing a frame. You can use an old picture frame or build one from wood. Make sure it’s large enough to make a statement behind your bed.
Next, pick your wallpaper. Consider colors and patterns that match your room’s decor. Measure the inside of your frame and cut the wallpaper to fit.
Attach the wallpaper to a piece of thin plywood or sturdy cardboard. This will give it structure and make it easier to place in the frame. Use spray adhesive for a smooth finish.
Once the wallpaper is dry, put it in the frame. Hang the frame on the wall above your bed. You can attach it securely with wall anchors and screws.
This DIY headboard can change the look of your bedroom quickly. It’s a budget-friendly option that lets you show off your personal style. You can even switch out the wallpaper for a new look whenever you want.
14) Chalkboard Paint Headboard
A chalkboard paint headboard adds a fun and creative touch to your bedroom. You can easily make one yourself with some basic materials and a little time.
Start by measuring the wall space above your bed where you want the headboard. Use painter’s tape to mark off the area.
Apply chalkboard paint to the marked area following the product instructions. You’ll likely need 2-3 coats for good coverage. Let it dry completely between coats.
Once dry, you can draw or write on your new headboard with chalk. Change up the design whenever you want a fresh look.
Try adding a decorative frame around the chalkboard area for a more polished appearance. You can use molding or even washi tape to create a border.
Get creative with your chalkboard headboard. Write inspirational quotes, draw pictures, or use it as a place to jot down reminders. The possibilities are endless.
This DIY project gives you a unique, customizable headboard that doubles as functional wall art. It’s an affordable way to transform your bedroom decor.
15) Lattice Headboard
A lattice headboard can add a touch of elegance to your bedroom. This DIY project is both stylish and simple to create. You’ll need wooden lattice panels, a frame, and some basic tools to get started.
Begin by measuring your bed to determine the size of your headboard. Cut the lattice panels to fit within your chosen frame. You can use pre-made frames or build one yourself using wooden boards.
Attach the lattice panels to the frame using wood glue and small nails. Make sure everything is secure and level. Sand any rough edges for a smooth finish.
Next, decide on a color scheme. You can paint the lattice headboard to match your bedroom decor. White is a classic choice, but bold colors can make a statement too.
For extra comfort, consider adding padding to the frame before attaching the ladder. This will create a softer surface to lean against while reading in bed.
Install the finished headboard by securing it to your bed frame or mounting it directly on the wall. You’ll have a unique, custom piece that transforms your bedroom’s look.
Materials and Tools Needed
Creating a DIY headboard requires some basic supplies and equipment. You’ll need materials to build the structure and tools to put it all together.
Essential Materials
Wood is the most common material for DIY headboards. You can use plywood, MDF, or solid wood boards. Fabric is another key item if you want a soft, upholstered look. Choose a durable fabric that matches your room’s style.
Foam padding adds comfort to upholstered headboards. You’ll also need batting to cover the foam. For attaching fabric, get a staple gun and staples.
Screws, nails, and wood glue help secure the headboard frame. Paint or stain can give your headboard a finished look. Don’t forget sandpaper to smooth rough edges.
Tools for Construction
A saw is crucial for cutting wood to size. You can use a hand saw, but a power saw makes the job easier. A drill is needed for making holes and driving screws.
Measuring tools like a tape measure and level ensure your headboard fits well. A hammer comes in handy for various tasks. Clamps help hold pieces together while glue dries.
For upholstered headboards, scissors cut fabric and foam. A utility knife trims excess material. Safety gear is important too. Wear safety glasses and a dust mask when cutting or sanding wood.
Choosing the Right Design
Picking the perfect DIY headboard design involves matching your style and planning carefully. The right choice can transform your bedroom’s look and feel.
Consider Your Bedroom Style
Think about your bedroom’s current decor. Is it modern, rustic, or traditional? Your new headboard should complement this style. For a modern room, try a sleek, geometric design. Rustic spaces work well with wooden or reclaimed materials. Traditional bedrooms suit upholstered or tufted headboards.
Look at your color scheme too. Choose a headboard that either matches or contrasts nicely with your walls and bedding. Bold colors can make a statement, while neutral tones offer versatility.
Don’t forget about texture. Soft fabrics add coziness, while smooth surfaces give a clean look. Mix textures for visual interest.
Measuring and Planning
Measure your bed and wall space before starting. Your headboard should be slightly wider than your bed. For a queen bed, aim for 60-64 inches wide. King beds need about 76-80 inches.
Consider the height too. Most headboards are 48-64 inches tall. Taller ones make a bigger impact but may not fit in rooms with low ceilings.
Plan your materials and tools. Make a list of everything you’ll need. This helps avoid multiple trips to the store. Think about storage space for materials and where you’ll work on your project.
Set a budget and timeline. DIY headboards can be cheap or pricey depending on materials. Give yourself enough time to complete the project without rushing.
Step-by-Step Construction Guide
Building a DIY headboard can be simple and rewarding. Follow these steps to create a custom piece for your bedroom. You’ll start with prep work, move on to assembly, and finish with decorative touches.
Preparing the Workspace
Clear a large, flat area for your project. You’ll need space to lay out materials and work comfortably. Gather all tools and supplies before starting. This includes wood, screws, a drill, saw, sandpaper, and any decorative elements.
Measure your bed frame and decide on the headboard size. Cut wood pieces to size or have them pre-cut at a hardware store. Sand all wood surfaces to prevent splinters.
Lay out your design on the floor. This helps you visualize the final product and catch any issues early. Make any needed adjustments to your plan now.
Assembling the Frame
Start by creating the main frame. Use wood glue and screws to join the pieces. Make sure corners are square. Let the glue dry completely.
Attach support pieces to the back of the frame. These add stability and help mount the headboard to your bed or wall.
If your design includes panels, attach them to the frame. Use finishing nails or wood glue for a clean look. For fabric-covered panels, wrap and staple material before attaching.
Finishing Touches
Sand the entire headboard to smooth any rough spots. Wipe away dust with a tack cloth.
Apply your chosen finish. This might be paint, stain, or varnish. Follow product instructions for best results. Apply in thin, even coats. Let each coat dry fully before adding the next.
Add any decorative elements like trim, buttons, or nailhead designs. Make sure these are secure and won’t catch on bedding.
Mount your headboard to the bed frame or wall. Use appropriate hardware for a sturdy installation. Check that it’s level before final tightening.
Final Thoughts
Creating a DIY headboard is an exciting and rewarding way to transform your bedroom without spending a fortune. The possibilities are endless, and each idea offers a unique way to express your personal style.
The beauty of these DIY projects lies in their versatility. Whether you prefer a minimalist, modern design or something more vintage and textured, you can adapt these ideas to suit your preferences. Plus, the satisfaction of building something with your own hands makes the end result even more special.
Take your time, follow the steps, and don’t be afraid to get creative. With some basic tools, a little patience, and a lot of imagination, you can craft a headboard that will elevate your bedroom and turn it into the sanctuary you’ve always wanted.
Happy crafting!