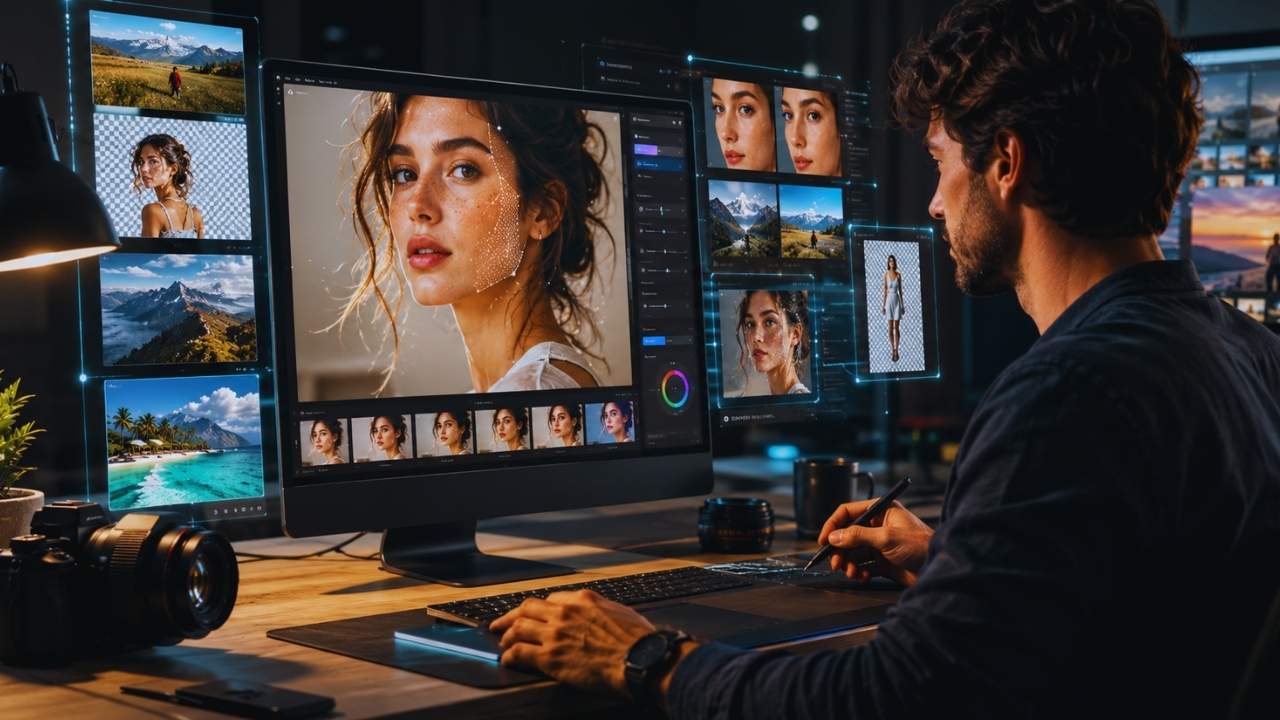
Product photography used to be simple in theory and expensive in reality. You needed a product, a photographer, lights, props, a backdrop, editing time, and enough patience to survive 47 emails about whether the shadow looked “premium but not dramatic.” For small ecommerce brands, Etsy sellers, Amazon sellers, Shopify stores, and solo founders, that workflow can be painfully slow and expensive.
That is why AI Product Photography has become so useful. Many AI product photography tools now offer starter plans somewhere around the $10 to $30 per month range, with some paid plans beginning around $20 per month and others offering free or trial credits before upgrading. Recent pricing roundups show starter-style plans at about $20 per month for some tools, $24 per month for others, and low-cost options starting around $10 per month, depending on credits and features.
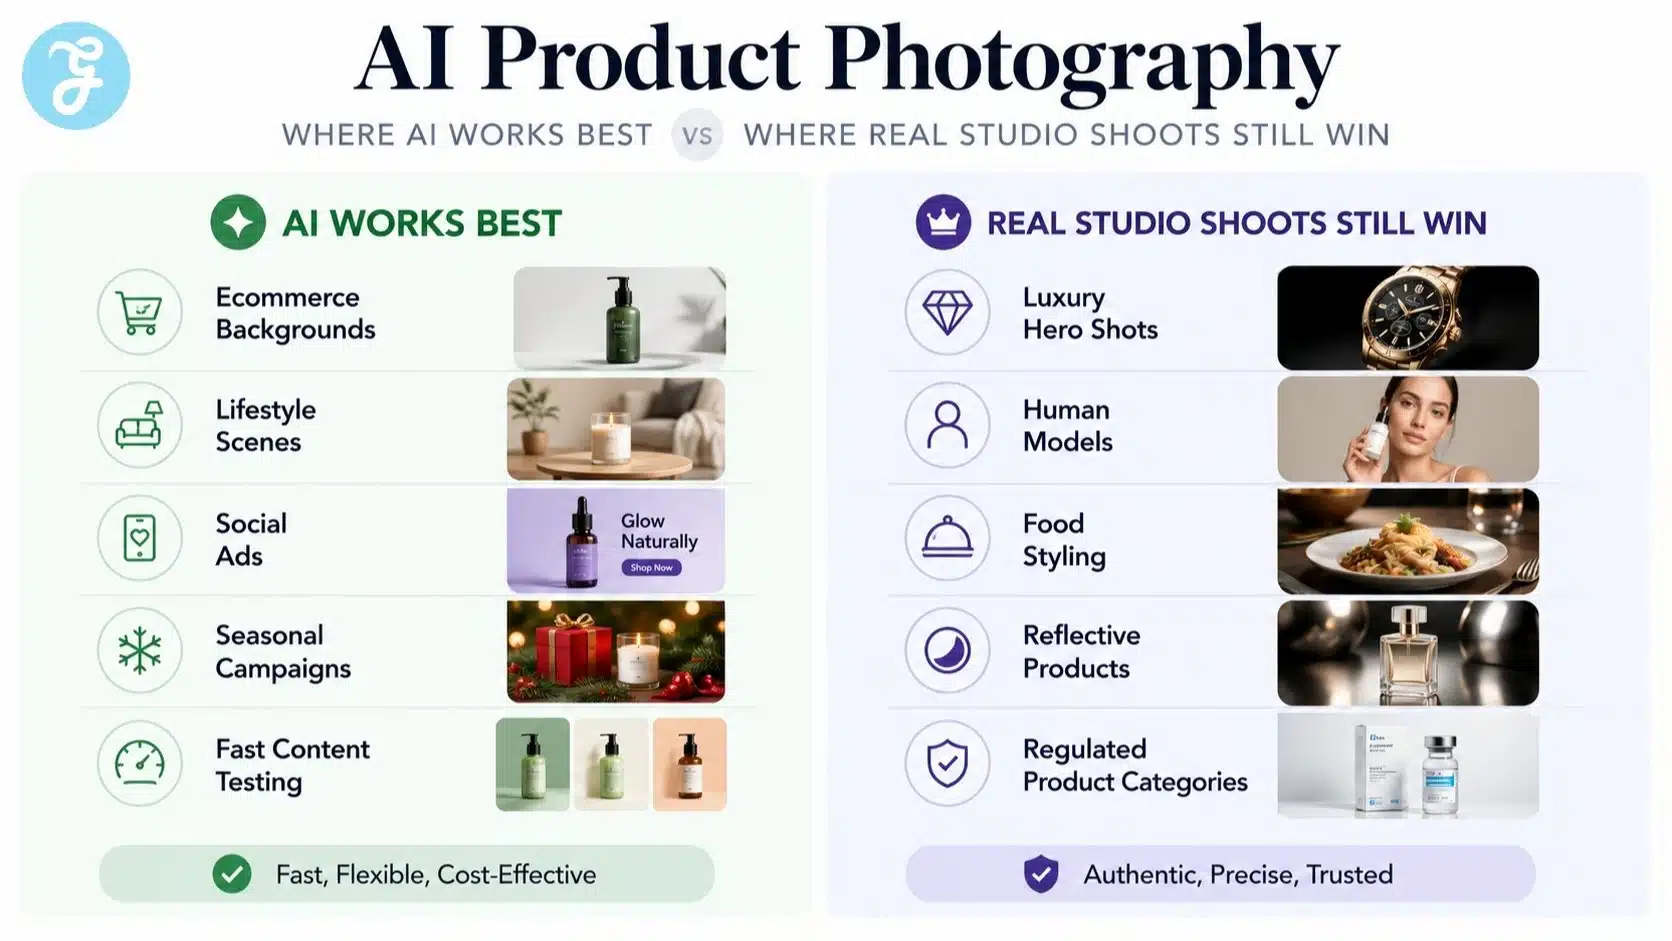
This does not mean AI replaces every studio shoot. If you need exact packaging accuracy, luxury campaign photography, human models, complex reflections, food safety realism, or regulated product claims, you still need professional control. But for basic e-commerce visuals, lifestyle mockups, social media images, ad creatives, and product page variations, AI can replace a large part of the beginner studio workflow.
What AI Product Photography Actually Replaces
Before treating AI like a magical photo department, it helps to define what it is good at. AI product photography is best for turning a clean product image into multiple styled visuals.
It can help with:
- background replacement;
- lifestyle product scenes;
- social media creatives;
- ad visuals;
- ecommerce banners;
- seasonal product images;
- simple clean-background product shots;
- fast campaign variations.
It is weaker when the image must show perfect physical truth. AI can still distort labels, packaging edges, logos, shadows, scale, and product materials. That is why the workflow should always include human review before publishing.
Before You Start
Before opening any tool, prepare your product image properly. AI product photography tools work best when the original product shot is clean, sharp, and easy to separate from the background.
You need:
- one clear front-facing product photo;
- good lighting;
- no heavy shadows over the product;
- high resolution if possible;
- clean product edges;
- correct label, logo, and packaging details;
- three to five scene ideas for your brand.
The better your input image, the better your output image. AI is helpful, not magic. If the source image looks like it was taken during an earthquake under a yellow kitchen bulb, the result will probably not scream “premium brand.”
Why The $20/Month Angle Makes Sense
The “$20/month tool” idea is not about one specific platform. It reflects the current entry-level pricing pattern across many AI image and product photography tools. Some tools offer free trials or limited free generations, while paid starter plans often begin around $10 to $30 per month, depending on credits, exports, commercial rights, background features, and batch generation.
Traditional product photography can still be worth it, especially for premium campaigns. But for a small store that needs fresh product scenes every week, a low-cost AI plan can reduce the need for repeated mini-shoots.
Here is the practical difference.
| Option | Typical Use | Best Fit |
|---|---|---|
| Traditional Studio Shoot | Exact product realism, luxury campaigns, models, complex lighting | High-value launches and brand-defining visuals |
| AI Product Photography Tool | Backgrounds, lifestyle scenes, ad creatives, social visuals | Small brands needing regular content |
| Hybrid Workflow | Real product photo plus AI-generated environments | Most e-commerce sellers balancing accuracy and speed |
The strongest workflow is usually hybrid. Take one accurate product photo, then use AI to create multiple scenes around it.
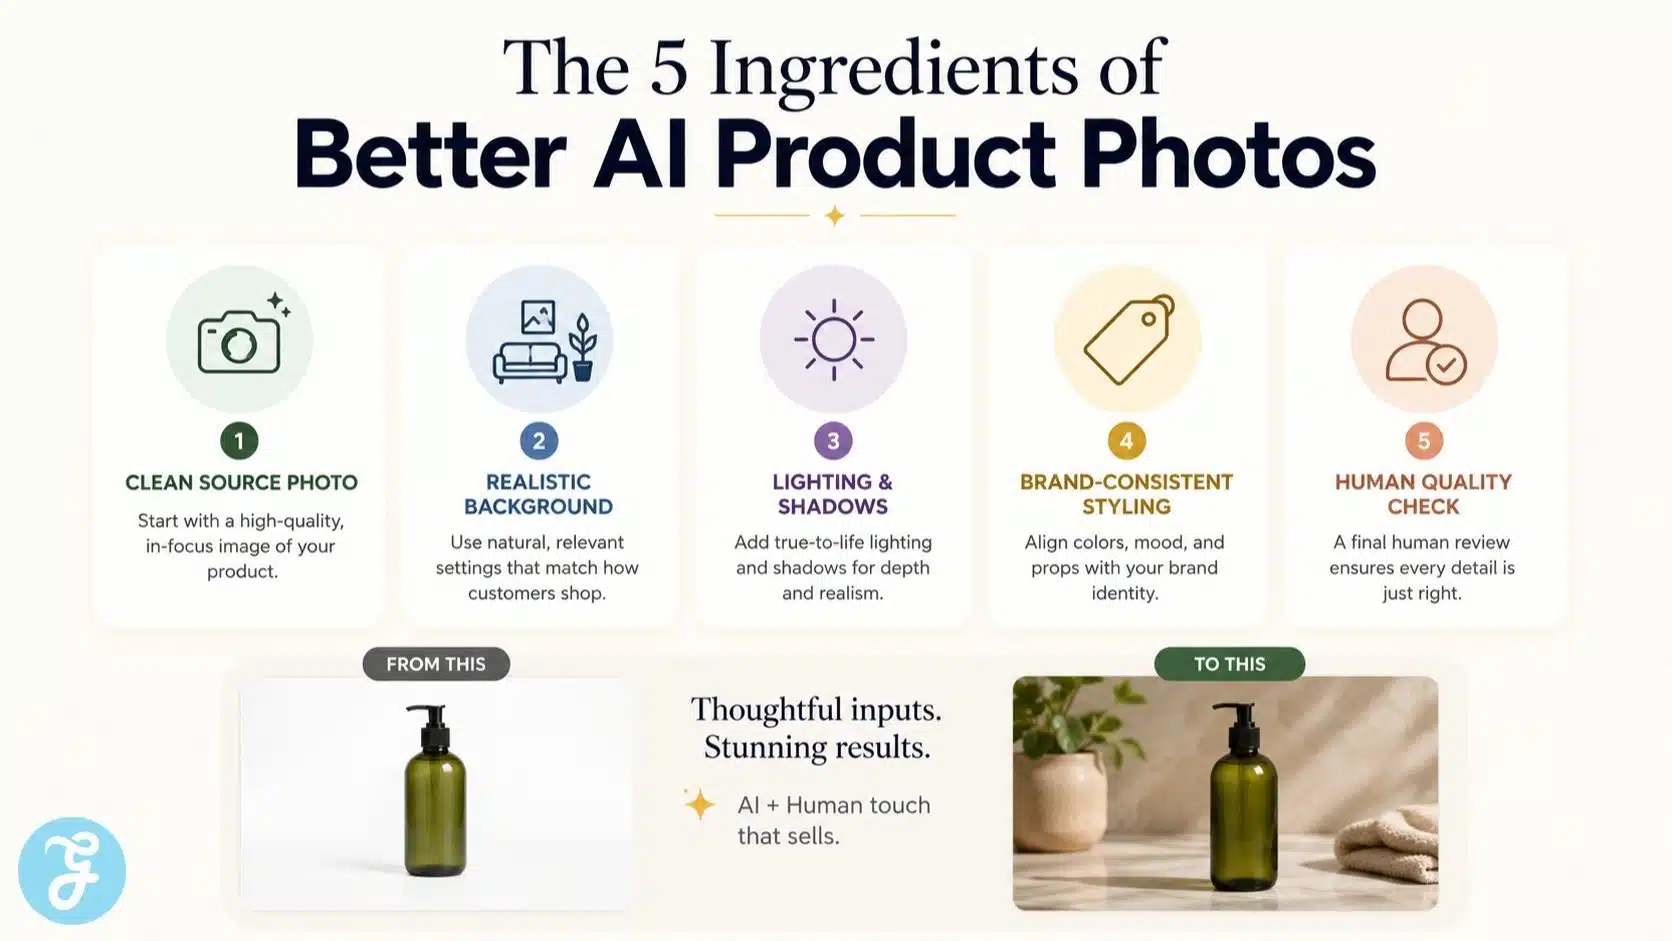
Step 1: Capture A Clean Source Photo
Start with one accurate product photo. This is your source of truth. The AI tool will use this image to understand the product shape, label, packaging, color, and edges.
For best results:
- use a plain background;
- keep the full product visible;
- avoid extreme angles;
- avoid blurry images;
- make sure labels are readable;
- reduce glare on glossy packaging;
- keep the product centered.
A smartphone can work if the lighting is clean. A cheap lightbox or a simple white poster board setup can also help. The goal is not artistic brilliance. The goal is a clean product image that the AI can understand.
Step 2: Remove Or Replace The Background
Most AI product photography tools can remove backgrounds automatically. This is where the studio replacement begins. Instead of setting up physical backdrops, surfaces, props, and lights, you can test different product scenes digitally.
Start with simple backgrounds:
- white ecommerce background;
- marble bathroom counter;
- kitchen countertop;
- wooden table;
- office desk;
- gym bag scene;
- outdoor picnic setup;
- coffee shop counter;
- seasonal gift setting;
- clean studio pedestal.
Do not start with overly complex prompts. Simple scenes usually look more realistic than crowded ones.
Step 3: Write A Clear Scene Prompt
Your prompt should describe the surface, environment, lighting, mood, and props. Do not overload it with too many instructions.
A simple prompt could be:
Place the product on a clean marble bathroom counter with soft natural morning light, minimal skincare props, realistic shadows, and a premium ecommerce look.
A good prompt usually includes these elements.
| Prompt Element | Example |
|---|---|
| Surface | Marble counter, wooden table, white platform |
| Environment | Bathroom, kitchen, gym bag, office desk |
| Lighting | Soft natural light, studio light, warm daylight |
| Mood | Premium, clean, organic, minimalist |
| Props | Towel, leaves, glass, fruit, notebook |
| Output Style | Realistic ecommerce product photo |
The prompt should tell the tool what a photographer would stage. Keep it controlled, realistic, and brand-appropriate.
Step 4: Generate Multiple Versions
Do not expect the first output to be perfect. Generate several versions for each concept, then choose the strongest.
Look for:
- realistic shadows;
- correct product shape;
- readable logo;
- natural placement;
- clean background;
- believable scale;
- no strange props touching the product;
- no distorted packaging;
- no fake claims on labels.
This is where AI saves time. A studio shoot requires rearranging physical props and lighting. AI lets you test visual directions quickly, then refine the best ones.
Step 5: Create A Basic E-commerce Image Set
For product listings, clarity matters more than creativity. Your customer needs to understand what they are buying before they admire the styling.
Create a simple image set:
- Main product image on a clean background
- Lifestyle image showing the product in context
- Close-up image showing texture or packaging
- Benefit-led scene
- Seasonal or campaign version
- Social media version
For marketplace platforms, check image rules before publishing. Some platforms require clean backgrounds, no extra props, or strict product accuracy. AI lifestyle images are usually safer for Shopify, ads, emails, landing pages, and social media.
Step 6: Check Product Accuracy Before Publishing
This is the most important part. AI can create images that look beautiful but are quietly wrong.
Check:
- label spelling;
- logo shape;
- product color;
- packaging size;
- cap, lid, or bottle shape;
- ingredient claims;
- certification marks;
- shadows and reflections;
- product scale;
- background realism.
For food, supplements, beauty, medical, electronics, baby products, and regulated categories, be extra careful. Never allow AI to invent benefits, safety claims, certifications, ingredients, or packaging details.
Step 7: Use AI Photos For Ads And Social Media
AI product photography is strongest when you need fresh creative variations. You can create seasonal, promotional, and lifestyle visuals without reshooting the product every time.
Use AI images for:
- Facebook ads;
- Instagram posts;
- Pinterest pins;
- Shopify banners;
- email headers;
- product launch teasers;
- holiday campaigns;
- blog images;
- landing page sections.
This is where the affordable monthly workflow becomes powerful. You can test different scenes and messages without booking a new shoot for every campaign.
Step 8: Keep One Real Product Photo As Your Source Of Truth
Even if AI becomes part of your main image workflow, keep one accurate real product photo for reference. That image should show the product exactly as it is.
Use the real image for:
- product accuracy;
- marketplace compliance;
- packaging reference;
- customer trust;
- future AI generations;
- comparison against AI outputs.
Think of AI as the scene builder, not the product truth machine.
What AI Product Photography Can Replace
AI can replace many basic studio tasks for small ecommerce brands.
| Studio Task | AI Replacement Potential |
|---|---|
| Basic white background images | High |
| Lifestyle product scenes | High |
| Social media visuals | High |
| Seasonal campaign images | High |
| Product ad creatives | High |
| E-commerce banners | High |
| Complex luxury shoots | Medium |
| Human model shoots | Medium To Low |
| Regulated product photography | Low |
| High-end hero campaign shoots | Low |
AI is strongest when the product itself is simple and the scene is flexible. It is weaker when exact realism, human interaction, or legal accuracy matters.
Common Mistakes To Avoid
AI product photography can go wrong quickly if every output is treated as publish-ready.
Avoid these mistakes:
- using blurry source images;
- generating scenes that do not match the brand;
- ignoring distorted labels;
- using fake product claims;
- creating unrealistic product scale;
- overloading prompts with too many props;
- publishing without human review;
- replacing all real photos with AI visuals;
- using the same background style for every product.
The best AI product photos look clean, realistic, and believable. The worst ones look like a perfume bottle got lost inside a fantasy furniture catalog.
A Simple Monthly Workflow For Small Brands
Here is a practical workflow for a small e-commerce brand using a low-cost AI product photography plan.
| Day | Task |
|---|---|
| Day 1 | Shoot or collect clean product photos |
| Day 2 | Upload products and remove backgrounds |
| Day 3 | Generate clean e-commerce images |
| Day 4 | Generate lifestyle scenes |
| Day 5 | Review accuracy and edit the best outputs |
| Day 6 | Resize for website, ads, and social media |
| Day 7 | Publish and test performance |
Repeat this every month for new products, seasonal campaigns, and ad testing.
When You Should Still Hire A Photographer
Do not fire the photographer just because an AI tool made a nice candle photo.
Hire a photographer when you need:
- exact product realism;
- human models;
- food styling;
- luxury campaign work;
- complex reflections;
- large catalog consistency;
- regulated product visuals;
- print-quality images;
- hero images for major launches;
- brand-defining creative direction.
AI is a cost saver, not a full creative department.
The Practical Verdict
AI product photography is no longer a gimmick. For small ecommerce brands, many affordable tools now sit in a starter-plan range that can replace basic studio-style visuals for lifestyle scenes, social posts, ad creatives, and product page variations. The pricing varies by platform, credits, commercial usage, and image volume, but the low monthly cost is what makes this workflow practical for smaller sellers.
But the real winner is not the person who generates the most images. It is the person who uses AI with taste, accuracy, and restraint. The product must still look real. The brand must still feel consistent. The customer must not feel tricked.
That is the honest tutorial answer: AI Product Photography can replace the beginner studio workflow, but it should not replace human judgment.