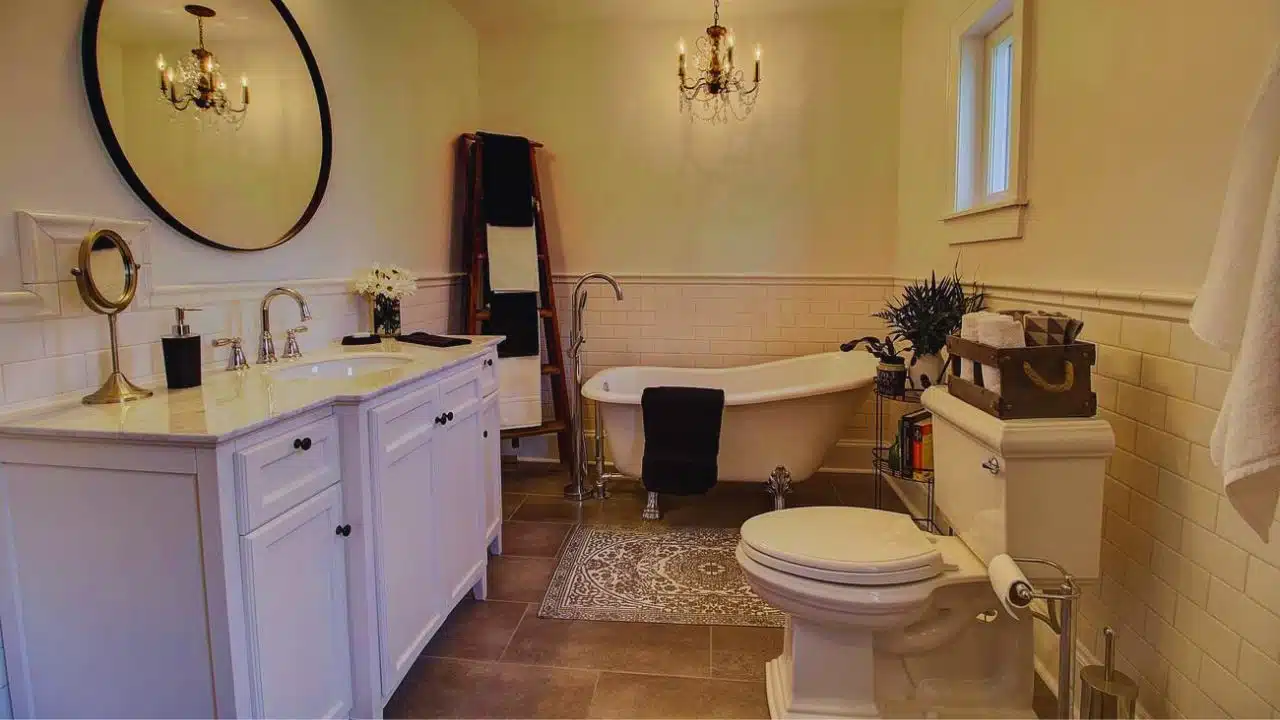
Bathroom remodeling can be daunting and costly, but you can transform your bathroom on a budget with the right DIY approach.
Whether you’re looking to refresh outdated fixtures, update your bathroom’s style, or enhance functionality, here are some creative ideas to help you achieve a stylish bathroom makeover without breaking the bank.
DIY Bathroom Remodel Ideas
Here are practical and budget-friendly DIY ideas to revamp your bathroom:
1. Refresh Cabinets With Paint and New Hardware
Refresh your bathroom cabinets by applying a fresh coat of paint that complements your decor scheme. Choose a durable paint suitable for humid environments. Remove old hardware and replace it with new knobs or handles to update the look instantly.
Consider contrasting or matching the hardware with other bathroom fixtures for a cohesive style. Ensure cabinets are thoroughly cleaned and sanded before painting to achieve a smooth finish. Use painter’s tape to protect walls and surrounding surfaces from paint splatter.
Allow ample drying time between coats as per the paint manufacturer’s instructions. Reattach doors and drawers once thoroughly dried and cured to avoid damage. This simple and affordable DIY project can give your bathroom a stylish makeover without needing expensive replacements.
2. Make Your Bathroom Vanity
Transform your bathroom with a custom DIY vanity that adds functionality and style. Repurpose an old dresser or cabinet to create a unique centerpiece tailored to your bathroom’s dimensions and design aesthetic.
Ensure it accommodates your sink and plumbing fixtures by carefully cutting and sealing openings. Customize the look with a fresh paint or stain that complements your bathroom decor. Enhance the durability of the surface with a waterproof sealant to withstand moisture and daily use.
Add personal touches such as decorative hardware or drawer organizers to maximize storage and organization. This budget-friendly project allows you to achieve a custom-built vanity without the high cost of purchasing new furniture, creating a focal point that reflects your style and enhances your bathroom’s overall appeal.
3. Paint Your Counter to Look Like Marble
Transforming your bathroom counter to mimic marble is an affordable way to achieve a luxurious look. Begin by thoroughly cleaning and sanding the surface to ensure smoothness. Apply a primer suitable for laminate or wood surfaces, allowing it to dry completely.
Next, use a sponge or brush to apply a base coat in a color that resembles marble veins—once dry, lightly sponge on layers of different colored paints to create realistic marble patterns.
Finish with a coat of clear epoxy resin to add depth and protect the painted surface. This DIY project offers a sophisticated upgrade without the high cost of natural marble, enhancing your bathroom’s aesthetic appeal.
4. Update Your Sink and Counter With Concrete
Updating your sink and countertop with concrete offers your bathroom a modern and industrial aesthetic. Concrete overlays are cost-effective and provide a durable surface.
This DIY project involves creating a custom mold to fit your sink and countertop dimensions and pouring and smoothing the concrete mixture. You can personalize the look with various finishes and sealants to protect against moisture and stains.
Concrete countertops are versatile, allowing you to integrate sinks seamlessly and customize shapes and designs. This upgrade adds a contemporary flair to your bathroom while offering a unique and stylish alternative to traditional materials.
5. Refresh Your Bathroom Walls
Refresh Your Bathroom Walls with a fresh coat of paint or stylish wallpaper to instantly update the look and feel of the space. Choose light, airy colors to create a sense of openness or bold patterns for a statement wall.
Consider adding texture with textured paint or wallpaper to enhance visual interest. Ensure the materials are moisture-resistant and easy to clean, ideal for the bathroom environment.
Coordinate your wall treatment with your bathroom’s overall theme and color scheme for a cohesive design. Don’t forget to repair any imperfections in the walls before applying new finishes to achieve a smooth surface.
Experiment with different tlike stenciling or color blocking for a custom look that reflects your style. Finish off the transformation with complementing accessories and lighting to complete the refreshed ambiance of your bathroom.
6. Update Your Light Fixtures
Updating your light fixtures is a quick and effective way to enhance your bathroom’s ambiance and functionality. Choose modern, energy-efficient options that complement your bathroom’s style and provide adequate illumination.
Swap out outdated fixtures with sleek designs in finishes like brushed nickel or matte black for a contemporary look. Consider fixtures with adjustable brightness or dimmable features to create the perfect atmosphere.
Install vanity lights above mirrors for even, shadow-free lighting ideal for grooming tasks. Incorporate LED bulbs for long-lasting, eco-friendly lighting solutions that reduce energy costs. Ensure fixtures are moisture-resistant and suitable for bathroom environments to maintain durability.
Upgrade sconces or overhead lights to improve overall brightness and visibility in the space. Seek professional advice if wiring modifications are needed to install new fixtures safely. Enjoy the transformative impact of updated lighting that enhances your bathroom’s aesthetic appeal and functionality.
7. Replace Old Faucets and Shower Heads
Updating your bathroom’s faucets and shower heads is a straightforward yet impactful DIY project. You can instantly enhance your bathroom’s aesthetic appeal and functionality by replacing outdated fixtures with modern, water-efficient models.
Choose fixtures that complement your bathroom’s style and install them following manufacturer instructions for a seamless upgrade. Upgraded faucets can improve water flow and temperature control, while new shower heads offer better water pressure and spray options for a more enjoyable shower experience.
This project doesn’t require extensive plumbing knowledge and can usually be completed in a few hours, making it a cost-effective way to refresh your bathroom without significant renovations.
8. Install New Bathroom Flooring or Update Your Existing Tiles
Updating your bathroom flooring is a transformative step in any remodel. Whether opting for new flooring materials like luxury vinyl or refreshing existing tiles with cost-effective solutions like tile stickers, this update can redefine your bathroom’s aesthetic.
Choosing durable, water-resistant materials ensures longevity and ease of maintenance, which is crucial for high-traffic areas like bathrooms. DIY-friendly options allow for efficient installation, minimizing disruption and costs associated with professional labor.
Consider the color and texture of your new flooring to complement existing decor and enhance the overall ambiance. Updating flooring can improveprovideproviding better, tracminimizeinimizing slip hazards.
Whether opting for a modern look with sleek tiles or a cozy feel with warm vinyl, your choice of flooring sets the tone for the entire space. Upgrading flooring is a practical investment that enhances functionality and visual appeal, making it a critical decision in any bathroom remodel.
9. Hide An Outdated Shower with Full-Length Curtains
To conceal an outdated shower, consider installing full-length curtains. This simple DIY solution not only adds privacy but also refreshes the look of your bathroom instantly. Choose curtains that complement your bathroom’s decor and color scheme for a cohesive aesthetic.
Opt for water-resistant materials to ensure durability and easy maintenance. Full-length curtains can effectively hide worn-out or less-than-ideal shower tiles without the expense of a complete renovation. This budget-friendly approach lets you personalize your bathroom’s style while covering up imperfections.
Ensure proper installation with a sturdy curtain rod and hooks designed to withstand moisture. Experiment with patterns or textures to add visual interest and depth to your bathroom space.
Curtains provide flexibility in adjusting light and maintaining privacy, enhancing the functionality of your shower area. This quick and practical update can transform your bathroom into a more stylish and inviting space.
10. Paint Your Walk-In Shower Doors
Transform the look of dated shower doors effortlessly by painting them with a fresh coat. Choose modern colors and finishes that complement your bathroom’s decor, instantly giving it a contemporary feel.
This DIY project is budget-friendly and requires minimal materials. Ensure that paint suits bathroom surfaces to withstand moisture and frequent use.
It’s a quick and effective way to update your bathroom without replacing the entire shower enclosure. Enjoy the satisfaction of a renewed space with improved aesthetics and without the hassle of extensive renovations.
11. Paint Your Shower Tiles
Painting shower tiles is a cost-effective way to refresh your bathroom without replacing tiles. Begin by thoroughly cleaning and priming the tiles to ensure paint adhesion. Choose a high-quality epoxy or tile-specific paint designed for moisture-prone areas.
Apply multiple thin coats for even coverage, allowing each layer to dry completely. Consider using a stencil or painter’s tape to create patterns or borders for a customized look.
Finish with a clear topcoat to protect the paint from water and daily wear. This DIY project can transform outdated tiles into a fresh, modern focal point in your bathroom.
12. Tile Over Existing Tile
Tile over existing tiles is a practical and cost-effective solution for updating your bathroom without the hassle of removing old tiles. This DIY-friendly method involves preparing the existing tile surface by cleaning it thoroughly and ensuring it’s free from any loose grout or debris.
Next, apply a bonding agent or primer to help the new tile adhere securely. Choose new tiles suitable for installation over existing tiles, such as thin porcelain or ceramic tiles. Carefully lay and level the new tiles, ensuring they align correctly with existing grout lines for a seamless finish.
Finally, grout the tiles once they’re set and clean off any excess grout for a polished look. This approach saves time and money and reduces waste by repurposing existing materials effectively.
13. Focus on Changes that Don’t Require Demolition
Focus on changes that don’t require demolition can significantly transform your bathroom without the mess and cost of major renovations. Start by updating fixtures like faucets, shower heads, and lighting for a fresh look.
Consider painting cabinets or walls to modernize the space quickly. Enhance the ambiance with new accessories such as shelving, mirrors, or art pieces. Refinishing your bathtub and tiles can renew their appearance without replacing them.
Install tile stickers on floors or walls for an affordable makeover. Add personality with new linens, rugs, and decorative accents. Upgrade outdated shower doors with a coat of paint for a modern touch.
Opt for DIY-friendly projects like installing new toilets or vanity cabinets to improve functionality. These non-destructive changes can significantly impact your bathroom’s aesthetics and functionality while staying within budget.
14. Refinish Your Tub & Tub Surround Instead of Replacing Them
Refinishing your bathtub and tub surround offers a cost-effective alternative to replacement. This process involves cleaning, sanding, and applying a new coating to rejuvenate the appearance of your bathroom fixtures.
It can extend the lifespan of your tub and tiles while saving money compared to complete replacements. Choose from various finishes to match your bathroom’s aesthetic without the expense of new installations.
DIY kits are available for those comfortable with home improvement projects, making it a manageable task. Professional refinishing services ensure a durable, high-quality finish for long-term satisfaction.
Consider refinishing if your tub and surround are structurally sound but need a cosmetic update. It’s an eco-friendly option that minimizes waste and disrupts your bathroom routine.
15. Install Your Toilet
Installing a toilet can be a manageable DIY project with the right tools and preparation. Start by turning off the water supply and disconnecting the old toilet. Remove the old wax ring and any remaining bolts or caulking.
Place the new wax ring on the flange and position the new toilet over it, ensuring a secure fit. Secure the toilet to the floor with bolts, but avoid over-tightening.
Reconnect the water supply line and check for leaks by flushing the toilet. Finally, apply caulking around the base for a finished look and ensure stability.
Our 5 DIY Bathroom Remodel Projects
For real-life examples of successful DIY bathroom remodels, check out our detailed project showcases:
- Affordable Master Bathroom Remodel REVEAL
- Avery’s Budget-Friendly Bathroom Makeover REVEAL
- Attley’s Budget-Friendly Bathroom Makeover REVEAL
- The REVEAL of Our Colorful DIY Bathroom Remodel
- DIY Bathroom Remodel REVEAL
These projects demonstrate how creative DIY approaches can achieve impressive results while saving significant costs. Each remodel showcases unique solutions and design inspirations tailored to budget constraints and aesthetic preferences.
Final thoughts
Embarking on a DIY bathroom remodel can be both rewarding and cost-effective. By implementing these budget-friendly ideas and creative solutions, you can transform your bathroom into a stylish and functional space without exceeding your financial limits.
Whether you’re looking to refresh existing fixtures or undertake more extensive renovations, DIY projects offer flexibility, affordability, and the satisfaction of creating a personalized bathroom retreat.