Your Nintendo Switch is great, but it looks like everyone else’s. Want to make it stand out? You’re not alone. Many gamers love adding personal touches to their consoles.
Good news: there are plenty of cool ways to customize your Nintendo Switch. From vinyl skins to colorful Joy-Cons, you can make it yours. This guide covers simple tricks to give your handheld a fresh look.
Keep reading for easy ideas anyone can try.
Key Takeaways
- Vinyl skins cost around $10–$20, stick cleanly, and come in designs like Mario or Zelda. They protect against scratches and do not block vents.
- Snap-on covers start at $20, fit Switch Lite, and feature silicone grips for better hold during extended gaming.
- Mixing Joy-Cons (e.g., neon red + blue) costs $40–$80 per pair; limited editions like Animal Crossing editions are priced higher.
- Thumb grips enhance control for under $10, with rubber textures ensuring stability in fast-paced games like Splatoon 3.
Create a thriving online community by engaging members with interactive content and valuable discussions.
Define membership levels with exclusive benefits to retain dedicated followers while attracting new community members.
Use an intuitive platform design that provides smooth access and usability across various devices.
Regularly assess member input and data insights to enhance the overall community experience.
Encourage connections among members through virtual events, forums, or networking opportunities suited to their interests.
Apply Vinyl Skins or Decals
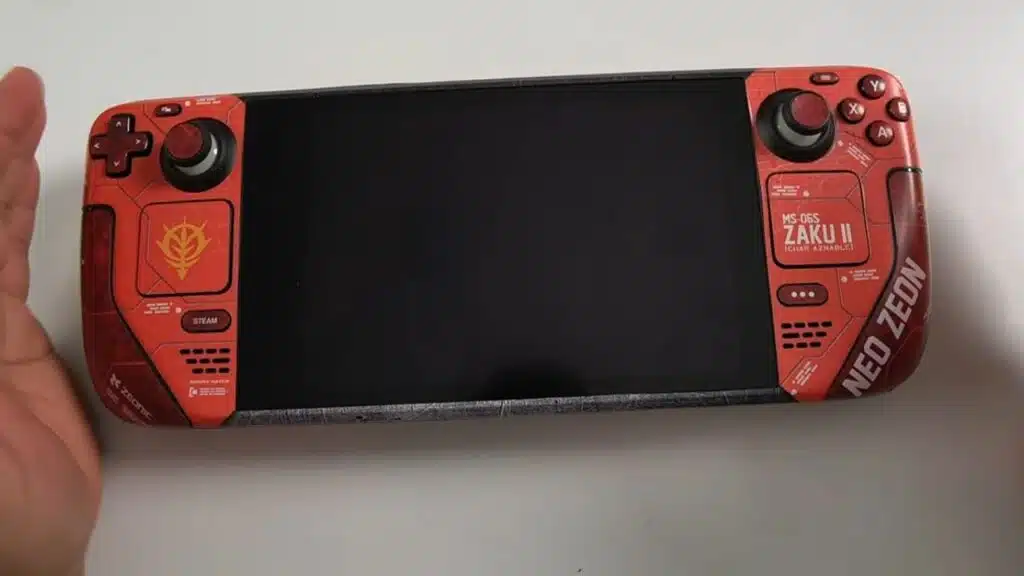
Changing your Nintendo Switch’s look is easy with vinyl skins or decals. These stickers add flair without permanent changes.
- Vinyl skins stick to the back and borders of your console, giving it a fresh style. Some peel off cleanly, leaving no sticky mess behind.
- Designs range from simple colors to game-themed art, letting you match your favorite titles. Pick one that suits your taste.
- Applying them takes patience. Smooth out air bubbles for a flawless finish, like putting on a giant sticker.
- For Nintendo Switch Lite owners, skins fit snugly over the smaller body. They protect against scratches while showing off personality.
- Avoid blocking vents or ports during application. Keep airflow smooth to prevent overheating during long gaming sessions.
- Homebrews and custom firmware communities often share skin ideas. Check forums for inspiration before buying.
- If you change your mind later, residue-free options let you swap designs hassle-free. No regrets, just new looks.
Use Snap-On Covers for Protection and Style
Snap-on covers give your Nintendo Switch a fresh look while keeping it safe. They’re affordable, stylish, and easy to install.
- Plastic snap-on covers cost around $20, offering solid protection without breaking the bank.
- Silicone covers stretch over your Switch, featuring fun designs like Mario or Zelda characters.
- These covers shield your console from scratches, drops, and everyday wear.
- Swapping them takes seconds, so you can change styles whenever you want.
- Some designs have textured grips, making your Switch easier to hold during long gaming sessions.
- They fit snugly over the console, keeping buttons and ports accessible.
- Bright colors and patterns let your personality shine through your console customization.
- Unlike permanent mods, snap-on covers let you revert to the original look anytime.
Add Thumb Grips for Enhanced Comfort
Thumb grips can level up your Nintendo Switch experience. These small accessories fit snugly over the joysticks, giving you better control and comfort. They cost about $10 and take seconds to install, making them an easy upgrade for any gamer.
The rubber or silicone material helps prevent slipping during intense gaming sessions. They’re great for long playtimes, reducing finger fatigue without adding bulk. Pick from fun colors or textures to match your style while keeping gameplay smooth and responsive.
Mix and Match Your Joy-Cons
Your Nintendo Switch Joy-Cons don’t have to match. Mixing colors lets you create a look that’s all your own.
- Start with the basics. Grab Joy-Cons in different colors like blue, red, yellow, or green for a bold contrast.
- Try special editions. Limited-run Joy-Cons, like the Animal Crossing or Splatoon designs, add rare flair.
- Use silicone covers. These slip over your Joy-Cons, offering extra grip and a quick way to switch up colors.
- Pair neon with pastel. A bright pink Joy-Con next to a mint green one gives off fun, playful vibes.
- Go monochrome. Mix shades of the same color, like gray with black, for a sleek, polished finish.
Replace Joy-Con Shells or Buttons
Switching up your Joy-Con shells or buttons gives your Nintendo Switch a fresh look. Just know that opening them up means saying goodbye to Nintendo’s warranty.
- Pick a shell or button set you like. They come in colors like neon, clear, or even metallic.
- Grab a small screwdriver and a tri-wing screwdriver. Joy-Cons need these to open without damage.
- Follow a step-by-step guide online. Videos help avoid mistakes when taking apart the Joy-Cons.
- Work on a clean table. Tiny parts can get lost if you’re not careful.
- Swap the shells or buttons slowly. Force can break plastic clips inside.
- Test buttons before closing everything. Make sure all parts click right.
- Screw the Joy-Con back together. Tighten just enough so nothing feels loose.
- Try the Joy-Con on your Switch. Check if buttons work in a game before celebrating.
This change is fun but needs patience. Messing up might mean buying new Joy-Cons, so take it slow.
Customize the User Interface with Themes and Icons
Personalize your Nintendo Switch home screen to make it truly yours, without breaking any rules. Explore these simple ways to refresh the look of your system in minutes.
- Change system themes. The Switch offers light and dark modes under System Settings, giving your screen a fresh vibe with a single tap.
- Get custom themes with My Nintendo Platinum Points. Redeem points for special designs that stand out from the default options.
- Create your own user icons. Use game screenshots or default artwork to craft unique profile pictures for each account.
- Adjust Joy-Con colors in the settings. Match your controller’s physical look by changing their digital display color.
- Download custom icon packs. Some games offer exclusive profile icons as rewards, adding variety to your menu.
- Arrange your home screen. Hold down a game tile to move it, keeping your favorites front and center.
- Use Quick Settings for easy adjustments. Hold the Home button to change brightness, volume, or theme without leaving your game.
Paint Your Nintendo Switch for a Unique Look
Painting your Nintendo Switch lets you stand out from the crowd. With the right tools and patience, you can create a one-of-a-kind design.
- Disassemble the Switch and joy-cons carefully before painting. This avoids damage to internal parts and ensures full coverage.
- Use Rust-Oleum flat white primer as a base. Apply two light coats with 10–15 minutes between each for even drying.
- Pick a bold color like Valspar “exotic sea” teal for the base coat. Three thin coats work better than one thick layer.
- Let each coat dry completely before adding the next. Rushing can cause drips or uneven texture.
- Seal the paint with a clear coat for protection. This keeps the color from chipping during gameplay.
- Add Turtle Wax for extra durability. It helps the finish last longer against scratches and daily wear.
- Reassemble the Switch only after everything is fully dry. Test buttons and sticks to make sure they work smoothly.
- Avoid painting over vents or ports. Blocking airflow can cause overheating, so use tape to cover these areas.
Attach Charms for a Personalized Touch
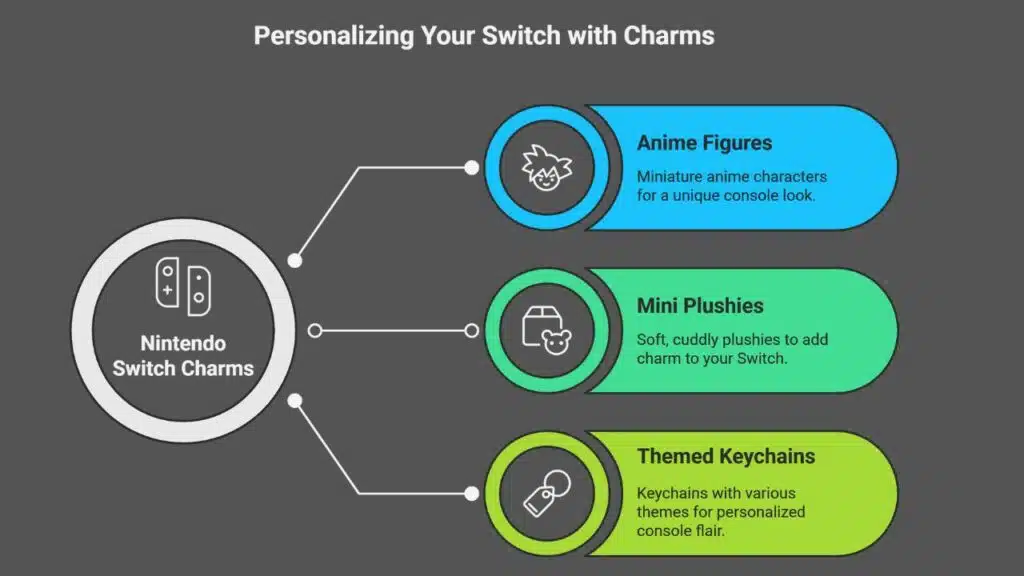
Give your Nintendo Switch a playful twist with cute or quirky charms. These tiny accessories hook onto the headphone jack, adding flair without getting in the way. Pick anime figures, mini plushies, or even themed keychains to match your vibe.
Charms are an easy update that won’t break the bank. Swap them out whenever you want a fresh look. Just slide one on, and boom—your console stands out in a snap. No tools needed, no risky mods involved—purely plug-and-play personality!
Consider Custom Pro Controller Designs
Your Nintendo Switch Pro Controller doesn’t have to be plain. Spice it up with custom designs that match your vibe. Swap out the buttons, change the shell, or pick a themed skin to make it pop.
Even better, tweak button settings for smoother gameplay.
Advanced users can try custom firmware like homebrew apps for extra options. Just be careful—voiding warranties is no joke. Whether you go bold or subtle, a personalized Pro Controller makes gaming feel fresh every time you play.
Stick to trusted mods and enjoy the upgrade!
Tips for Safe and Effective Customization
Customizing your Nintendo Switch should be fun, not risky. Start by using a magnetic screwdriver to keep track of tiny screws. Label each screw with tape to avoid mix-ups during reassembly.
Prep surfaces properly before painting. Lightly sand the shell with 400 grit paper. Wipe it down with a mix of rubbing alcohol and water. For extra smoothness, use 1,000–2,000 grit sandpaper on rough spots.
Protect ports and vents with tape before spraying paint. Always work outdoors and wear a respirator mask for safety.
Work slow and steady. Rushing might damage your console. Follow these steps for a clean, professional finish without headaches.
Takeaways
Your Nintendo Switch should feel like yours, so make it stand out. Try vinyl skins for bold designs, or snap-on covers for extra flair. Mix Joy-Con colors, add thumb grips, or even paint the shell.
With these tweaks, your console will turn heads and show off your style. Have fun making it one-of-a-kind!
FAQs
1. What are the easiest ways to personalize my Nintendo Switch?
You can start small, like swapping out the Joy-Con shells or adding decals. If you’re feeling bold, try a full skin wrap or custom dock. The options are endless, and you don’t need to be a pro to make it look fresh.
2. Can I change the look of my Joy-Cons without breaking them?
Yes! Replacement shells come in all colors and styles. Just follow a good guide, take your time, and you’ll have a Switch that stands out. Some kits even include the tools you need.
3. Are there custom themes for the Switch home screen?
Officially, no. But you can use special docks or LED mods to give your setup extra flair. Some third-party docks even add cool lighting effects.
4. Where can I find safe, high-quality skins for my Switch?
Stick to trusted brands like dbrand or DecalGirl. Cheap knockoffs might damage your console. A good skin fits like a glove and won’t leave sticky residue.