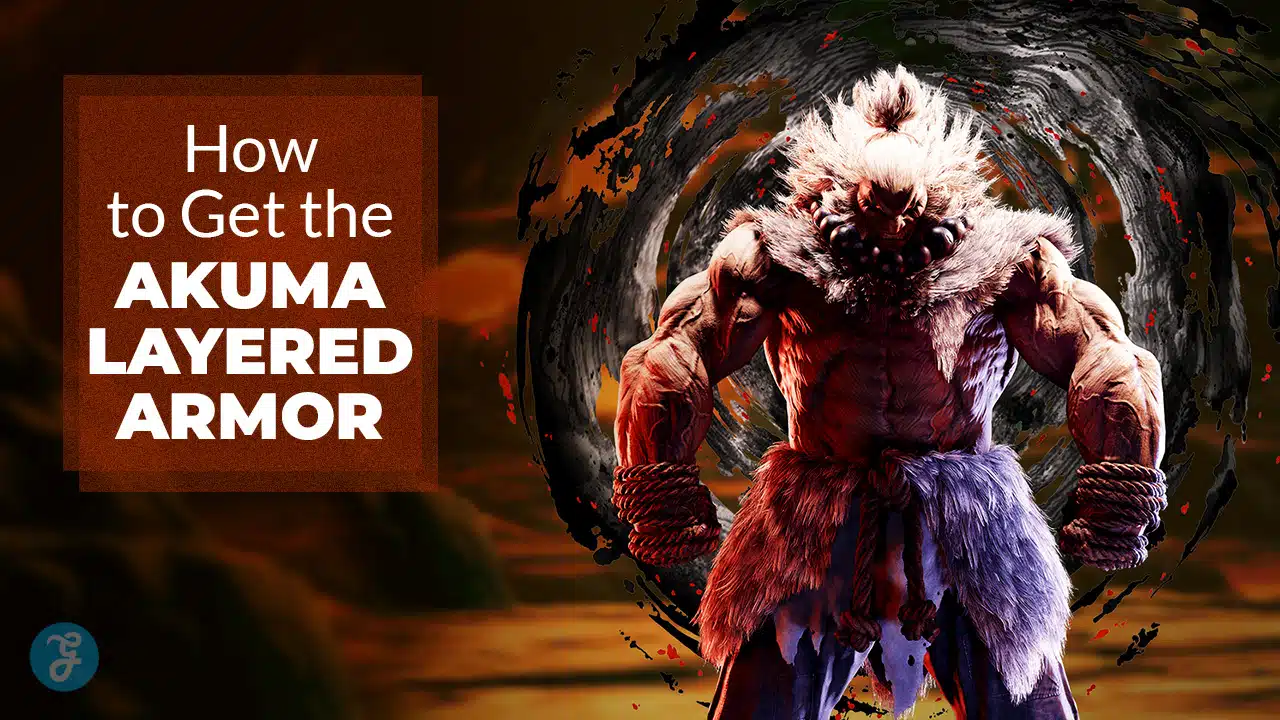
If you are hunting for Akuma Layered Armor Monster Hunter Wilds, you are in the right place. The Street Fighter 6 collaboration gives you Akuma’s full look as a layered armor set, plus an in-game questline that teaches you how his special actions work.
In this guide, I will walk you through the exact requirements, where to start the collab mission, every step you need to complete, and what to do if the quest does not show up. I will also explain how to equip the Akuma layered set once you unlock it, and how to farm the extra rewards tied to the collab arena quests.
What You Get From the SF6 Akuma Collab
The collaboration is not just a cosmetic drop. It is a mini quest chain with a featured arena hunt that lets you try Akuma’s special actions in a controlled fight.
When you finish the collab chain, you can unlock the Akuma look as layered armor and you can also earn SF6 materials you use for additional collab rewards. Depending on how far you go, you can also unlock extra cosmetics like a nameplate, background, and a pose tied to the collaboration.
The important thing is this. The Akuma layered set is tied to a specific Side Mission, so you cannot just buy it from a vendor or randomly forge it without doing the mission steps.
Akuma Layered Armor Monster Hunter Wilds Requirements
Before you start, make sure you meet the basic requirements that block most players.
You need to be Hunter Rank 21 or higher. If you are below that, the mission will not appear, even if you downloaded the update.
You also need to have the collaboration content installed and your game updated to the version that includes the SF6 collab. If your friend can see the quest and you cannot, your update state is usually the reason.
Finally, you need access to the Oilwell Basin region and its base camp. The first quest marker appears there, so if you cannot travel to the Oilwell Basin Base Camp, progress the story until you can.
Where to Start the Akuma Side Mission
The mission you are looking for is the collab Side Mission called Ultimate Strength. You start it by talking to Quinn at the Oilwell Basin Base Camp.
In most cases, Quinn shows up with a clear quest indicator on your map once your game is updated and you meet the Hunter Rank requirement. If you do not see Quinn, scroll down to the troubleshooting section later in this article.
When you speak to Quinn, you begin a short investigation chain in the Oilwell Basin. Do not skip the objective text. The game gives you direction, but it does not always spell out the exact area numbers clearly.
How to Complete Ultimate Strength Step by Step
Ultimate Strength is not a single “go hunt this monster” quest. It is a multi-step mission that makes you move through the Oilwell Basin and interact with points of interest.
Follow this order, and you will finish it quickly.
Step 1: Talk to Quinn in Oilwell Basin
Go to Oilwell Basin Base Camp and talk to Quinn.
This starts the mission and adds your next objectives to the map.
Step 2: Investigate the Upper Stratum Carcass
Your next task is to investigate the upper stratum.
Go to Area 5 in the Oilwell Basin and look for a Tempered Rathian carcass. When you reach the right spot, interact with it to advance the mission.
If you are in the right area but cannot see it, open your detailed map and check for the mission marker. It can be slightly off your default route.
Step 3: Investigate the Lower Stratum Carcass
After the upper stratum, you need to investigate the lower stratum.
Go to Area 11 in the Oilwell Basin and find the Tempered Gypceros carcass. Interact with it to complete the second investigation step.
At this point, the mission starts shifting toward Azuz and the underground areas of the Basin.
Step 4: Optional Talks in Azuz
The mission may offer an optional objective to speak with people in Azuz.
You can do it if you want extra context, but you typically do not need it to complete the main unlock path. If you are trying to speedrun the unlock, focus on the required steps.
Step 5: Talk to Maki in Azuz
Once you have investigated both carcasses, go to Azuz and talk to Maki.
Maki should be marked on the map when this step is active. If you cannot find Maki, use your quest list to confirm you are on the correct mission step.
Step 6: Find Akuma in the Subterranean Area
This is the step that confuses most players.
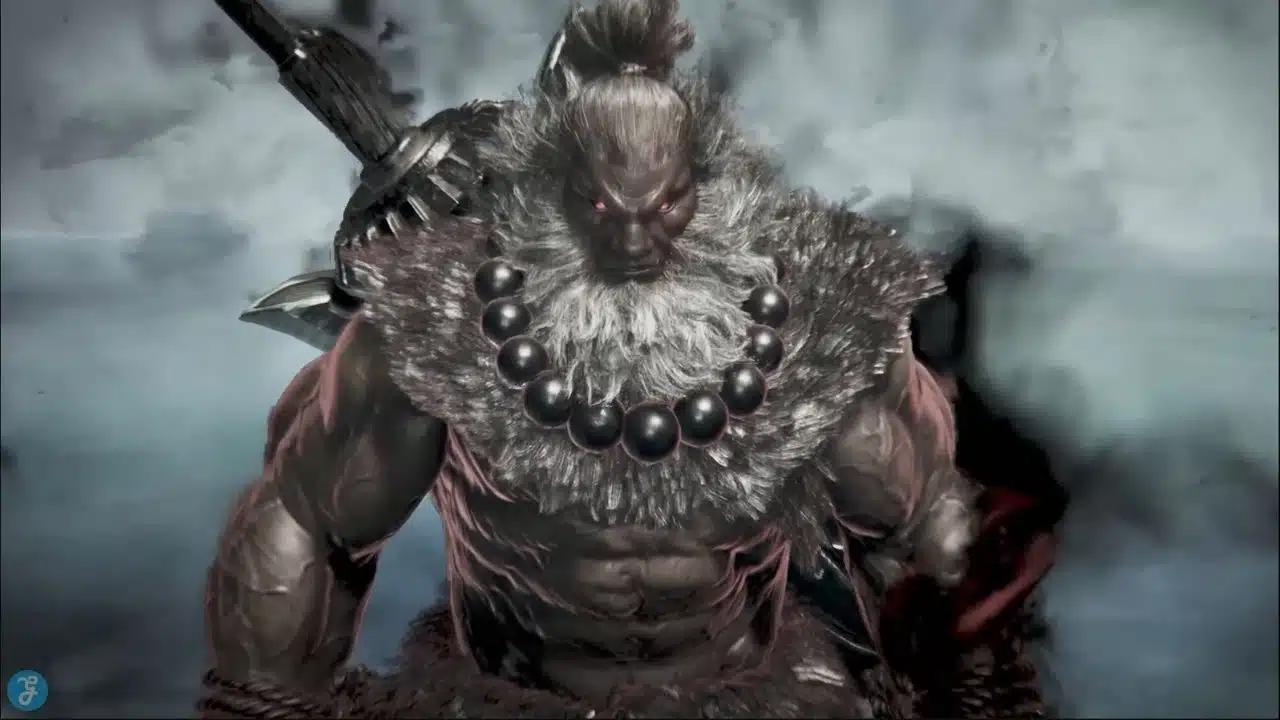
You are asked to search the lowest part of the subterranean area and find Akuma. A reliable location is the fork between Area 18 and Area 14 in the Oilwell Basin.
Look for a small passage off the fork. Akuma will be there, and interacting with him advances the mission into the arena portion.
Step 7: Accept the Arena Quest in the Grand Hub
After you speak to Akuma, you get an arena quest tied to the collab.
Go to the Grand Hub and accept the arena quest from the Arena Quest counter. This fight functions as a tutorial for Akuma’s collab actions.
On your first clear for the Side Mission, the arena segment is often solo only. After you clear it once, you can usually repeat it with a limited number of players, depending on the specific arena quest rules.
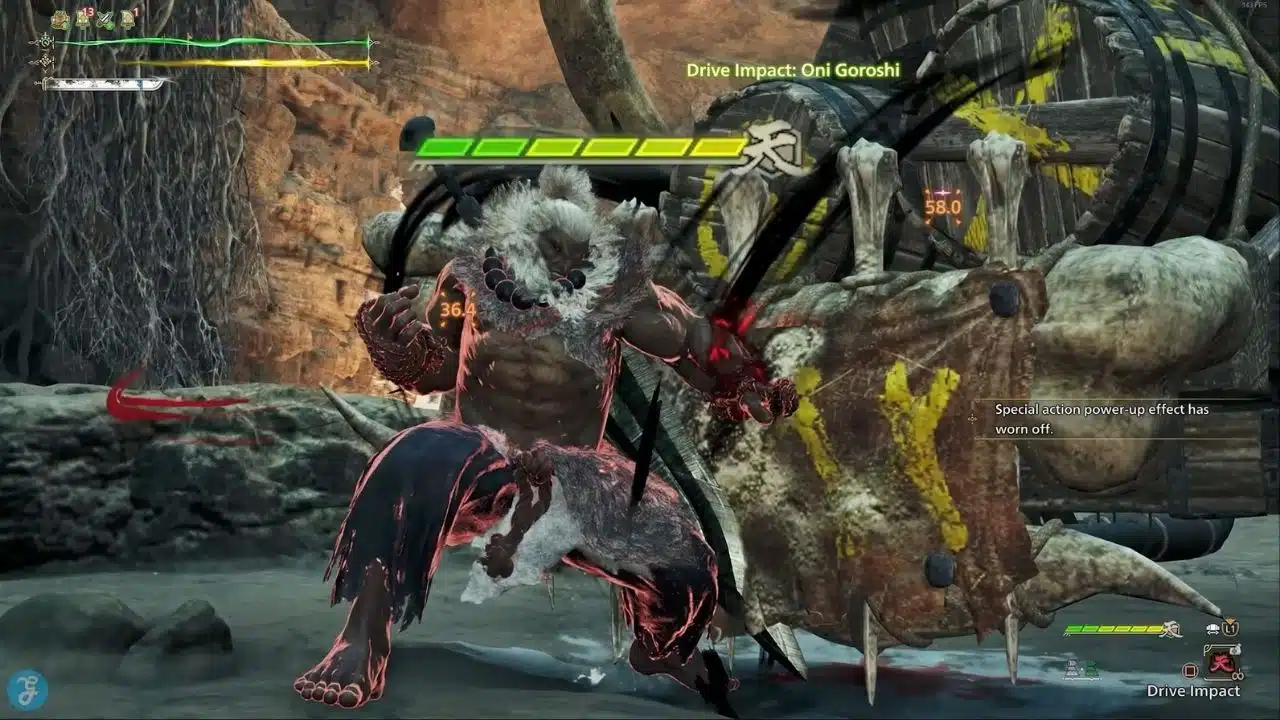
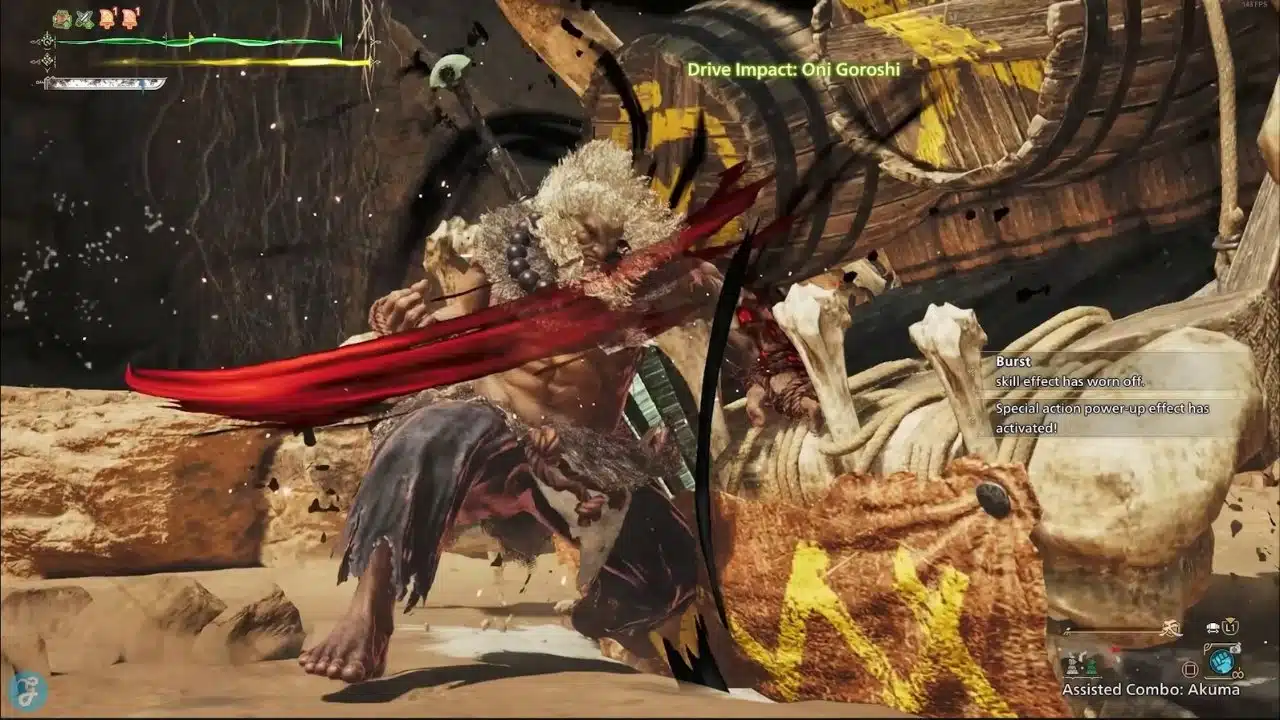
Step 8: Clear the Arena Fight
You will fight a Tempered Ajarakan in the arena.
The game typically puts you into a preset loadout designed for the collab, so do not worry if your personal build is not being used. Pay attention to the on-screen prompts because the arena is meant to teach you what the Akuma actions do and how the resource gauge works.
Step 9: Return and Talk to Akuma
After you clear the arena quest, return and talk to Akuma in the Oilwell Basin.
This is where your rewards finalize. This is also the step that commonly unlocks the Akuma look rewards and grants at least one SF6 material ticket you can use for crafting related collab gear.
How the Akuma Layered Armor Unlock Actually Works
The Akuma layered armor is tied to completing the collab Side Mission chain. In simple terms, you unlock it by finishing Ultimate Strength and completing the required arena section.
Some players get confused because they expect the layered armor to appear instantly in their layered list with no crafting. Others expect to forge it like normal armor. In practice, you should check both places after completion.
First, check your layered armor list. If the Akuma layered set appears, you can equip it immediately.
Second, check the Smithy for any collaboration forge options that may be labeled under special or event categories. The collab also uses SF6 tickets for additional rewards, so you may need to forge certain pieces if the game treats them as craftable cosmetics.
If you completed the mission but cannot equip the layered look, it usually means you have not unlocked the layered armor system on your save yet, or you are trying to equip it from the wrong menu.
How to Equip Akuma Layered Armor Monster Hunter Wilds
Once you unlock the set, equipping it is simple, but you need to do it from the layered equipment menu, not your normal armor slots.
Go to your equipment appearance settings and select the layered armor option. Choose the Akuma layered armor set and confirm.
If you do not see the layered menu at all, you need to unlock layered armor functionality first. In Wilds, layered armor is tied to High Rank progression and becomes available after you reach the point where the game lets you craft High Rank gear and manage layered looks.
Since the Akuma mission requires HR 21, most players are already in the right progression band. Still, it is worth checking if your layered menu is unlocked before you panic.
Best Tips for the Akuma Arena Quest
The arena fight is where most people fail their first attempt, not because it is impossible, but because they play it like a standard hunt.
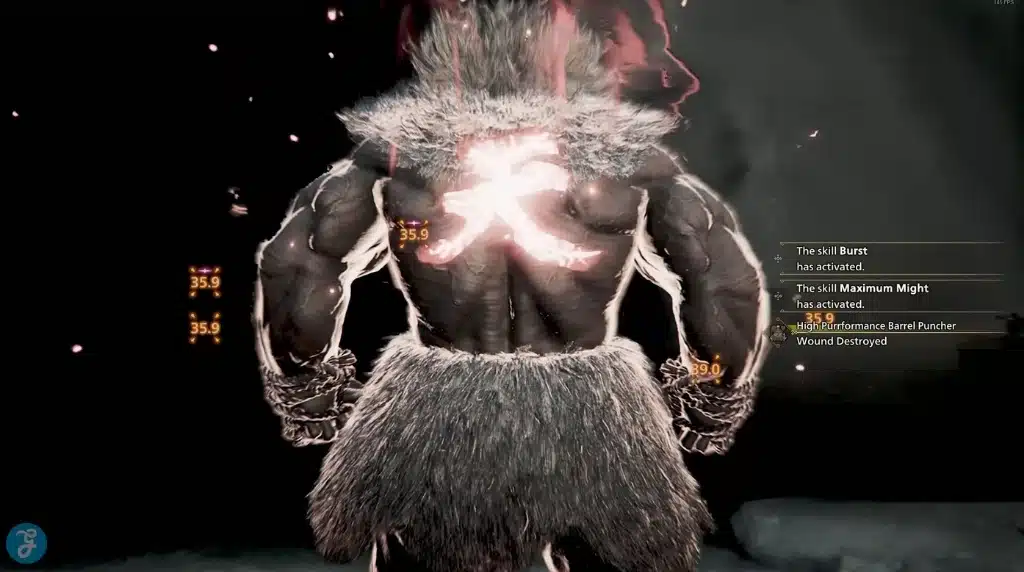
Use the collab actions. The mission is built around them, and the game rewards you for leaning into the Akuma kit instead of playing slow and safe.
Watch for wounds and punish them. Wilds is built around targeting weak points, and the collab arena is designed to showcase that loop.
If the arena gives you a practice object in the staging area, use it. The small practice window can save you a failed run because you will understand the input timing before the monster starts pressuring you.
How to Get More SF6 Tickets for Extra Rewards
After you clear Ultimate Strength, you can usually farm more SF6 tickets through the collaboration arena quests. These quests often appear as repeatable arena missions tied to the collab.
The common pattern is simple. Clear the collab arena quests to earn SF6 tickets, then use those tickets to forge additional collaboration rewards at the Smithy.
This is also where you should manage expectations. The layered armor unlock is your primary goal, but the tickets are how you collect the extras. If you want everything, you will run the arena more than once.
At this point, Akuma Layered Armor Monster Hunter Wilds becomes part of a broader grind loop. You already got the look, and now you are farming tickets to finish the set of collab unlocks.
What to Do If Ultimate Strength Does Not Show Up
If you cannot find the quest, check these in order.
- First, confirm your Hunter Rank is 21 or higher. If you are HR 20, the quest will not appear.
- Second, confirm your game is updated to the version that added the SF6 collaboration. If you play on multiple platforms, confirm all of them are patched.
- Third, confirm you are online and your game is loading event and collaboration content correctly. Some games limit visibility of collaboration content when you boot in offline mode.
- Fourth, travel to the Oilwell Basin Base Camp and look for Quinn’s marker on the map. If you are standing in the camp and still do not see Quinn, back out to the title screen and reload your save after confirming your patch state.
- Fifth, confirm you have reached the story point where Oilwell Basin is available. If you cannot travel there yet, you are not far enough into the main progression.
What to Do If You Cannot Find Akuma Underground
This is the second biggest blocker after the quest not showing up.
Make sure you are on the correct mission step. If the quest tracker is still telling you to investigate carcasses, Akuma will not be your next objective yet.
If you are on the “search the lowest part of the subterranean” step, go to the fork between Area 18 and Area 14 and look for the small passage. Akuma is easy to miss if you rush past the fork.
Use your map and zoom in. If your marker is slightly above or below your current level, you may need to use a different path to reach the correct elevation.
Can You Get This After the Event Ends
Many players worry about missing collab content.
This collaboration content is not treated like a short weekend event. It is designed as a collaboration mission chain that remains available, so you can do it later as long as you meet the requirements and have the content installed.
That means you can still go after Akuma layered armor even if you took a break from the game. You do not need to rush it in one week.
How to Play This With Friends
Your first completion of the side mission arena segment is often restricted. After you clear it once, you can generally repeat the arena quests with limited co-op rules.
If your goal is the layered armor unlock, do not wait on friends if the game locks the first clear to solo. Clear it once, unlock your rewards, then bring friends for ticket farming runs afterward.
If you want a smooth farming loop, one player hosts and posts the arena quest repeatedly, and everyone runs the same target until you have the tickets you need.
Common Mistakes That Waste Time
Do not farm tickets before you finish the Side Mission chain. The unlock is tied to completion steps, so you can waste runs if you are not on the right progression state.
Do not ignore the return step after the arena quest. Many players clear the arena and assume the reward is automatic, but the mission can still require you to talk to Akuma or another NPC to finalize it.
Do not assume the layered armor equips automatically. You still need to open the layered menu and apply it like any other appearance set.
Akuma Layered Armor Monster Hunter Wilds Wrap Up
Akuma Layered Armor Monster Hunter Wilds is unlocked by completing the SF6 collab Side Mission chain, starting with Quinn at the Oilwell Basin Base Camp and finishing the arena segment tied to Akuma. Once you clear the mission, check your layered armor menu and your Smithy collaboration crafting options, then equip the set from your layered appearance settings.
If you want the extra collab rewards, repeat the collab arena quests to farm SF6 tickets and forge the remaining items. If the quest does not appear, your fix is almost always Hunter Rank, update version, or story access to Oilwell Basin.