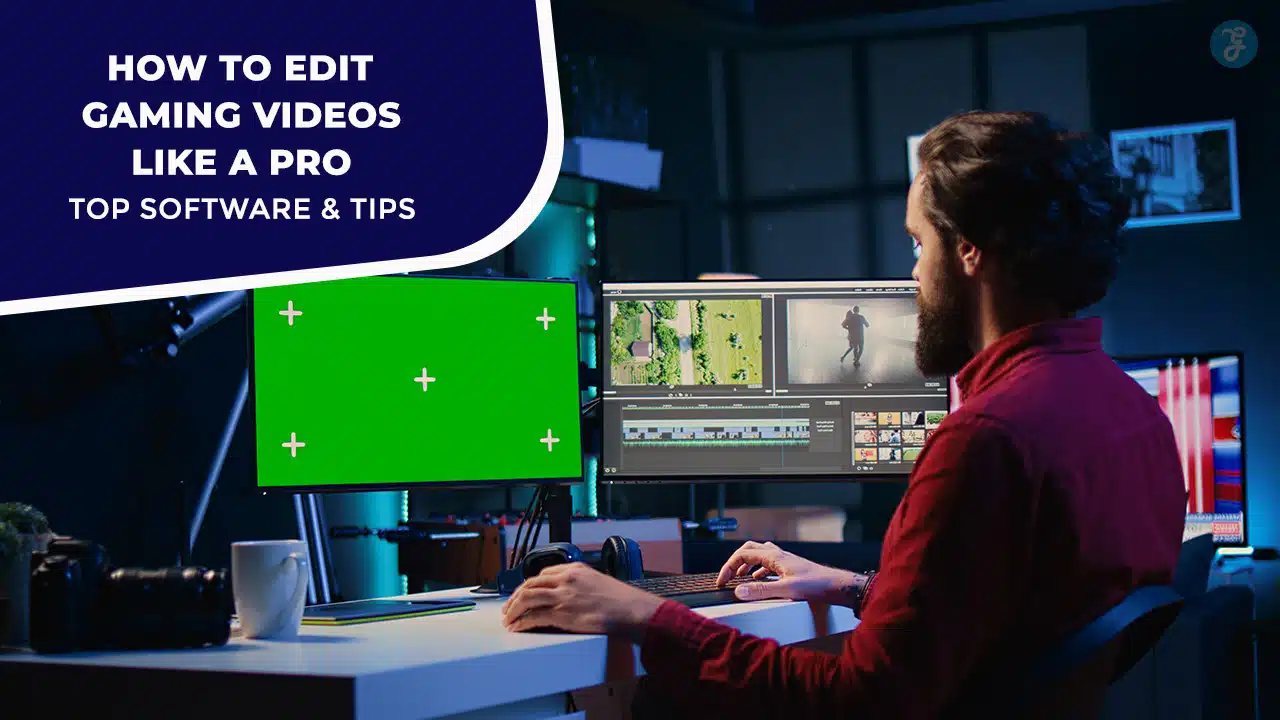
Choose a free editor or paid suite, set timeline markers to tag your best clips, and read on to find the one that fits you.
Top Free and Paid Software Options
You need solid picks for free and paid editing kits.
| Software | Cost | Platform | Key Features |
|---|---|---|---|
| VSDC Editor | Free | Windows | Lightweight, screen and webcam capture, runs on low-spec PCs |
| Apple video tool | Free | macOS, iOS | Device sync, seamless timeline edits |
| Linux editing suite | Free | Linux | Open-source, fast rendering, strong community support |
| Adobe Premiere Pro | $20.99/mo | Windows, Mac | Multi-cam editing, advanced effects, robust export options |
| CyberLink PowerDirector | $99.99/yr | Windows | 360° VR tools, motion tracking, step-by-step tutorials |
Prepare Your Gameplay Footage
Fire up your capture device, set your frame rate to 60 FPS, and record every clutch moment. Then jump into your video editor, skim your clips, tag the best plays, and spot the scenes that will wow your crowd.
Plan and Record Your Gameplay
You must plan your gameplay before you hit record. Define your genre and your goals.
- Choose your style and goal
Decide if you want a walkthrough, let’s play, or game review. Pick entertainment or max views as your aim. Use Answer The Public to find top search engine terms for youtube gaming. - Check gear and software
Test Open Broadcaster Software on your PC. Try VSDC Free Screen Recorder on your Windows rig. Or connect a capture device for Xbox and PlayStation. - Map out your script
Jot notes in a text editor. Mark key moments you want to save. Note where you will fade in or fade out audio cues. - Run a short trial
Grab thirty seconds of footage. Watch it back on a tablet or monitor. Adjust mic levels and game volume until both sound clear. - Start the full capture
Hit record in your recording tool. Keep clips under thirty minutes for easier work in your video editor. Save each file with clear names so video editors spot them fast.
Select the Best Clips
Good editing starts with great highlights. Pick clips that jump off the screen.
- Open raw files from the stream capture tool and skim them in the timeline. Note time codes for big wins, funny glitches, and epic fails.
- Flag clips that show jaw-dropping plays, game-changing moves, or comic slip-ups. Keep each clip under 15 seconds to maintain a brisk pace.
- Inspect the waveform view for voiceovers that ring clear and in-game sounds that pop. Drop noisy or quiet takes that pull viewers out.
- Drop clip markers in the cutting app at peak action and smooth over jump cuts. Use snapping grids to align keyframes like puzzle pieces.
- Confirm each clip runs at 60 FPS and 1080p or higher so motion stays fluid on YouTube. Check bitrate to avoid pixelation on highlight reels.
- Sync tagged clips with royalty-free tunes from YouTube’s music library. Match music beats to clip cuts for a pro feel.
Essential Editing Techniques
Use Pro Editor to trim out slow bits and add crossfades that keep the action rolling. Tweak voiceovers in Sound Lab or layer a killer soundtrack under your gameplay, so the audience rides every twist.
Cut and Trim Unnecessary Footage
Cutting and trimming clips lifts your video pulse. It keeps viewers focused on epic action.
- Clip out yawns and slow zones with the razor tool in your editing software.
- Mark cuts on the timeline to isolate only the funniest or most epic wins.
- Delete idle segments that last more than 5 seconds to keep energy high.
- Trim the intro from 20 seconds down to 5, so you start at the good part.
- Remove repeated jumps or reload scenes to avoid redundancy.
- Slice off extra build-up to make sure every moment moves fast.
- Play back your project after edits and check if it feels tight and fun.
Add Transitions for Smooth Flow
Good transitions keep gameplay feeling fresh. They let footage slide from one moment to the next.
- Drag and dock snippets on the timeline. Apply a Dissolve effect in DaVinci Resolve or with FadeFX to join scenes.
- Keep each crossfade short. That way your pace stays tight and no lag kills the vibe.
- Pick subtle wipes instead of flashy spins. Viewers focus on gameplay, not on a flashy swirl.
- Test each scene change in playback. Tweak any jump that feels rough or jarring.
- Match each audio fade with the cut. Your soundtrack slides under the video, so no beat drops feel abrupt.
Enhance Audio with Soundtracks or Voiceovers
Solid sound makes gameplay pop. You can weave tunes or voice tracks to amp up the fun.
- Capture clean game audio and mic voice with your recording tool, set levels to avoid clipping. Use your volume meter to spot dB spikes.
- Launch your editing suite and hit SHIFT+A or ADD OBJECT > AUDIO to import music and commentary files. Pick royalty-free music from YouTube’s music library to dodge copyright issues.
- Trim the music clip on the timeline to match action cues. Snap waveforms at key beats and cut out dead air.
- Balance volume automation, boost the voice track above gameplay sounds. Tweak the amplitude graph so every word rings clear.
- Apply fade in and fade out effects on both tracks. Smooth starts and ends ease the ear and keep viewers invested.
- Engage a noise gate or compressor on your master track. This tool tames hiss and holds levels steady across clips.
Add Professional Touches
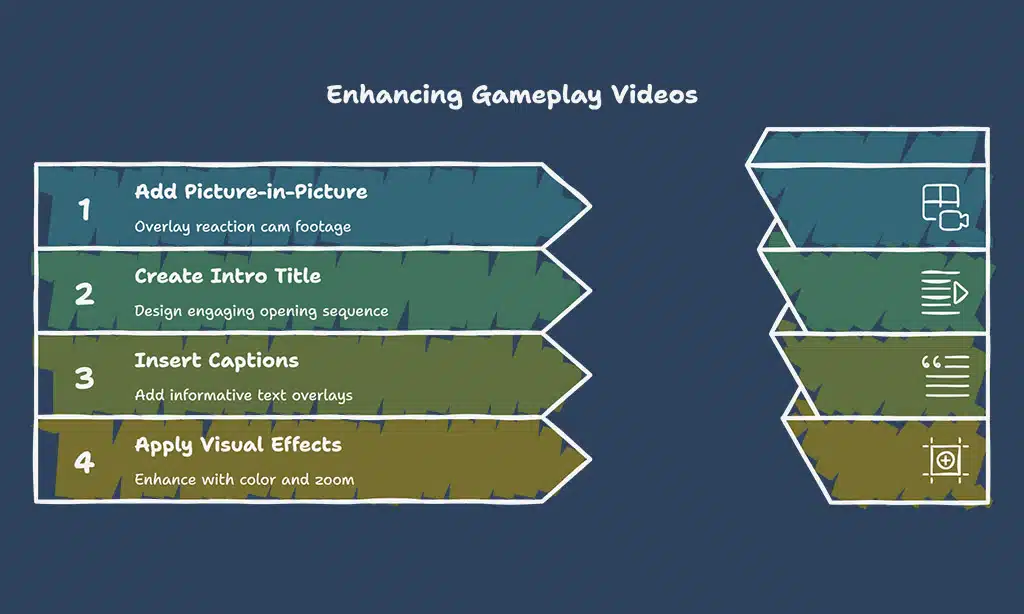
Pop in a reaction cam with Premiere Pro’s titler tool, punch up the audio, and read on for more expert tips.
Use Picture-in-Picture for Reactions
You use picture-in-picture to show your reactions on cam while you play. Next, hit SHIFT+V or use Add Object > Video to import your face clip. Then layer that clip above the gameplay track and shrink it down.
Pick a corner outside big boss fights so you never block the action.
Keep the window small enough to charm but not to bug. Tuck it in a corner like a sidekick at a party. Let fans catch every flinch and grin, without losing any epic moves.
Add Titles, Captions, and Highlights
Good titles guide viewers. Strong highlights keep them glued to the screen.
- Draft a short intro title that teases your game. Save that design as a template for later use.
- Use ADD OBJECT > TEXT to insert clear labels or captions. Set each line with a tooltip effect to offer quick tips.
- Choose fonts that stand out, pick colors that match your game’s mood. Apply VIDEO EFFECTS > TRANSPARENCY > FADE IN for smooth entry.
- Freeze the frame at clutch plays, then add color shifts or crop zoom. Highlight the exact split-second where the action pops.
- Blur the cluttered areas around your highlight. Make your key moment the star.
Takeaways
You can turn raw gameplay into a slick highlight reel with a few simple edits.
Pick a free tool or open source editor on Linux to chop clips, and drop in transitions.
Add audio tracks, catchy titles and captions, and watch your style shine through.
Share clips in forums, swap tips with fellow creators, and keep leveling up.
FAQs
1. What top software works best for gaming video editing?
Try a well-known PC video editor, or use a free Mac app. Both let you cut clips, tweak colors, and add your voice track, like a pro.
2. How do I cut and join clips to keep things smooth?
Think of your timeline as a train. You trim unwanted cars, add a fade to link each part. Then your video rolls on, no jarring jumps.
3. How can I sync game sound with my commentary?
Zoom into the sound files, match your speech to the game hits, slide your track until the peaks meet. That way you nail every boom and word.
4. What tips help my gaming videos stand out?
Grab attention in the first five seconds, drop in a hot moment, mix in fun graphics, pump up the music, and chat with your viewers like you chat with a buddy.