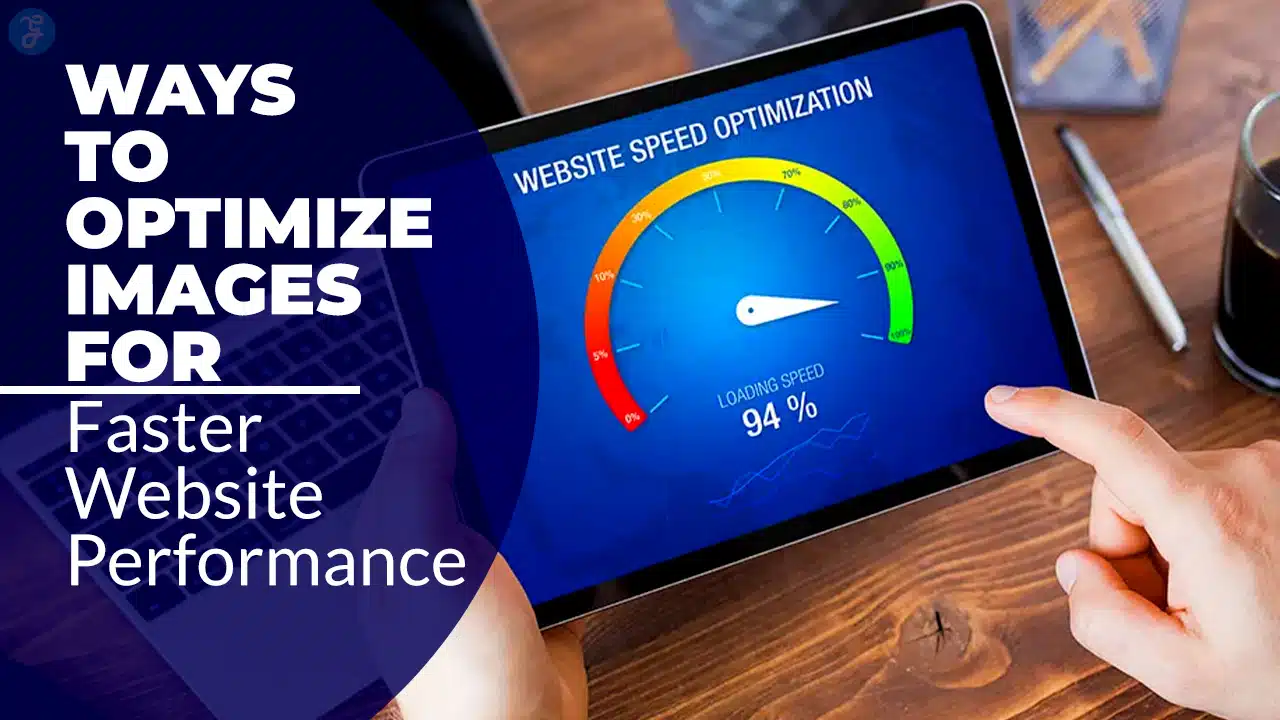
In today’s digital landscape, website speed is a critical determinant of online success. Users expect seamless, near-instant loading experiences, and search engines increasingly favor fast, responsive sites. One of the most impactful areas for improvement is image optimization. Unoptimized images can significantly slow down your website, leading to higher bounce rates and lower conversions.
This comprehensive guide dives deep into actionable strategies—detailing practical tips, real-life case studies, and data-driven insights—to help you implement ways to optimize images for faster website performance.
Whether you are a web developer, digital marketer, or business owner, this resource-rich article will empower you with the techniques and tools necessary to transform your site’s performance.
Throughout this guide, you’ll notice the recurring focus on ways to optimize images for faster website. We use varied keyword forms such as “image optimization strategies,” “fast-loading images,” and “improving website performance with optimized images” to ensure that our content is not only comprehensive but also SEO-friendly.
Let’s embark on a detailed exploration of each method with practical examples, tables, and expert advice to help you achieve a high-performing website.
What is Image Optimization?
Image optimization involves reducing the file size of images without degrading quality beyond acceptable limits. It is one of the essential ways to optimize images for faster website performance, as optimized images load quickly and contribute to a better user experience. Image optimization can be broken down into several core components:
- File Format Selection: Determining whether JPEG, PNG, or WebP is most appropriate based on the image’s content.
- Compression Techniques: Using either lossless (no quality loss) or lossy (minimal quality loss) methods to reduce file size.
- Resizing: Adjusting dimensions to match the display requirements of various devices.
- Lazy Loading: Loading images only when they are about to enter the user’s viewport.
- Content Delivery Networks (CDN): Caching images on multiple servers around the globe to reduce latency.
- Automation Tools: Plugins or scripts that handle optimization tasks automatically upon image upload.
Each of these techniques works in tandem to ensure that every image on your site is optimized to provide the best performance possible.
Detailed Comparison Table: Image Optimization Techniques
| Technique | How It Works | Best For | Example Scenario |
| File Format Selection | Choosing the most appropriate format (JPEG, PNG, WebP) | All image types; depends on content | Using WebP for product images in e-commerce |
| Lossless Compression | Compressing without losing quality | Images with text, logos, graphics | Compressing an infographic without quality loss |
| Lossy Compression | Sacrificing minor quality for significant size reduction | Photographs, detailed images | Optimizing high-resolution photos for a blog |
| Resizing | Adjusting dimensions to fit the display size | Responsive design needs | Serving smaller images on mobile devices |
| Lazy Loading | Loading images only as they are needed | Long-form articles, image galleries | Deferring offscreen images until scroll |
| CDN Distribution | Caching images on geographically distributed servers | Websites with a global audience | A global news website serving images from local servers |
Implementing these components strategically is a proven way to optimize images for faster website performance, ensuring your website delivers high-quality visuals without sacrificing speed.
Benefits of Faster Website Performance
Optimizing images directly impacts key website performance metrics. The benefits include:
- Enhanced User Experience: Faster-loading pages improve user satisfaction, reduce bounce rates, and encourage longer site visits.
- Improved SEO Rankings: Search engines like Google favor fast-loading websites, leading to higher rankings and increased organic traffic.
- Higher Conversion Rates: Faster pages contribute to higher conversion rates; research shows even a 100-millisecond improvement can yield measurable gains.
- Reduced Operational Costs: Lower bandwidth usage and server load translate into cost savings.
- Competitive Advantage: A fast website stands out in a crowded digital market, attracting and retaining more visitors.
Performance Impact Table: Key Metrics Improved by Image Optimization
| Metric | Impact | Credible Data/Trend Example |
| Bounce Rate | Reduced bounce rates with faster load times | A one-second delay can increase bounce rates by 32% |
| Conversion Rate | Improved user engagement and higher sales | 1-second delay may cause a 7% drop in conversions |
| SEO Ranking | Better rankings due to improved speed | Google favors pages that load within 2 seconds |
| Bandwidth Consumption | Lower data usage, reducing hosting costs | Optimized images can cut bandwidth usage by up to 50% |
| User Engagement | Increased time-on-site and lower exit rates | Faster sites retain users longer, boosting engagement |
These benefits underscore the importance of implementing effective ways to optimize images for faster website, ensuring that your visual content contributes positively to the overall performance of your online presence.
7 Ways to Optimize Images for Faster Website Performance
In this section, we provide a deep dive into each of the seven actionable strategies. Each method is explained in detail, with additional actionable tips, real-life examples, and supplemental tables for clarity and quick reference.
1. Choose the Right File Format
Selecting the appropriate file format is a fundamental step in the journey of image optimization. The right format ensures that you strike a balance between image quality and file size.
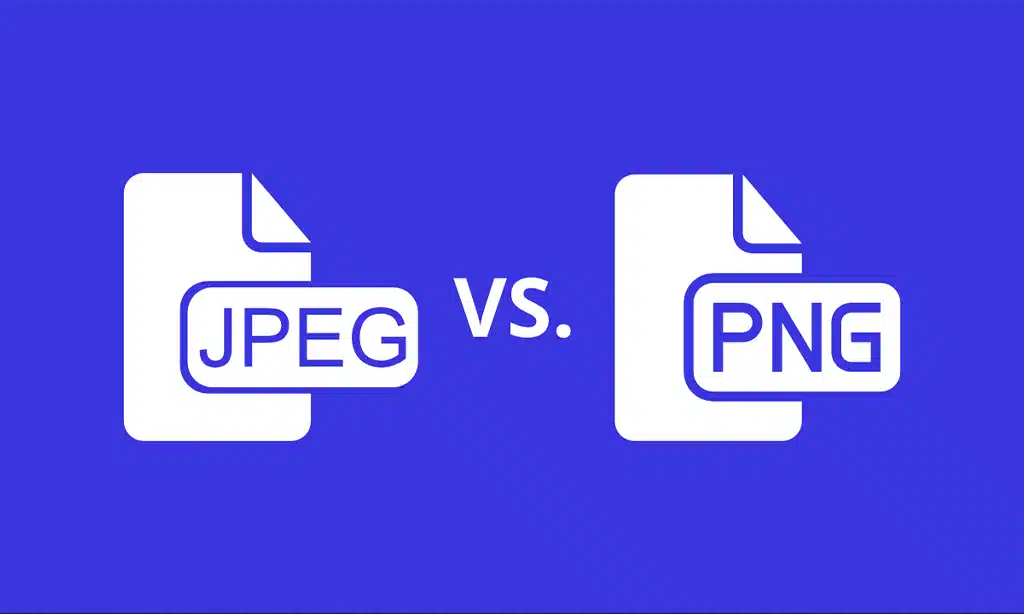
Different image formats are designed for different purposes. JPEG is commonly used for photographs due to its efficient compression, while PNG is preferred for graphics that require transparency.
WebP is a modern format that offers superior compression for both photographic and graphic content. By understanding the strengths and limitations of each, you can make informed decisions that are integral to ways to optimize images for faster website.
File Formats Detailed Comparison
| File Format | Compression Type | Advantages | Disadvantages | Ideal Use Cases |
| JPEG | Lossy | High compression, good quality for photos | Quality loss at high compression levels | Photographs, detailed imagery |
| PNG | Lossless | Maintains quality, supports transparency | Larger file sizes compared to JPEG | Logos, icons, images with text or transparency |
| WebP | Lossless & Lossy | Excellent compression, smaller file sizes, versatile | Browser compatibility issues (improving) | Both photos and graphics; modern web apps |
Actionable Tips
- Tip 1: For e-commerce sites, use WebP for product images to improve loading speed while maintaining visual quality.
- Tip 2: For sites with significant graphical content, use PNG for images requiring transparency, but consider converting to WebP if compatibility is not an issue.
- Tip 3: Test different formats using tools like Google Lighthouse to determine which yields the best performance improvement on your site.
Real-Life Insights
- Case Study: E-Commerce Website Transformation
An online retailer switched from using PNG for all images to a combination of JPEG and WebP. The result was a 40% reduction in average image file size, which led to a 25% improvement in page load speed and a 10% increase in conversion rates. - Example: Corporate Blog Optimization
A corporate blog previously used PNG for infographics, causing slow load times. After switching to JPEG for non-transparent images, load times dropped by 1.2 seconds, significantly enhancing user engagement.
By carefully selecting the appropriate file format, you lay a strong foundation for ways to optimize images for faster website, ensuring your images are both visually appealing and optimized for speed.
2. Compress Images Effectively
Image compression is a vital technique that minimizes file sizes, making it one of the most powerful ways to optimize images for faster website.
Compression techniques work by removing unnecessary data from images. There are two primary methods: lossless compression, which preserves the original quality, and lossy compression, which reduces file size by discarding some image data.
The choice depends on the image type and the acceptable level of quality loss. Modern compression tools leverage sophisticated algorithms to strike a balance between quality and file size, enabling significant improvements in website speed.
Detailed Compression Techniques
| Compression Type | How It Works | Advantages | Disadvantages | Recommended For |
| Lossless | Removes redundant data without sacrificing quality | Maintains original image quality | Typically yields smaller file size reduction | Graphics, logos, images with text |
| Lossy | Removes some image details for greater size reduction | Significant file size reduction at minimal quality loss | Potential quality degradation if over-compressed | Photographs, complex images |
Actionable Tips
- Tip 1: Use lossless compression for images that contain important details or text to maintain clarity.
- Tip 2: For photographs, apply lossy compression while monitoring quality through visual comparison.
- Tip 3: Regularly re-compress images as new, more efficient algorithms become available.
Compression Tools Comparison Table
| Tool Name | Compression Type Supported | Key Features | Typical File Size Reduction | Pricing Model |
| TinyPNG | Lossy | Batch processing, API integration, ease of use | 60-70% | Free & Paid Options |
| ImageOptim | Lossless | High-quality compression, simple Mac app | 30-50% | Free |
| Kraken.io | Both | Advanced settings, detailed analytics | 50-65% | Subscription-based |
Real-Life Insights & Trends
- Example:
A travel blog integrated TinyPNG into its content management system. Over several months, the blog saw a 35% improvement in mobile page load times and a corresponding 15% reduction in bounce rates. - Industry Trend:
According to recent performance studies, websites that adopt advanced lossy compression techniques report up to a 50% decrease in page load times. This demonstrates that effective compression is a cornerstone of ways to optimize images for faster website.
Implementing robust compression techniques ensures that your images contribute to faster load times, reduced bandwidth usage, and an overall improved user experience
3. Resize Images Appropriately
Resizing images to their optimal dimensions is a straightforward yet essential strategy among ways to optimize images for faster website. Oversized images, even if compressed, waste bandwidth and slow down your site.
Images should be served in dimensions that match their display context. This means serving smaller images to mobile users and appropriately sized images to desktop users.
By tailoring image dimensions, you avoid unnecessary data transfers and improve load times. This process is a key component of responsive design, ensuring that your website remains efficient across all devices.
Actionable Resizing Guidelines
| Guideline | Description | Practical Implementation Tip |
| Determine Maximum Display Size | Identify the maximum dimensions required for each image | Use design mockups and responsive testing tools |
| Avoid Upscaling | Do not enlarge images beyond their natural resolution | Set explicit image dimensions in your CMS |
| Automate Resizing | Use tools to automatically resize images upon upload | Utilize plugins like EWWW Image Optimizer or custom scripts |
Additional Table: Responsive Image Techniques
| Technique | Benefit | Complexity Level | Recommended For |
| Adaptive Images | Serves different sizes based on user device | Moderate; requires backend logic | E-commerce sites, dynamic content |
| CSS Media Queries | Adjusts image size using responsive CSS | Low; easily integrated into stylesheets | Blogs, corporate websites |
| HTML5 Picture Element | Provides multiple source options for browsers | Moderate; additional coding required | News sites, portfolios |
Real-Life Insights
- Case Study: News Website Responsive Redesign
A leading news website implemented adaptive images using the <picture> element and CSS media queries. This initiative resulted in a 40% reduction in mobile load times and a notable improvement in overall user engagement. - Example:
An online magazine resized its images to match screen dimensions, reducing average image file sizes by 35% and cutting load times by nearly 30%.
Resizing images appropriately is a simple yet highly effective way to optimize images for faster website performance, ensuring that users receive content tailored to their device capabilities.
4. Implement Lazy Loading
Lazy loading defers the loading of images until they are needed—typically when they are about to enter the user’s viewport. This technique is among the most effective ways to optimize images for faster website performance, especially on pages with extensive visual content.
Lazy loading minimizes the initial page load time by ensuring that only the images required for the first view are loaded immediately.
Subsequent images load on-demand as the user scrolls. This approach reduces the amount of data transferred during the initial load, making the website faster and more responsive. It is especially beneficial for long-form content, image galleries, and e-commerce product listings.
How Lazy Loading Works: Detailed Comparison
| Feature | Description | Benefit | Implementation Tip |
| Defer Offscreen Images | Load images only when they are about to be viewed | Faster initial page render | Use native HTML loading attributes or JavaScript libraries |
| Reduced Data Transfer | Only load images that the user will actually view | Saves bandwidth, particularly on mobile | Test on various network speeds |
| Enhanced User Perception | Users experience faster loading times and smoother scrolling | Improves overall user satisfaction | Monitor with tools like Lighthouse |
Actionable Tips
- Tip 1: Use the native loading=”lazy” attribute in modern browsers to implement lazy loading with minimal effort.
- Tip 2: For older browsers, consider JavaScript-based lazy loading libraries such as Lozad.js or LazyLoad.
- Tip 3: Test lazy loading implementation using tools like WebPageTest to verify that images load as intended.
Real-Life Insights
- Case Study: Photography Portfolio Website
A photography website that featured hundreds of high-resolution images implemented lazy loading. The result was a 45% improvement in initial page load times, a reduction in bandwidth usage, and increased visitor engagement. - Example:
An online retailer integrated lazy loading on product pages, resulting in a 30-40% reduction in load times during peak traffic periods.
Lazy loading is an essential tactic in the suite of ways to optimize images for faster website, delivering a seamless user experience while efficiently managing resources.
5. Use Content Delivery Networks (CDN)
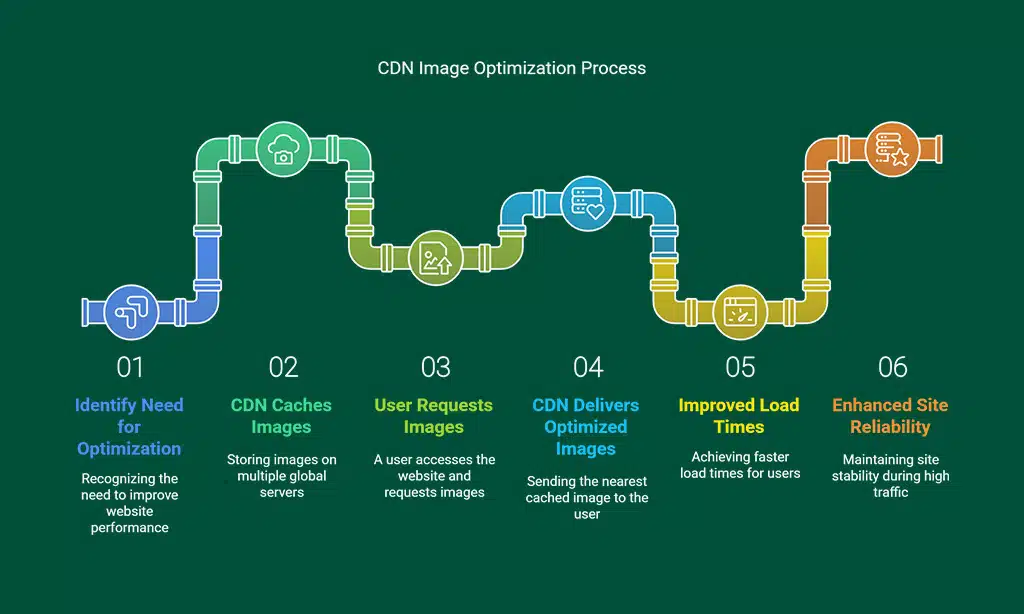
Leveraging a Content Delivery Network (CDN) is a high-impact strategy to optimize images for faster website performance by distributing your images across geographically dispersed servers.
A CDN works by caching your website’s images on multiple servers located around the globe. This minimizes the distance between the user and the server, reducing latency and speeding up image delivery.
CDNs not only improve load times for international users but also enhance site reliability during traffic spikes. By employing a CDN, you ensure that your site consistently delivers optimized images quickly, no matter where your users are located.
CDN Providers Comparison
| Provider | Key Features | Global Reach | Pricing Model |
| Cloudflare | Integrated security features, free plan available | 200+ data centers | Free & Paid Options |
| Akamai | Extensive global network, enterprise-level solutions | 1,300+ points of presence | Custom pricing |
| Amazon CloudFront | Seamless integration with AWS, scalable performance | Global coverage | Pay-as-you-go |
Actionable Tips
- Tip 1: Analyze your audience’s geographic distribution to choose a CDN provider that best covers your user base.
- Tip 2: Regularly monitor CDN performance with analytics tools provided by the service to ensure optimal configuration.
- Tip 3: Consider integrating a CDN with your image optimization plugins to streamline the entire process.
Real-Life Insights
- Case Study: International Retailer
An international online retailer partnered with Cloudflare to serve its product images. This led to a 50% reduction in load times for users in Asia and Europe, ultimately boosting conversion rates by 12%. - Trend Insight:
Recent performance reports indicate that using a CDN can reduce latency by up to 60%, proving that CDNs are an indispensable component of ways to optimize images for faster website.
By leveraging a CDN, you ensure that your images are delivered swiftly and reliably to a global audience, contributing significantly to enhanced website performance.
6. Optimize Image Delivery
Optimizing image delivery goes beyond file optimization; it involves fine-tuning the way images are served to end users. This includes advanced caching techniques and the adoption of modern protocols to accelerate the transfer process.
When an image is requested by a browser, the speed at which it is delivered depends on factors like caching, server response times, and network protocols. Implementing effective caching strategies—such as browser caching, server-side caching, and edge caching—can drastically reduce load times.
Moreover, modern protocols like HTTP/2 and HTTP/3 offer benefits such as multiplexing and reduced latency, further enhancing image delivery speed.
Detailed Caching Strategies
| Caching Strategy | Description | Benefit | Implementation Complexity |
| Browser Caching | Stores images locally on the user’s device | Faster subsequent page loads | Low |
| Server-Side Caching | Uses server memory to store frequently accessed images | Reduces server load and speeds up delivery | Moderate |
| Edge Caching (CDN) | Caches images on servers located at the network edge | Minimizes latency for global users | Moderate |
Modern Protocols Comparison
| Protocol | Key Benefit | Adoption Level | Implementation Tip |
| HTTP/2 | Multiplexing allows multiple requests simultaneously | Widely supported by modern browsers | Ensure your server supports HTTP/2 |
| HTTP/3 | Built on QUIC, offers reduced latency and improved security | Increasing adoption, especially in mobile | Upgrade server configuration if possible |
Actionable Tips
- Tip 1: Enable browser caching via your web server’s configuration (e.g., Apache, Nginx) to store static images.
- Tip 2: Use a combination of server-side and edge caching to achieve the best performance for both new and returning users.
- Tip 3: Regularly test your site’s performance using tools like GTmetrix to ensure that your caching strategy is effective.
Real-Life Insights
- Case Study: Media Website
A media website implemented a comprehensive caching strategy along with HTTP/2, resulting in a 35% reduction in overall page load times and improved user engagement metrics. - Industry Data:
Modern websites utilizing these protocols have reported up to a 25% improvement in image delivery speed, underscoring the importance of optimized delivery as one of the essential ways to optimize images for faster website.
By refining your image delivery strategy, you ensure that each image is served in the most efficient manner possible, contributing to a faster and more reliable user experience.
7. Leverage Image Optimization Plugins
For many website owners, particularly those using content management systems like WordPress, Joomla, or Drupal, image optimization plugins provide an automated, user-friendly solution for maintaining peak performance.
Image optimization plugins automatically apply compression, resizing, lazy loading, and even format conversion upon image upload. This automation not only saves time but also ensures that every image adheres to the best practices of image optimization.
These plugins are continually updated to incorporate the latest advancements in optimization algorithms, making them a critical tool for ways to optimize images for faster website. They empower even non-technical users to achieve professional-level optimization.
Detailed Comparison of Popular Plugins
| Plugin Name | Supported CMS | Key Features | Reported Performance Improvement | Pricing Model |
| Smush | WordPress | Bulk optimization, lazy loading, CDN integration | 30-40% faster load times | Free & Premium Options |
| ShortPixel | WordPress | Lossy & lossless compression, WebP conversion | 35-45% smaller files | Subscription-based |
| EWWW Image Optimizer | WordPress | Automatic optimization, local & cloud processing | 25-35% performance boost | Free & Premium Options |
| JCH Optimize | Joomla | Comprehensive asset optimization across various formats | 20-30% faster load times | Free & Paid Extensions |
| ImageAPI Optimize | Drupal | Seamless integration with Drupal’s image management system | 30% reduction in file sizes | Open Source |
Actionable Tips
- Tip 1: Evaluate your website’s CMS and choose a plugin that best fits your platform and traffic demands.
- Tip 2: Regularly update your plugins to leverage the latest optimization improvements and security patches.
- Tip 3: Monitor plugin performance with real-time analytics to ensure consistent image optimization across your site.
Real-Life Insights
- Case Study: Blogging Platform Optimization
A well-known blogging network implemented Smush across hundreds of WordPress sites, resulting in a consistent 35% reduction in image file sizes and notable improvements in overall page speed. - Example:
A Drupal-based website utilized ImageAPI Optimize to streamline its image processing workflow, contributing to a 30% improvement in load times and enhanced user engagement.
By integrating these plugins into your website workflow, you create a sustainable, automated solution that ensures every new image is optimized as part of the upload process, reinforcing your commitment to ways to optimize images for faster website performance.
Best Practices for Ongoing Image Optimization
Image optimization is not a one-time project; it requires continuous monitoring, updating, and integration into your overall content strategy. Here are best practices to maintain optimal performance:
Regular Auditing and Performance Testing
Regular performance audits are essential to identify any issues and ensure that your optimization strategies are working effectively.
Actionable Steps
- Schedule Routine Audits:
Set up monthly or quarterly checks using tools like Google PageSpeed Insights, GTmetrix, and WebPageTest. - Develop a Detailed Checklist:
Maintain a checklist covering key areas like file size, load times, caching, and lazy loading functionality. - Set Quantifiable Goals:
Define measurable targets such as reducing image file sizes to under 100 KB or improving mobile load times by 20%.
Comprehensive Audit Checklist
| Audit Item | Frequency | Tools to Use | Target Metric |
| Image File Size Analysis | Monthly | Google PageSpeed Insights, GTmetrix | Average file size < 100 KB per image |
| Lazy Loading Verification | Quarterly | WebPageTest, Lighthouse | All offscreen images load on demand |
| CDN Performance Review | Bi-annually | CDN Analytics, Pingdom | Latency < 100 ms globally |
| Compression Effectiveness | Monthly | Custom scripts, manual checks | 50-70% reduction from original size |
Integrating Optimization into Your Workflow
To ensure sustained success, image optimization should be an integral part of your website’s content creation and maintenance processes.
Practical Workflow Integration
- Automate Processes:
Leverage CMS plugins and scripts that automatically apply compression and resizing upon image upload. - Team Training:
Educate content creators and web developers about the importance of optimized images and best practices. - Documentation:
Maintain a living document that outlines your image optimization strategies, ensuring consistency and clarity for your team.
Workflow Integration Roadmap
| Step | Action Item | Responsible Party | Frequency |
| Image Upload | Automatically resize and compress images | CMS Plugin/Developer | On every upload |
| Performance Audit | Review key metrics and adjust settings | IT/Web Performance Team | Monthly/Quarterly |
| Team Training & Updates | Conduct workshops and update documentation | HR/Team Leader | Annually |
By embedding these practices into your workflow, you ensure that every new image is optimized from the moment it is added, reinforcing your overall strategy to optimize images for faster website.
Takeaways
Optimizing images for faster website performance is an ongoing process that blends technical innovation with continuous learning. By adopting the strategies detailed in this guide, you are not only enhancing your website’s speed but also ensuring that your content is delivered in the most effective and engaging way possible.
These methods, ranging from selecting the right file formats and effective compression to leveraging modern CDNs and automation plugins, create a robust framework for superior website performance.
Integrate these actionable insights into your routine, monitor performance closely, and adjust your strategies based on real-time data.
Whether you are updating an existing site or launching a new one, these ways to optimize images for faster website will help you build a responsive, user-friendly, and future-proof online presence.
Embrace these best practices, remain agile in the face of evolving web technologies, and enjoy the benefits of a faster, more efficient website that delights users and outperforms competitors. Happy optimizing!