Sustainability isn’t just a trend; it’s a way to make a lasting impact on the environment while saving money on utility bills.
For homeowners, adopting sustainable practices doesn’t have to mean costly renovations or high-tech installations. Small, affordable upgrades can significantly improve your home’s energy efficiency and reduce its carbon footprint.
This article explores 10 affordable sustainable upgrades that are easy to implement and perfect for homeowners looking to create a greener, more energy-efficient living space.
1. Switch to LED Lighting
Why It’s a Great Upgrade?
LED bulbs are one of the simplest and most affordable ways to reduce your home’s energy consumption. They use up to 90% less energy than traditional incandescent bulbs and last significantly longer.
Benefits
- Energy Efficiency: LEDs consume less electricity, lowering your energy bills.
- Long Lifespan: Most LED bulbs last up to 25,000 hours or more.
- Eco-Friendly: They produce less heat and are free of toxic materials like mercury.
Cost Breakdown
- Initial cost: $2–$10 per bulb
- Savings: Up to $225 annually for a household replacing 40 traditional bulbs
Pro Tip:
Install dimmable LED lights to further control energy usage and set the mood for your space.
2. Install a Programmable Thermostat
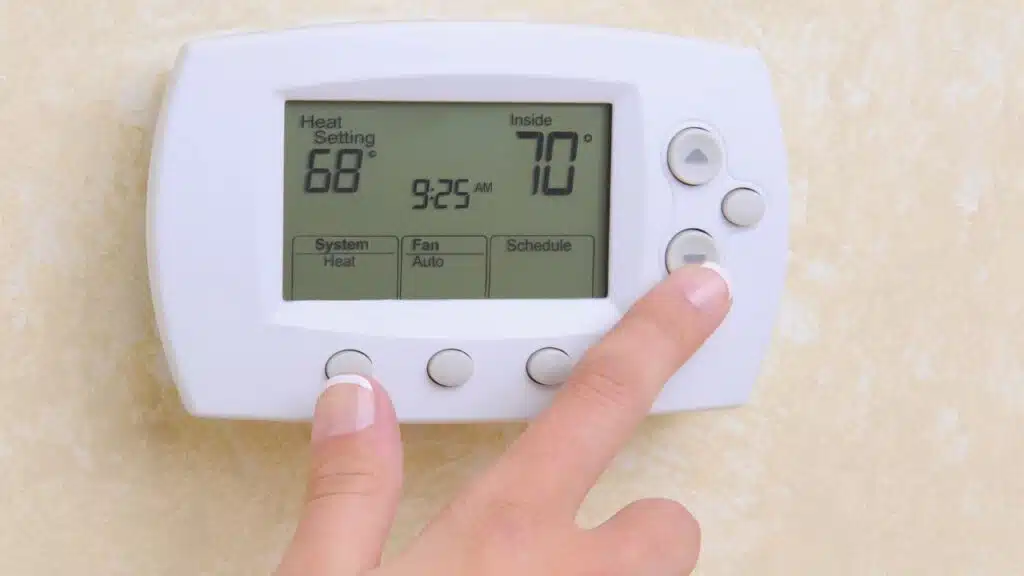
Why It’s a Great Upgrade?
A programmable thermostat allows you to control the temperature of your home more efficiently, reducing energy waste when you’re asleep or away.
Benefits
- Lower Heating and Cooling Costs: Adjust settings to save energy during off-peak hours.
- Convenience: Many models can be controlled via smartphone apps.
- Smart Learning: Advanced thermostats, like Nest, learn your habits and optimize settings.
Cost Breakdown
- Initial cost: $50–$250
- Savings: Up to 10% annually on heating and cooling bills
Pro Tip:
Set your thermostat to reduce heating or cooling by 7–10 degrees during the night for maximum savings.
3. Add Weatherstripping to Doors and Windows
Why It’s a Great Upgrade?
Weatherstripping seals gaps around doors and windows, preventing drafts and reducing energy loss.
Benefits
- Improved Insulation: Keeps your home warm in winter and cool in summer.
- Lower Energy Bills: Reduces the workload on your HVAC system.
- Simple Installation: Easy DIY project with minimal tools required.
Cost Breakdown
- Initial cost: $20–$50 for materials per window or door
- Savings: Up to 20% on heating and cooling bills
Pro Tip:
Inspect weatherstripping annually and replace worn or damaged strips for optimal efficiency.
4. Use Low-Flow Water Fixtures
Why It’s a Great Upgrade?
Low-flow faucets, showerheads, and toilets help conserve water without sacrificing performance.
Benefits
- Reduced Water Usage: Cut water consumption by up to 50%.
- Lower Utility Bills: Save on both water and energy used for heating water.
- Environmentally Friendly: Contributes to water conservation efforts.
Cost Breakdown
- Initial cost: $10–$50 per fixture
- Savings: Up to $145 annually for a family of four
Pro Tip:
Look for WaterSense-certified products for maximum efficiency and performance.
5. Install Solar-Powered Outdoor Lights
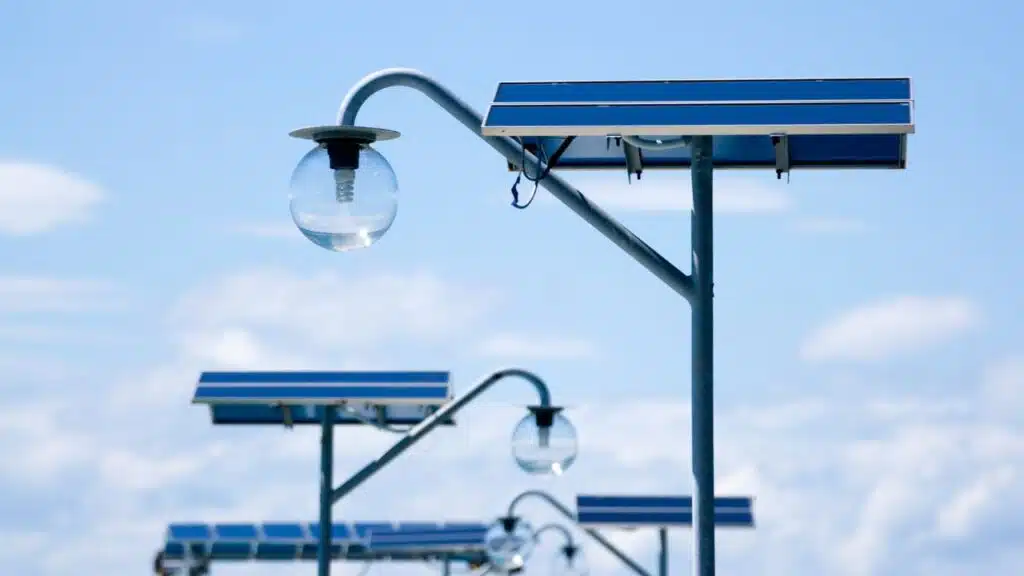
Why It’s a Great Upgrade?
Solar-powered lights are a cost-effective way to illuminate your outdoor space using renewable energy.
Benefits
- No Electricity Costs: Solar panels charge during the day and power lights at night.
- Easy Installation: No wiring required.
- Low Maintenance: Durable and weather-resistant.
Cost Breakdown
- Initial cost: $20–$100 per light
- Savings: Reduces outdoor electricity costs to nearly zero
Pro Tip:
Place lights in areas with maximum sunlight exposure for optimal charging.
6. Add Insulation to Your Attic
Why It’s a Great Upgrade?
Proper insulation in your attic prevents heat loss in the winter and keeps your home cooler in the summer.
Benefits
- Energy Savings: Reduce heating and cooling needs.
- Improved Comfort: Maintain consistent indoor temperatures year-round.
- Affordable ROI: Low-cost upgrade with significant long-term savings.
Cost Breakdown
- Initial cost: $1–$3 per square foot
- Savings: Up to 15% on energy bills annually
Pro Tip:
Use eco-friendly insulation materials like recycled denim or cellulose for a greener choice.
7. Replace Air Filters Regularly
Why It’s a Great Upgrade?
Clogged air filters force your HVAC system to work harder, increasing energy usage. Replacing filters ensures efficient airflow and cleaner indoor air.
Benefits
- Energy Efficiency: Reduces strain on your HVAC system.
- Healthier Air Quality: Filters out dust, allergens, and pollutants.
- Affordable Maintenance: Low-cost improvement with immediate benefits.
Cost Breakdown
- Initial cost: $10–$30 per filter
- Savings: Up to 15% on HVAC energy costs
Pro Tip:
Replace filters every 1–3 months, depending on usage and household conditions.
8. Upgrade to Energy-Efficient Appliances
Why It’s a Great Upgrade?
Replacing old appliances with energy-efficient models reduces electricity consumption and lowers utility bills.
Benefits
- Lower Operating Costs: Energy Star-rated appliances use significantly less energy.
- Rebates and Incentives: Many governments offer rebates for upgrading to energy-efficient models.
- Reduced Carbon Footprint: Helps you contribute to sustainability efforts.
Cost Breakdown
- Initial cost: $500–$2,000 per appliance
- Savings: Up to $300 annually, depending on the appliance
Pro Tip:
Start with the appliances that consume the most energy, like refrigerators, washing machines, and dishwashers.
9. Plant Native Trees and Shrubs
Why It’s a Great Upgrade?
Strategic landscaping can reduce energy costs by providing natural shade and improving insulation.
Benefits
- Reduced Cooling Costs: Shade from trees lowers indoor temperatures in summer.
- Improved Air Quality: Plants absorb carbon dioxide and release oxygen.
- Low Maintenance: Native plants require minimal water and care.
Cost Breakdown
- Initial cost: $20–$200 per plant, depending on species and size
- Savings: Up to 20% on cooling costs during summer months
Pro Tip:
Plant deciduous trees on the south and west sides of your home for optimal shade and sunlight control.
10. Install a Rainwater Harvesting System
Why It’s a Great Upgrade?
Rainwater harvesting systems collect and store rainwater for non-potable uses like watering plants, cleaning, and irrigation.
Benefits
- Water Savings: Reduce dependence on municipal water supply.
- Cost-Effective: Minimal setup costs with long-term benefits.
- Eco-Friendly: Helps conserve water resources.
Cost Breakdown
- Initial cost: $50–$500, depending on the system size
- Savings: Significant reduction in water bills
Pro Tip:
Use rain barrels with built-in filters to keep collected water clean and ready for use.
Conclusion
Sustainability starts at home, and these 10 affordable upgrades are practical, eco-friendly solutions that benefit both your wallet and the environment.
From simple changes like switching to LED bulbs to investing in long-term improvements like attic insulation and rainwater harvesting systems, these upgrades are accessible to every homeowner.
Start small and gradually implement these sustainable practices to transform your home into an energy-efficient, environmentally friendly haven. By making these changes today, you can enjoy lower utility bills, improved comfort, and the satisfaction of contributing to a greener future.