Whether you’re a seasoned DIY enthusiast or a beginner looking for a new hobby, DIY home improvement projects are an excellent way to enhance your living space.
Not only do they allow you to customize your home to reflect your personality, but they also offer a budget-friendly way to add style and functionality without the need for professional contractors.
By tackling these projects yourself, you can transform your home into a more inviting, stylish, and efficient space while increasing its value.
This guide will walk you through 15 creative DIY projects that are perfect for homeowners looking to make practical and aesthetic improvements.
Each project is designed to be approachable, whether you’re renovating a single room or refreshing your entire house. Let’s explore how you can take your home to the next level!
Why DIY Projects Are Worth Your Time?
DIY projects not only offer cost-saving benefits but also give you the satisfaction of personalizing your home.
When you undertake these projects, you have full control over the design, materials, and finishing touches, allowing you to create something truly unique.
Additionally, many DIY home improvements can significantly boost your home’s value, making them a smart investment if you’re planning to sell in the future.
The key to successful DIY projects is careful planning, attention to detail, and a willingness to learn new skills. With the right tools and guidance, you can take on a variety of home improvement projects that will make a big impact without requiring a large budget.
1. Install a Backsplash in Your Kitchen
One of the easiest and most impactful ways to enhance your kitchen is by installing a stylish backsplash. Not only does a backsplash protect your walls from spills and stains, but it also adds a decorative element that can transform the look of your kitchen.
Whether you prefer the sleek appearance of subway tiles, the modern touch of glass mosaics, or the rustic charm of stone, a backsplash can give your kitchen a professional and polished appearance.
How to Install a DIY Backsplash
To install a backsplash, begin by selecting your tiles and measuring the area to determine how many you’ll need.
You’ll also need tile adhesive, spacers, grout, and a tile cutter. After prepping the surface by cleaning the walls and applying a layer of adhesive, start laying the tiles from the bottom up, using spacers to ensure even spacing. Once the tiles are set, apply grout to fill in the gaps and give the backsplash a smooth, finished look.
Installing a backsplash is a rewarding weekend project that can instantly elevate the style and functionality of your kitchen.
2. Create a Custom Accent Wall
If you’re looking for a way to add visual interest to a room without committing to a full renovation, a custom accent wall is a perfect solution. Accent walls are a popular design feature that draws the eye and can set the tone for the entire room.
From bold paint colors to textured wallpaper or wood paneling, the options are endless when it comes to creating a unique accent wall.
Tips for Designing the Perfect Accent Wall
When choosing the location for your accent wall, consider selecting a wall that naturally draws attention, such as the one behind your bed or sofa.
You can experiment with geometric patterns using painter’s tape and paint or install wood slats for a modern, textured look. For a simpler option, peel-and-stick wallpaper allows you to achieve stunning designs without the commitment of traditional wallpaper.
A custom accent wall can dramatically enhance the aesthetic of any room and can be completed in just a day or two.
3. Build Floating Shelves
Floating shelves are a stylish and functional addition to any room. These shelves, which appear to “float” without visible brackets, provide storage space for books, decor, and other items while maintaining a clean and minimalist look.
Whether installed in the living room, kitchen, or bathroom, floating shelves can help you organize your space while adding a modern design element.
How to Build and Install Floating Shelves
Building floating shelves requires wood planks, brackets, and basic tools such as a drill and level. Begin by cutting the wood to your desired length, sanding it smooth, and staining or painting it to match your room’s decor.
Once the shelves are ready, install the brackets on the wall, making sure they are evenly spaced and secure. Mount the shelves onto the brackets, and you’ve got a sleek storage solution that doubles as a design feature.
Floating shelves are a versatile DIY project that can be adapted to any room in your home, providing both storage and a touch of sophistication.
4. Refinish Old Furniture
Refinishing old furniture is a cost-effective way to enhance your home’s decor while adding a personal touch. Instead of purchasing new furniture, consider updating your existing pieces with a fresh coat of paint, stain, or new hardware. Whether it’s an old dresser, a coffee table, or a set of dining chairs, refinishing furniture can breathe new life into outdated items and transform them into statement pieces.
Steps for Refinishing Furniture
Start by sanding the furniture to remove any old paint or varnish. This step is crucial for ensuring that the new finish adheres properly. Once sanded, wipe down the furniture to remove any dust, then apply your chosen paint or stain.
For an extra touch of elegance, consider swapping out old hardware for new, stylish knobs or handles. Refinishing furniture allows you to customize the piece to fit your home’s style and gives you the satisfaction of transforming something old into something new.
Refinishing furniture is an eco-friendly and rewarding DIY project that can elevate the look of your home without breaking the bank.
5. Install Crown Molding
Crown molding is a classic architectural feature that adds elegance and sophistication to any room. Installing crown molding can enhance your home’s interior by creating a polished transition between walls and ceilings. While crown molding is often associated with formal living rooms or dining areas, it can be used in any room to elevate the overall aesthetic.
How to Install Crown Molding Like a Pro
Although installing crown molding may seem intimidating, it’s a manageable DIY project with the right tools and preparation. Begin by measuring the perimeter of the room and purchasing enough molding to cover the space. 4
You’ll also need a miter saw to cut the molding at precise angles. After cutting the molding to fit, use a nail gun to secure it to the walls, and fill in any gaps with caulk for a seamless finish.
Crown molding is a timeless feature that adds value and charm to your home, and it can be installed over a weekend with minimal tools.
6. Upgrade Your Lighting Fixtures
Lighting plays a crucial role in the look and feel of a room. Outdated or dim lighting can make your home feel uninviting, while modern, well-placed lighting can brighten your space and enhance your decor. Upgrading your lighting fixtures is a simple DIY project that can have a dramatic impact on the ambiance of your home.
Choosing the Right Lighting for Each Room
When selecting new lighting fixtures, consider both the style and function of each room. For example, pendant lights work well in kitchens and dining areas, while statement chandeliers can add elegance to entryways and living rooms. Additionally, consider installing dimmer switches to allow for adjustable lighting, giving you more control over the mood of your space.
Upgrading your lighting fixtures is a cost-effective way to update your home’s aesthetic and improve functionality.
7. Paint Your Front Door

Your front door is one of the first things people notice about your home, making it an ideal place to start when it comes to enhancing curb appeal. A freshly painted front door can instantly update the exterior of your home and make it more inviting. Whether you choose a bold color or a classic neutral, painting your front door is a quick and easy DIY project with a big impact.
How to Paint Your Front Door Like a Pro
Begin by removing any hardware from the door and sanding it down to create a smooth surface. Apply a coat of primer next to aid in proper paint adhesion, then two coats of your chosen exterior paint color.
Use a small brush to reach any tight corners and ensure an even finish. Once the paint is dry, reattach the hardware, and admire your home’s updated look.
Painting your front door is a weekend project that can significantly enhance your home’s curb appeal without requiring a large investment.
8. Create a Garden Planter Box
Whether you have a spacious backyard or a small balcony, a garden planter box is a great way to incorporate greenery into your home. Building your own planter box allows you to customize the size, shape, and style to fit your space perfectly. Plus, you’ll have the satisfaction of growing your own herbs, flowers, or vegetables right outside your door.
Step-by-Step Guide to Building a Planter Box
To build a planter box, you’ll need wood planks, screws, a saw, and a drill. Start by cutting the wood to the desired dimensions, then assemble the box using screws to secure the corners. Line the inside with landscape fabric to prevent soil from escaping, and drill drainage holes in the bottom to allow excess water to escape.
Once assembled, fill the box with soil and your favorite plants, and you’ve got a beautiful and functional addition to your outdoor space.
A DIY garden planter box is a versatile project that adds both beauty and functionality to your home, encouraging outdoor living and sustainability.
9. Install a Sliding Barn Door
Sliding barn doors have become a popular design trend for their combination of functionality and style. These doors add a rustic, farmhouse-inspired touch to any room while also saving space since they slide along the wall rather than swinging open.
Whether used for a pantry, closet, or bathroom, installing a sliding barn door can give your home a unique and updated look.
How to Install a Sliding Barn Door
To install a sliding barn door, you’ll need a barn door kit, which typically includes the door itself, a track, and mounting hardware. Start by measuring the door opening and cutting the track to fit. Secure the track to the wall using heavy-duty screws, ensuring that it is level.
Once the track is installed, attach the door to the rollers and hang it on the track. With a few final adjustments, your new sliding barn door will be ready to use.
A sliding barn door adds character and functionality to your home and can be installed in just a few hours with the right tools.
10. Create a Built-In Reading Nook
A reading nook is a cozy, dedicated space where you can relax with a good book. Whether you have an unused corner, an alcove, or a window seat, creating a built-in reading nook can enhance the comfort and charm of your home.
This project allows you to combine function and style, creating a peaceful retreat where you can unwind.
Steps for Building a Comfortable Reading Nook
To create a built-in reading nook, start by identifying the perfect spot in your home. You can either build a simple bench seat or repurpose an existing window seat.
Add cushions, throw blankets, and plenty of pillows to create a comfortable seating area. Consider installing shelves nearby to store your favorite books, and use soft lighting to create a warm and inviting atmosphere.
A DIY reading nook adds both function and character to your home, providing a cozy space to relax and enjoy some quiet time.
11. Update Your Cabinet Hardware
If you’re looking for a quick and budget-friendly way to update your kitchen or bathroom, replacing your cabinet hardware is a great place to start. Swapping out old, outdated handles and knobs for modern, stylish options can give your cabinets a fresh new look without the need for a full renovation.
Choosing the Right Hardware for Your Space
When selecting new cabinet hardware, consider the overall style of your home. Sleek, minimalist hardware works well in modern kitchens, while more ornate designs may complement traditional or rustic spaces.
Installation is as simple as removing the old hardware and screwing in the new handles or knobs. This small upgrade can make a big difference in the overall appearance of your cabinets.
Updating your cabinet hardware is a quick and easy DIY project that instantly refreshes the look of your kitchen or bathroom.
12. Install a New Bathroom Vanity
A bathroom vanity is both a functional and aesthetic focal point in any bathroom. Replacing an outdated vanity with a modern one can dramatically improve the look and feel of the space. With the wide variety of vanities available, you can easily find one that fits your bathroom’s size, style, and storage needs.
How to Install a Bathroom Vanity
Installing a new bathroom vanity involves a few key steps. Start by turning off the water supply and removing the old vanity. Once the space is cleared, install the new vanity by securing it to the wall and connecting the plumbing.
Finish the installation by adding a new faucet and sink, if necessary. With a fresh coat of paint and new hardware, your bathroom will feel like a brand-new space.
Installing a new bathroom vanity is a rewarding DIY project that enhances both the style and functionality of your bathroom.
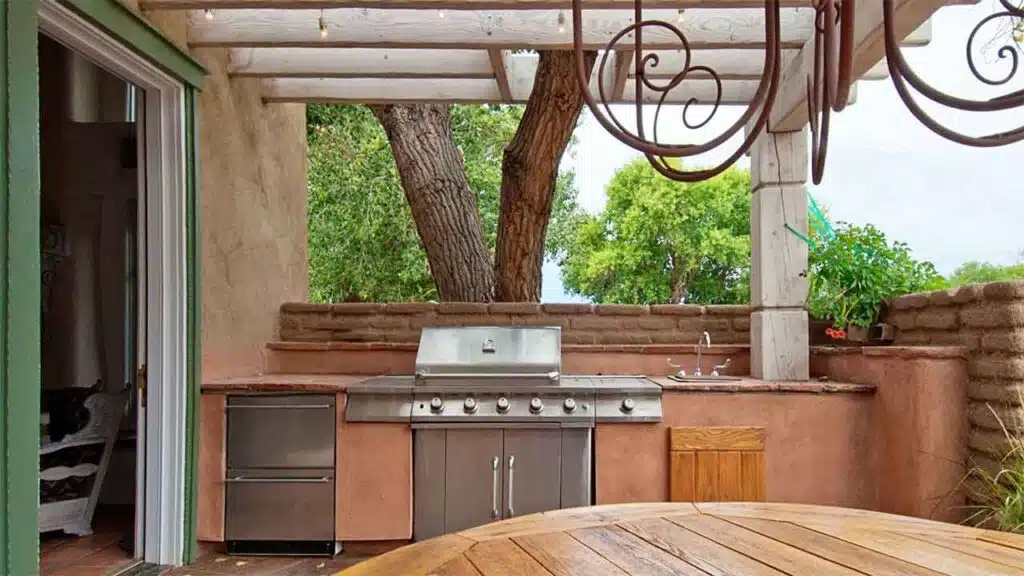
13. Add a DIY Fire Pit in Your Backyard
A fire pit is a great addition to any backyard, providing a cozy spot for gathering with friends and family on cool evenings. Building your own fire pit is easier than you might think, and it can be customized to fit the style and layout of your outdoor space.
Whether you prefer a modern fire pit made of concrete or a rustic one built with stone, this project adds both beauty and function to your backyard.
How to Build a DIY Fire Pit
To build a fire pit, start by selecting a location that is safely away from any structures or overhanging trees. Mark the area where the fire pit will be placed, and dig out a small trench to accommodate the base.
You can use bricks, pavers, or stones to create the walls of the fire pit. Once the fire pit is built, fill the bottom with gravel for drainage, and you’re ready to enjoy cozy nights by the fire.
A DIY fire pit transforms your backyard into a welcoming outdoor living space, perfect for relaxing and entertaining.
14. Make a DIY Headboard
A headboard adds a finishing touch to your bedroom, giving your bed a more polished and personalized look. Instead of purchasing an expensive pre-made headboard, why not make your own? A DIY headboard allows you to customize the size, style, and materials to match your bedroom decor perfectly.
Ideas for DIY Headboards
There are many ways to create a DIY headboard, from simple upholstered designs to more intricate wood panels. One of the easiest methods is to create a padded headboard using a piece of plywood, foam padding, fabric, and a staple gun. Alternatively, you can create a rustic headboard using reclaimed wood or even a painted mural on the wall behind your bed.
A DIY headboard is a fun and creative project that enhances your bedroom’s decor while adding a personal touch.
15. Refinish Hardwood Floors
If your hardwood floors are looking worn or outdated, refinishing them is a great way to restore their natural beauty. While refinishing hardwood floors requires some time and effort, the results are well worth it. A fresh, glossy finish can transform the look of your entire home and increase its value.
Steps for Refinishing Hardwood Floors
To refinish hardwood floors, start by removing all furniture from the room and thoroughly cleaning the floors. Use a floor sander to sand away the old finish, working in the direction of the wood grain. Once the floors are sanded smooth, apply a stain if desired, followed by a protective polyurethane finish. Allow the floors to dry completely before moving furniture back in.
Refinishing hardwood floors is a labor-intensive project, but it’s one that can dramatically improve the appearance of your home and increase its value.
Conclusion
DIY home improvement projects are a rewarding way to enhance both the functionality and aesthetic appeal of your living space.
From small updates like changing hardware or painting a door to more substantial projects like building furniture or installing crown molding, these 15 DIY projects offer a range of options for homeowners at any skill level.
Each project allows you to personalize your home while staying within your budget, and many of them can be completed over a weekend.
By taking the time to invest in your home with these DIY projects, you’ll not only create a space that reflects your unique style but also increase your home’s value and enjoyment for years to come.