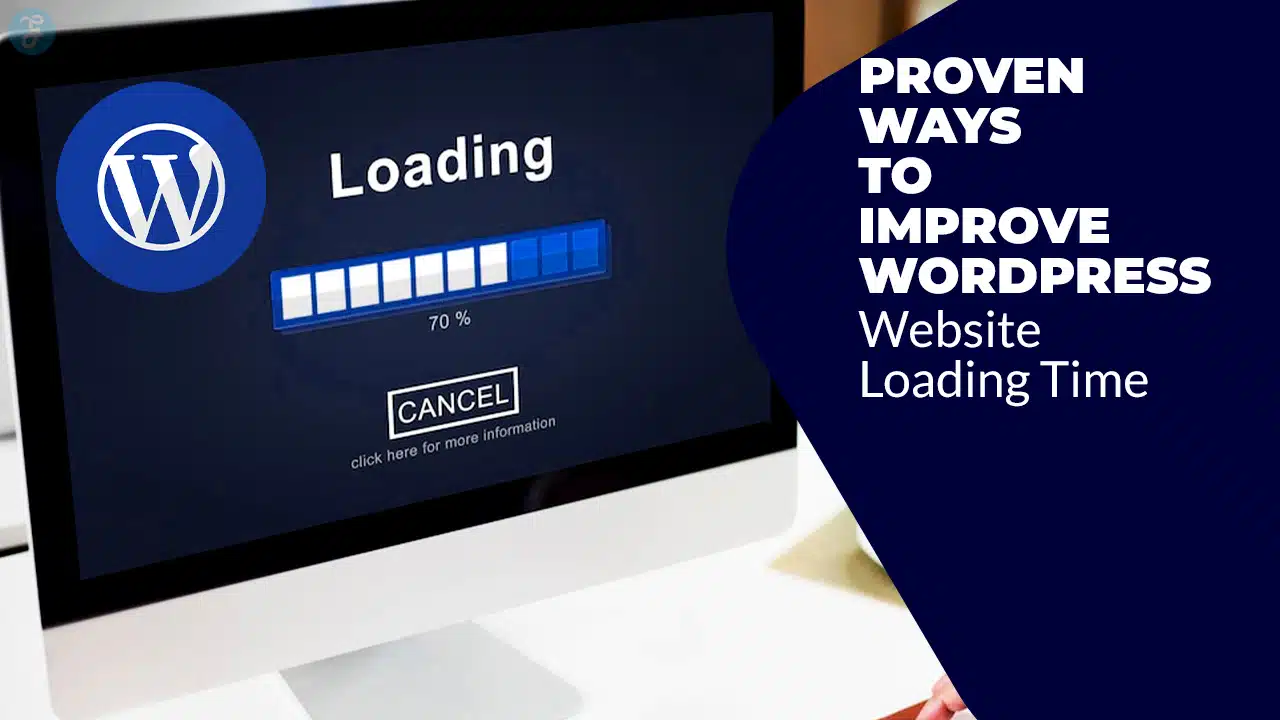
In today’s fast-paced digital world, website speed is no longer just a luxury—it’s a necessity. Studies show that users expect a site to load in under 3 seconds, and even a 1-second delay can result in a 7% decrease in conversions. Google also considers page speed a ranking factor, meaning slow websites can struggle to rank well in search results.
If you’re running a WordPress website, optimizing its loading time should be a top priority.
In this guide, we will explore 10 proven ways to improve WordPress website loading time, ensuring a fast, seamless experience for visitors while boosting SEO and conversions. We will also provide real-world case studies, tools, and actionable strategies to help you get the best results.
Understanding Website Speed and Its Importance
Website loading time refers to how long it takes for all elements of a webpage—including images, text, and scripts—to fully load. A fast-loading website ensures a better browsing experience, keeping visitors engaged and reducing bounce rates.
Why WordPress Website Speed Matters?
- User Experience: Slow websites frustrate visitors, increasing bounce rates and lowering engagement.
- SEO Rankings: Google prioritizes fast websites in search results, improving search visibility.
- Conversion Rates: Faster sites lead to higher sales, subscriptions, and lead generation.
- Mobile Friendliness: Speed is crucial for mobile users who rely on varying network speeds.
Now, let’s explore 10 powerful ways to improve WordPress website loading time and ensure your site performs optimally.
10 Proven Ways to Improve WordPress Website Loading Time
Let’s take a look.
1. Choose a Reliable Hosting Provider
Your web hosting service plays a significant role in determining your site’s speed. Shared hosting might be cheap, but it often leads to slower performance due to resource limitations. Opting for a managed or dedicated hosting service ensures optimal speed and uptime.
Comparison of Hosting Types:
| Hosting Type | Speed & Performance | Best For |
| Shared Hosting | Slower due to resource sharing | Small websites, beginners |
| VPS Hosting | Moderate speed, scalable | Growing websites, medium traffic |
| Dedicated Hosting | Fastest, best for high-traffic sites | Large businesses, heavy traffic |
| Managed WordPress Hosting | Optimized for WordPress speed | Bloggers, businesses, eCommerce |
Recommended Hosting Providers:
- SiteGround: Best for performance and customer support.
- WP Engine: Ideal for managed WordPress hosting.
- Kinsta: Premium hosting with fast servers and security.
2. Optimize Images for Faster Loading
Images are essential for a visually appealing website but can slow down loading time if not optimized. Large, uncompressed images increase the page size, resulting in longer load times and poor performance. By optimizing images, you can significantly reduce page weight without sacrificing quality. Using modern formats, proper compression techniques, and lazy loading ensures better rendering speeds and enhances user experience.
How to Optimize Images:
| Optimization Method | Description | Tools to Use |
| Image Compression | Reduces file size while maintaining quality, improving speed and reducing bandwidth usage | TinyPNG, Imagify, Smush |
| Use WebP Format | A modern image format that provides better compression than JPEG and PNG while maintaining quality | WebP Converter Plugin, ShortPixel |
| Lazy Loading | Delays the loading of off-screen images until needed, reducing initial page load time | Lazy Load by WP Rocket, a3 Lazy Load |
| Use Scalable Vector Graphics [SVG] | Ideal for logos and icons as they are lightweight and scale without losing quality | SVG Support Plugin |
| Responsive Images | Ensures that the right image size is loaded based on device screen size, improving performance on mobile | Native WordPress Responsive Images |
Additional Image Optimization Tips:
- Use a Content Delivery Network [CDN] to serve images from multiple locations worldwide.
- Avoid using too many large background images; instead, use CSS effects where possible.
- Enable lossless or lossy compression depending on how much quality retention is required.
- Run periodic image audits to remove unnecessary or outdated images that take up space.
By following these image optimization strategies, you can greatly enhance your WordPress website’s loading time, ensuring a faster and more engaging browsing experience for your users.
3. Enable Browser Caching
Browser caching stores website files on a visitor’s device, reducing load times for returning users by eliminating the need to reload static assets repeatedly. This significantly improves page speed, particularly for users who frequently visit your site. Implementing browser caching not only enhances user experience but also reduces server load, leading to better overall performance.
How to Enable Browser Caching
Modify the .htaccess File (For Apache Servers): Add the following code to enable caching for specific file types:
<IfModule mod_expires.c>
ExpiresActive On
ExpiresByType text/html “access plus 1 day”
ExpiresByType image/gif “access plus 1 month”
ExpiresByType image/jpeg “access plus 1 month”
ExpiresByType image/png “access plus 1 month”
ExpiresByType text/css “access plus 1 week”
ExpiresByType application/javascript “access plus 1 week”
1. </IfModule>
2. Leverage WordPress Caching Plugins: Using a caching plugin simplifies the process by handling caching settings automatically.
Best Caching Plugins:
| Plugin | Features | Pricing |
| WP Rocket | Premium all-in-one caching with CDN integration, lazy loading, and database optimization | Paid |
| W3 Total Cache | Highly customizable with support for CDN, minification, and database caching | Free/Paid |
| LiteSpeed Cache | Optimized for LiteSpeed servers, featuring advanced caching, image optimization, and lazy loading | Free |
| WP Super Cache | Easy-to-use plugin for caching static HTML files, suitable for beginners | Free |
By leveraging browser caching, you can drastically reduce page load times and provide a seamless browsing experience for your visitors.
4. Minify CSS, JavaScript, and HTML

Minification removes unnecessary spaces, line breaks, and comments from code, reducing file sizes and improving speed. Large CSS and JavaScript files slow down website performance, especially when multiple requests are made to load them. Minification, along with file combination, helps reduce HTTP requests and speeds up website rendering. Properly minified resources allow browsers to fetch and display web pages faster, enhancing user experience.
How to Minify CSS, JavaScript, and HTML
- Use Minification Plugins: Plugins like Autoptimize and Fast Velocity Minify automatically minify and combine CSS, JS, and HTML files.
- Manually Minify Code: Developers can use online tools like CSSNano and UglifyJS to remove unnecessary characters from code manually.
- Enable Minification in CDN Settings: Many CDN services like Cloudflare provide automatic minification settings.
- Avoid Over-Minification: Sometimes, aggressive minification can break website functionality. Always test after minifying.
Best Minification Plugins:
| Plugin | Features | Pricing |
| Autoptimize | Minifies CSS, JS, and HTML; integrates with caching plugins | Free/Paid |
| Fast Velocity Minify | Advanced minification, file combination, async loading | Free |
| WP Super Minify | Lightweight minification for basic use | Free |
| Asset CleanUp | Allows selective minification of scripts and styles | Free/Paid |
By implementing minification properly, WordPress websites can achieve significant performance gains while maintaining smooth functionality.
5. Use a Content Delivery Network [CDN]
A Content Delivery Network [CDN] helps distribute your website content across multiple servers worldwide, ensuring faster access to users regardless of their location. Instead of relying on a single server to handle all requests, a CDN caches and delivers content from strategically placed servers, reducing latency and improving load times. This is especially beneficial for websites with a global audience, as visitors can access content from the server closest to them.
Benefits of Using a CDN:
- Improved Website Speed: Reduces the time needed to load content by serving files from the nearest data center.
- Better Reliability: Distributes traffic across multiple servers, reducing downtime and overload issues.
- Enhanced Security: Protects against DDoS attacks, data breaches, and malicious traffic.
- Lower Bandwidth Costs: Optimizes content delivery, reducing server load and hosting expenses.
| CDN Provider | Features | Best For |
| Cloudflare | Free & paid plans, DDoS protection, automatic caching, SSL support | All websites |
| BunnyCDN | Affordable pricing, fast global network, customizable caching rules | Small to medium sites |
| StackPath | High-end security, real-time analytics, excellent scalability | Large businesses & enterprises |
| Amazon CloudFront | Deep AWS integration, pay-as-you-go pricing, great for media streaming | Developers & high-traffic websites |
By implementing a CDN, WordPress users can significantly improve page loading times, enhance security, and provide a smoother browsing experience for visitors worldwide.
6. Reduce HTTP Requests
Too many HTTP requests [loading scripts, images, and stylesheets] slow down a website, leading to longer load times and poor performance. Each request made to the server adds to the overall page load time, which can negatively impact user experience and SEO rankings. Minimizing the number of requests by optimizing resources and streamlining assets can dramatically improve website speed.
Common Sources of HTTP Requests
| Element | Impact on Load Time | Optimization Solution |
| CSS & JavaScript Files | Increase number of HTTP requests | Combine & minify files |
| Images | Large files slow down page speed | Use sprites, compression & lazy loading |
| Third-Party Scripts | External scripts [e.g., ads, social widgets] increase requests | Limit usage & load asynchronously |
| Fonts | Multiple font styles add extra requests | Use system fonts or self-hosted fonts |
How to Reduce HTTP Requests:
- Combine CSS and JavaScript files to minimize redundant requests.
- Use CSS sprites to consolidate multiple images into a single file, reducing requests.
- Limit third-party scripts such as ad networks, tracking pixels, and embedded widgets.
- Use asynchronous or deferred loading for non-essential scripts to improve page rendering.
- Enable lazy loading for images and videos to load only when necessary.
- Reduce the number of custom web fonts or use system fonts to eliminate additional HTTP requests.
- Utilize a CDN [Content Delivery Network] to offload requests and serve content from distributed locations.
By following these steps, website owners can significantly reduce the number of HTTP requests, leading to a faster and more efficient WordPress website.
7. Optimize WordPress Database
WordPress stores unnecessary data such as post revisions, trashed items, spam comments, expired transients, and unused database tables, which accumulate over time and slow down your website. Regular database optimization removes this clutter, improves query efficiency, and enhances overall site performance.
How to Optimize the WordPress Database:
- Delete Post Revisions & Auto-Saved Drafts: WordPress stores multiple revisions of posts, which take up space unnecessarily.
- Remove Spam & Trashed Comments: Regularly clean up spam and deleted comments to keep the database lean.
- Optimize Database Tables: Over time, database tables can become fragmented. Running an optimization query can improve speed.
- Clear Expired Transients: Transients are temporary stored data that, if left unchecked, can slow down performance.
- Use Scheduled Cleanups: Set up an automatic cleanup schedule to maintain an optimized database without manual intervention.
Best Database Optimization Plugins:
| Plugin | Features | Pricing |
| WP-Optimize | Cleans up database, compresses images, and caches pages | Free/Paid |
| WP-Sweep | Deletes orphaned data, revisions, and transients for better efficiency | Free |
| Advanced Database Cleaner | Deep database optimization, selective table cleanup | Free/Paid |
By regularly optimizing your WordPress database, you can reduce load times, improve server response, and ensure a smoother browsing experience for your visitors.
8. Implement Lazy Loading for Images and Videos

Lazy loading prevents images and videos from loading until a user scrolls to them, significantly improving the initial page load time. This technique reduces the number of resources loaded initially, ensuring that only visible content is rendered first. As a result, lazy loading enhances user experience, reduces bandwidth consumption, and improves performance on slower connections, especially on mobile devices.
Benefits of Lazy Loading:
- Faster Page Load Times: Loads only the necessary images and videos, reducing initial page load delays.
- Reduced Bandwidth Usage: Saves data for users by loading media only when needed.
- Better SEO Performance: Improves Core Web Vitals, such as Largest Contentful Paint [LCP] and Cumulative Layout Shift [CLS].
- Enhanced Mobile Experience: Helps optimize loading for users with slower internet connections.
How to Implement Lazy Loading in WordPress:
- Use a Plugin: Install and activate a lazy loading plugin for automatic implementation.
- Enable Native Lazy Loading: WordPress 5.5+ has built-in lazy loading for images. Ensure this is enabled.
- Manually Implement Lazy Loading: Modify image and video HTML tags by adding loading=”lazy” attributes.
Best Lazy Loading Plugins:
| Plugin | Features | Pricing |
| Lazy Load by WP Rocket | Optimized lazy loading for images, iframes, and videos | Free/Paid |
| a3 Lazy Load | Mobile-friendly, customizable lazy loading | Free |
| Smush Lazy Load | Includes image compression and lazy loading | Free/Paid |
| Lazy Loader | Lightweight, supports all media elements | Free |
By implementing lazy loading, you can significantly enhance page performance while ensuring a smooth browsing experience for users.
9. Disable Unnecessary Plugins and Themes
Having too many plugins slows down a website by increasing the number of scripts and database queries, leading to longer loading times and reduced performance. Many plugins load unnecessary assets, such as stylesheets and JavaScript files, which can further bloat your website. It’s essential to audit, deactivate, and remove plugins that are not in use while ensuring the active ones are optimized.
How Plugins Impact Website Speed:
| Issue | Effect on Speed | Solution |
| Excessive Plugin Usage | Increases HTTP requests and server load | Remove unnecessary plugins |
| Poorly Coded Plugins | Slows down database queries | Choose well-coded alternatives |
| Heavy Theme Features | Adds extra CSS/JavaScript files | Opt for lightweight themes |
| Outdated Plugins | Security vulnerabilities & performance issues | Keep plugins updated |
Steps to Optimize Plugins & Themes:
- Audit Plugins: Regularly check and remove inactive or redundant plugins.
- Replace Heavy Plugins: Use lightweight alternatives to reduce resource usage.
- Use Multi-Function Plugins: Choose plugins that perform multiple tasks instead of installing separate ones.
- Optimize Themes: Use well-coded, performance-optimized themes like Astra, GeneratePress, or OceanWP.
- Disable Unused Features: Many themes come with extra features you may not need—disable them to improve performance.
By managing plugins and themes efficiently, you can enhance WordPress website loading time, ensuring faster and more responsive performance.
10. Enable GZIP Compression
GZIP compression reduces the size of web files before sending them to users, improving loading speed by compressing text-based resources such as HTML, CSS, and JavaScript files. This significantly decreases the amount of data transferred between the server and the user’s browser, leading to faster page loads and improved website performance. Studies have shown that enabling GZIP compression can reduce file sizes by up to 70%, making it an essential optimization technique for WordPress websites.
Benefits of GZIP Compression:
- Faster Website Loading Times: Compresses files before transmission, reducing latency.
- Reduced Bandwidth Usage: Saves server resources and improves efficiency.
- Improved SEO Rankings: Faster websites rank better on search engines.
- Enhanced User Experience: Visitors experience quicker page loads, reducing bounce rates.
How to Enable GZIP Compression:
- Use a WordPress Plugin: WP Rocket or Enable GZIP Compression Plugin can automate the process.
- Enable GZIP via .htaccess File [For Apache Servers]: Add the following code to compress files:
<IfModule mod_deflate.c>
AddOutputFilterByType DEFLATE text/html text/plain text/xml
AddOutputFilterByType DEFLATE text/css text/javascript
AddOutputFilterByType DEFLATE application/javascript application/json
AddOutputFilterByType DEFLATE application/xhtml+xml application/xml
</IfModule>
1. Enable GZIP Compression via Nginx Configuration – Add this to your Nginx config file:
gzip on;
gzip_types text/plain text/css application/json application/javascript;
gzip_min_length 1000;
gzip_comp_level 5;
2. Check if GZIP Compression is Enabled – Use tools like GZIP Compression Test or GTmetrix to verify.
<IfModule mod_deflate.c>
AddOutputFilterByType DEFLATE text/html text/plain text/xml
AddOutputFilterByType DEFLATE text/css text/javascript
</IfModule>
How to Test and Monitor Website Spee

Monitoring your website’s loading time is crucial for optimizing speed and user experience. Various tools provide detailed insights into what slows your site down and offer actionable recommendations for improvements.
| Tool | Features | Pricing |
| Google PageSpeed Insights | Measures mobile & desktop speed, provides optimization suggestions, Core Web Vitals analysis | Free |
| GTmetrix | Provides detailed load time reports, waterfall analysis, Lighthouse integration, historical data tracking | Free/Paid |
| Pingdom Speed Test | Checks page size & requests, monitors uptime, tracks performance over time | Free/Paid |
| WebPageTest | Advanced performance analysis, multiple test locations, video playback of load process | Free |
| Lighthouse [Chrome DevTools] | Open-source, audits website performance, accessibility, SEO, and best practices | Free |
Interpreting Speed Test Results
Understanding key performance metrics from speed tests is essential for effective optimization. Here’s what the most important metrics mean:
| Metric | Meaning | Optimization Strategies |
| FCP [First Contentful Paint] | Time taken for the first piece of content [text/image] to appear | Optimize CSS, use lazy loading, enable caching |
| LCP [Largest Contentful Paint] | Time taken to load the largest visible content [main image, hero section, etc.] | Use CDN, optimize images, reduce render-blocking resources |
| TTFB [Time to First Byte] | Time taken for the server to respond to the request | Use faster hosting, enable caching, optimize database |
| CLS [Cumulative Layout Shift] | Measures page stability by detecting layout shifts during loading | Use proper dimensions for images, preload fonts, avoid inserting dynamic ads above content |
| Total Blocking Time [TBT] | Measures time where the page is unresponsive due to JavaScript execution | Minimize JavaScript, defer non-essential scripts, use lightweight plugins |
By using these tools and understanding these metrics, website owners can identify bottlenecks and apply targeted optimizations to improve WordPress website loading time significantly.
Takeaways
By implementing these 10 proven ways to improve WordPress website loading time, you ensure better user experience, improved SEO rankings, and increased conversions. Optimize today and see the difference! Have more tips? Share in the comments!