The way you appear on screen is the digital equivalent of a firm handshake. In a world where remote work has become the standard, your video feed is often the only visual context colleagues and clients have of you. Yet, so many professionals sabotage their credibility with grainy shadows, harsh silhouettes, or distracting glare. You don’t need a dedicated studio or expensive gear to fix this. You just need to understand light.
Whether you are battling the intense backlight of a high-rise window or trying to brighten up a dim home office, mastering video call lighting hacks is the quickest way to elevate your professional image. Good lighting isn’t vanity; it’s about communication.
When people can see your facial expressions clearly, they trust you more. This guide covers everything from managing “Burj-view” sunlight to achieving that soft, professional “Zoom glow” using simple tools you likely already have.
Key Takeaways
| Category | Quick Win | Why It Works |
| Backlight | The 45° Pivot | Moves harsh light from behind you to your side, adding depth. |
| Front Light | Monitor “Flash” | Use your screen as a giant, soft light source for free. |
| Color | Match Temps | Syncs your lights with your environment (Daylight vs. Warm White). |
| Setup | Eye-Level Cam | Removes unflattering chin shadows and improves eye contact. |
The Psychology of Light: Why It Matters
Before diving into specific video call lighting hacks, it is crucial to understand the “why.” This is not about vanity; it is about professional impact. Subconsciously, humans equate clarity and brightness with competence and energy. If your team cannot see your eyes due to heavy shadows or grainy video, you lose a critical layer of non-verbal connection and trust.
Many professionals mistakenly upgrade to expensive 4K webcams to fix their video feed, only to be disappointed. The golden rule of video conferencing is simple: A cheap webcam in great light always looks better than a professional camera in the dark.
You do not need a film crew to solve this. Whether you are battling blinding window glare or a dim home office, the following strategies are designed to help you control your environment so that your expertise—not your lighting—takes center stage.
Part 1: Taming the “Burj-View” (Managing Intense Backlight)
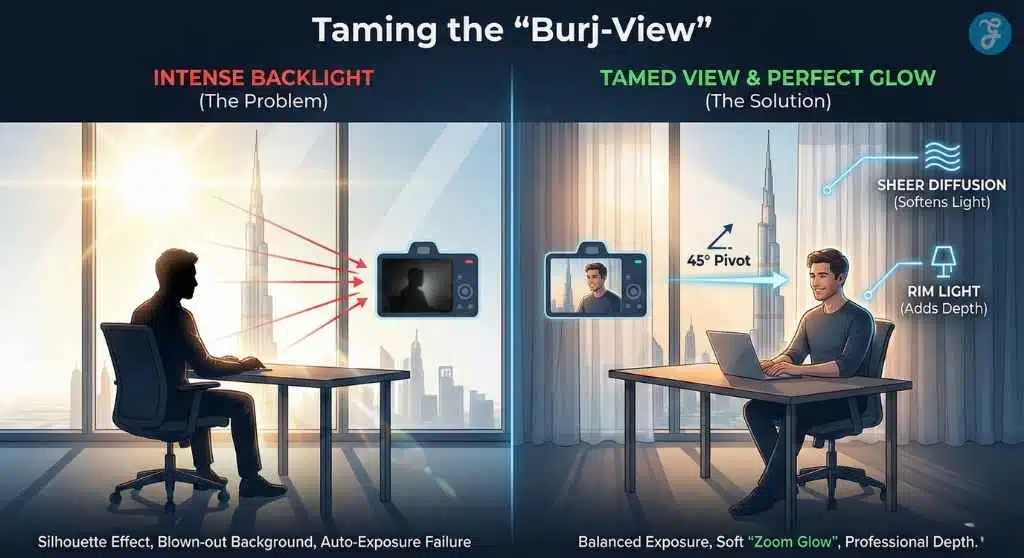
We call it the “Burj-View Problem.” You have a stunning view behind you—perhaps a cityscape or a lush garden—that you want to show off. But cameras have a limited dynamic range. They can expose for the bright window or your face, but rarely both. If the camera exposes for the window, you become a witness-protection silhouette. If it exposes for you, the window becomes a blinding white explosion. Here is how to tame the beast.
1. The 45-Degree Pivot
The most common mistake people make is sitting with their back directly parallel to a window. This is the worst-case scenario for video call lighting hacks because the contrast is unmanageable.
Instead of facing the wall or the window directly, rotate your desk setup by 45 degrees.
-
The Fix: Position yourself so the window is to your side, slightly ahead of you.
-
The Result: You keep a slice of that beautiful view in the background, but the sunlight now wraps around your face (creating “modeling”) rather than blasting the back of your head. This adds three-dimensional shape to your face, making you look more human and less 2D.
2. The Sheer Diffusion Trick
Hard light is the enemy of video. Direct sunlight creates hard shadows under your eyes and nose and highlights skin texture imperfections. You want soft light.
-
The Hack: If you must sit near a window, install sheer white curtains. If you are in a temporary setup (like an Airbnb or hotel), tape a white shower curtain liner or even parchment paper over the glass.
-
Why It Works: This acts as a massive “softbox.” It scatters the light rays, turning a small, harsh sunbeam into a wall of soft, glowing light that wraps gently around your features. This is the secret to that “beauty filter” look without using software.
3. The “Manual Exposure” Lock
Webcams are smart, but they get confused easily. When you have a bright background, the auto-exposure sensor panics and darkens the whole image to “save” the bright window, leaving you in the dark.
Most modern webcams (Logitech, Anker, Insta360) and phone apps (Camo, EpocCam) allow you to turn off “Auto Exposure.”
-
Step-by-Step:
-
Open your webcam settings software.
-
Find the Exposure slider and uncheck “Auto.”
-
Slide the exposure up until your face is correctly lit.
-
Note: The window behind you will likely turn completely white (“blow out”). That is acceptable. It is better to have a white background and a visible face than a perfect background and an invisible face.
-
4. Separation Lighting (The Rim Light)
Sometimes, even with good front lighting, you look like a cardboard cutout stuck onto a background. You blend into your dark chair or dark wall. To look professional, you need separation.
-
The Setup: Place a small, focused lamp or LED strip behind you, aiming at the back of your head or shoulders. It should be out of the camera’s view.
-
The Effect: This creates a subtle “halo” of light on your hair and shoulders. In the film industry, this is called a “rim light” or “kicker.” It visually “pops” you out from the background, adding immediate production value to your call.
Part 2: Achieving the Glow (Front Lighting Mastery)

Once you have managed the background, the next priority in our video call lighting hacks arsenal is the “Key Light”—the main source of illumination on your face. The goal here is soft, even coverage that minimizes imperfections.
5. The “North Star” Position
Where should your main light go? Not on the side (too dramatic), and not below you (too scary).
-
The Rule: Place your main light source directly behind your webcam, raised slightly above your eye level, and angled down at about 15-20 degrees.
-
Why: This mimics the angle of the sun or indoor ceiling lighting. It pushes shadows down below your chin and nose, hiding them from the camera. If you wear glasses, raising the light is critical (see Hack #9).
6. The Monitor “Flash” Hack
What if you have zero budget and no lamps? You are staring at a massive light source right now: your monitor.
-
The Hack:
-
Open a blank Word document, a specialized “screen light” website, or a white image file.
-
Make it full screen.
-
Crank your monitor brightness to 100%.
-
-
The Result: This turns your screen into a large, soft, cool-white panel light. It is one of the most effective free video call lighting hacks available. It provides a surprisingly flattering, shadow-free fill light that is perfect for quick Zoom calls.
7. Color Temperature Matching
Have you ever looked orange while your background looked blue? Or looked like a ghost, while your room looked yellow? This is a “White Balance” mismatch. Light creates color, measured in Kelvin (K).
| Light Source | Kelvin Value | Best Used When… |
| Candle/Warm Lamp | 2700K – 3200K | It’s night, or your room is lit by table lamps. |
| Neutral White | 4000K – 4500K | You are in an office with overhead fluorescent tubes. |
| Daylight/Window | 5600K – 6500K | It is daytime, and you have natural window light coming in. |
-
The Fix: If you are sitting near a window (blue daylight), set your smart bulbs or ring light to “Cool White” (5600K). If you are in a windowless room with warm lamps, set your light to “Warm White” (3200K). Never mix them, or your skin tone will look muddy.
8. The Bounce Card (DIY Fill)
If your light source is a window on your right, the left side of your face will be in deep shadow. This “contrast ratio” can be too high for webcams, making the shadow side look like a black void.
-
The Hack: You don’t need a second light. Place a white piece of foam board, a white pillow, or even a sheet of printer paper on the shadowed side of your desk, just out of frame.
-
The Physics: The light from the window hits your face, but it also hits the white card. The card bounces that light back onto the dark side of your face. It lifts the shadows naturally without requiring electricity.
9. The Glasses Glare Fix
Glasses wearers struggle with ring lights reflecting as two white circles in their lenses. This completely breaks eye contact and looks distracting.
-
The Geometry Solution:
-
Go Higher: Move your light source significantly higher than your head.
-
Angle Down: Tilt the light down steeply to point at your face.
-
The Result: Angle of incidence equals angle of reflection. Because the light is coming from high up, the reflection bounces off your glasses and goes down toward your keyboard, effectively missing the camera lens.
-
Part 3: Advanced Hardware & Software Secrets
In this final section, we move beyond lamps and windows to the subtle adjustments that separate the amateurs from the pros. These video call lighting hacks focus on optics, software, and environment.
10. Apple’s “Studio Light” & Portrait Mode
If you are using a Mac (macOS Ventura or later) or a Windows machine with NVIDIA Broadcast, software can now emulate physical lighting.
-
Studio Light: This feature uses AI to identify your face and artificially brighten it while slightly dimming the background. It effectively simulates a ring light.
-
Portrait Mode: While known for blurring backgrounds, the depth information helps the camera separate you from the chaos behind you.
-
Pro Tip: Use these intensity sliders sparingly. If you crank “Studio Light” to 100%, you will look artificial. Aim for 30-40% to subtly lift facial brightness.
11. The “Chin Shadow” Eraser
Lighting isn’t just about brightness; it’s about angles. If your laptop is on your desk, the camera is looking up your nose. This casts unflattering shadows on your neck and chin, especially if you have overhead lights (ceiling cans).
-
The Hack: Stack your laptop on a pile of books or use a stand until the webcam lens is perfectly level with your hairline. Then, tilt the laptop screen slightly forward.
-
The Effect: This forces you to look slightly up, opening your eyes wider. More importantly, it allows the light to hit your face fully, eliminating the “double chin” shadow caused by downward camera angles.
12. Contrast Clothing Strategy
Your camera’s auto-exposure is easily tricked by your clothes.
-
The Issue: If you wear a pure white shirt, the camera sees a giant bright object and darkens the whole image (making your face dark). If you wear pure black, it brightens the image (making your face washed out/grainy).
-
The Hack: Wear mid-tone solid colors. Royal blue, emerald green, burgundy, or charcoal gray are safe bets. These colors are close to “18% gray” (the middle of the exposure spectrum), helping the camera expose your skin tone accurately.
13. The “Lampshade” Softener (Wall Bouncing)
If all you have is a harsh, focused desk lamp that blinds you when you point it at your face, turn it around.
-
The Technique: Point the lamp at the white wall facing you (behind your monitor).
-
Why: The wall becomes the light source. The light hits the wall and bounces back as a massive, diffused glow. A larger light source equals softer shadows. This is arguably the best way to get studio-quality softness from a $10 lamp.
14. The “Microfiber” Glow
This is the most overlooked of all video call lighting hacks. Over time, your webcam lens collects dust and oil. When light hits a dirty lens, it smears, creating a hazy, milky look that ruins contrast and creates “light streaks” from lamps.
-
The Fix: Before every important call, wipe your lens with a microfiber cloth.
-
The Result: The “haze” disappears, blacks become deeper, and the lighting looks intentional rather than accidental. It instantly makes your video look 4K crisp.
Troubleshooting: Lighting Strategies for Tricky Rooms
Not every workspace is a standard bedroom or office. Different environments present unique video call lighting challenges. Identifying your specific “room type” is the first step to solving your exposure problems.
Scenario A: The “Dungeon” (Windowless Basement or Interior Room)
This is common for home offices converted from closets or basements. The biggest issue here is not glare, but “muddy” video caused by low light and yellow overhead bulbs.
-
The Fix: You must create your own “sun.” Relying on a single overhead ceiling light creates “raccoon eyes” (dark shadows in eye sockets).
-
The Strategy: Use the “Wall Bounce” technique (Hack #13) with Daylight (5600K) LED bulbs. By bouncing a strong, cool-white light off a wall in front of you, you simulate a large window. Adding a mirror on the back wall can also reflect this light, artificially doubling the brightness and adding depth to a cramped space.
Scenario B: The “Aquarium” (Sunroom or Glass-Walled Office)
While natural light is great, too much of it shifts constantly as clouds move, causing your webcam’s auto-exposure to flicker distractingly.
-
The Fix: You need “Negative Fill.”
-
The Strategy: Instead of adding light, you need to subtract it. If light is bouncing off every white wall and glass surface, you look washed out. Hang a dark grey or black cloth on the wall, specifically behind the camera. This absorbs excess scattered light and brings contrast back to your face, stopping you from looking like a glowing ghost.
Scenario C: The “Mixed Reality” (Open Plan Office)
If you are working in a hybrid space with overhead fluorescent strips and distant windows, your camera will struggle with the color mix (greenish overheads vs. blueish windows).
-
The Fix: Overpower the bad light.
-
The Strategy: You cannot change the office lights or the sun. You must introduce a key light (like a portable LED panel) close to your face that is brighter than the ambient light. Set this light to match the dominant source (usually daylight if you are near a window). By making your face the brightest thing in the frame, the camera focuses on you and ignores the weird color casts of the background.
On-the-Go: Mastering Video Call Lighting on Mobile
We often assume video calls happen at a desk, but what about when you are dialing in from a coffee shop, a hotel lobby, or a parked car? Mobile lenses are smaller and struggle even more in low light.
1. The “Window Slice” Technique
In a public space, you rarely have control over the lights.
-
The Hack: Find a window and stand perpendicular to it (shoulder to the glass). Turn your body slightly toward the window until the light fills your face. Never sit with the window behind you in a coffee shop; phone cameras have poor dynamic range and will turn you into a complete silhouette instantly.
2. The Pop-Socket Stability
Lighting looks worse when the camera is shaking. The sensor struggles to capture light information when the image is blurry from motion.
-
The Hack: If you don’t have a tripod, lean your phone against a sturdy object (a napkin holder, a laptop screen). Stable footage allows the camera’s sensor to absorb light more efficiently, reducing the “grainy” look common on mobile calls.
3. The “Selfie Flash” Assist
Most phones won’t let you turn on the rear flashlight while using the front selfie camera.
-
The Hack: If you are in a dim Uber or a dark hotel hallway, increase your screen brightness to maximum manually before the call starts. Just like the “Monitor Flash” hack for desktops, a max-brightness phone screen acts as a decent fill light for close-up mobile shots.
Frequently Asked Common Video Lighting Questions
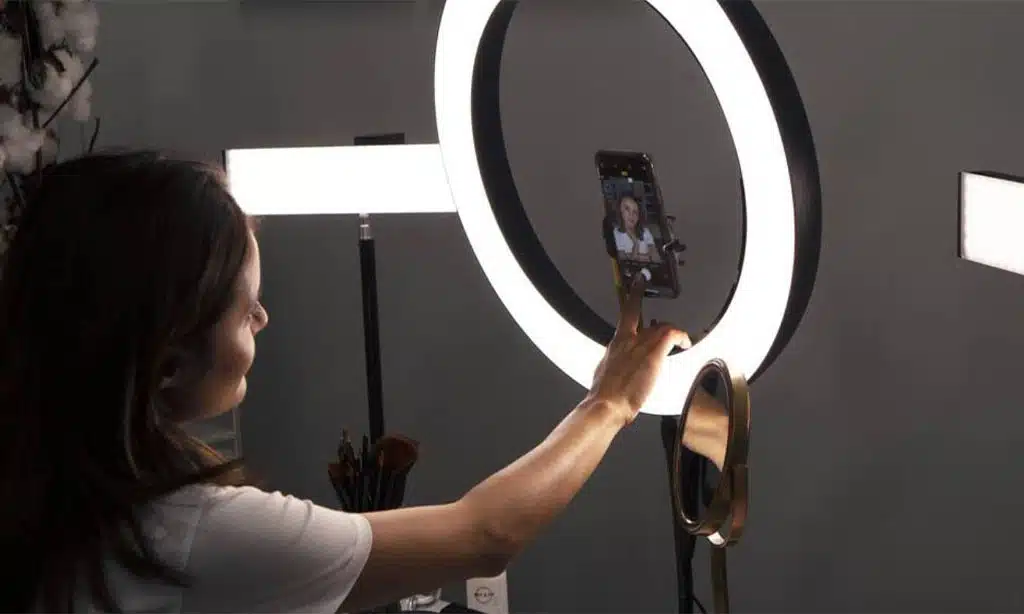
1. Do I really need a ring light for good video calls?
No. While ring lights are popular, they can actually be harmful if used incorrectly (causing eye strain and flat lighting). A standard desk lamp bounced off a wall (Hack #13) or a window with sheer curtains (Hack #2) often creates a more natural, professional look than a cheap ring light.
2. Why do I look grainy on Zoom even with the lights on?
Grain (digital noise) happens when the camera sensor isn’t getting enough light. Even if your room feels bright to your eyes, it might be dark to a camera. Try moving your light source closer to your face (inverse square law: halving the distance increases brightness by 4x) or using the “Monitor Flash” hack to add more frontal light.
3. What is the best color shirt to wear for video lighting?
Avoid high-contrast patterns (stripes/checks) which cause “moiré” (shimmering lines). Avoid pure white or jet black. Stick to solid, muted jewel tones like navy blue, olive green, or teal. These colors help the camera balance exposure and make skin tones look healthy.
4. How do I stop my glasses from reflecting my screen?
Screen reflection is different from light reflection. To fix screen glare, turn down your monitor brightness slightly and use “Dark Mode” on your apps. This reduces the amount of white light blasting from your screen into your lenses.
5. Can I mix daylight and lamp light?
Ideally, no. Mixing color temperatures (blue daylight + orange tungsten) confuses the camera’s white balance, often leaving you looking either overly blue or overly orange. If you have a window open, turn off your warm room lights. If it’s night, close the blinds and use only your indoor lights.
The Bottom Line: Lighting Is Your New Handshake
Perfecting your video presence doesn’t require a degree in cinematography. It simply requires an understanding of where light comes from and how it shapes your face. By implementing even just two or three of these video call lighting hacks—perhaps the “45-Degree Pivot” and the “Chin Shadow Eraser”—you can transform your digital appearance from gloomy to glowing.
Remember, in a remote world, your video feed is your workspace. Keeping it bright, clear, and professional tells your team that you are present, prepared, and ready to work. Start with what you have, experiment with angles, and let the light do the work for you.