Lash sealers are indispensable tools in the beauty arsenal for maintaining and enhancing the longevity of eyelash extensions or mascara applications.
Beauty trends and social media influence drive the increasing demand for eyelash extensions and sealers. This significant factor contributes to the growth of the eyelash market and the ultimate satisfaction of most women with various eyelash needs.
Delve into this detailed guide, where you will discover the countless reasons for using a lash sealer and a step-by-step process for its effective application.
Four Influential Reasons Why You Should Use a Lash Sealer
Nowadays, most women prefer to buy and use lash sealers for various reasons. As a beauty-conscious woman, if you are uncertain about the reasons to use it, consider the benefits.
1. Extended Wear Time
Lash sealers have the power to form a robust protective barrier around your eyelashes. Using the best one can significantly resist the effects of moisture and environmental factors like humidity and pollution.
This protective barrier can help ensure that your eyelash extensions maintain their intended look in the long term. Its application will reduce the need for frequent touch-ups.
2. Water and Oil Resistance
With the application of lash sealer, you can prevent the breakdown of the lash bond to extend your DIY eyelash extension’s lifespan. During humid climates or for individuals with oily skin, using a lash sealer is of great significance.
It will help your lashes maintain a fresh, well-defined look throughout wear. Hence, you won’t need to worry about lashes falling out in 1-2 days, giving you a sense of control over your look.
3. Enhanced Shine and Color
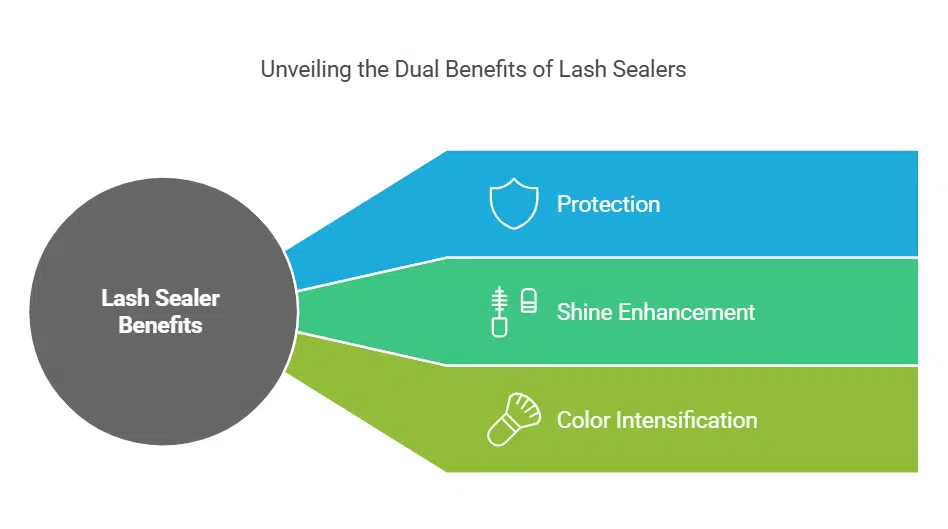
A top-quality lash sealer can protect your eyes and impart a stunning, lustrous shine to your lashes. By applying it, you can enhance your eyes’ overall visual appeal.
What’s more, several lash sealer formulations are explicitly designed to intensify the color of the mascara or extensions. Thus, its usage can help create a more vibrant appearance that everyone will adore.
4. Prevention of Clumping and Flaking
Lash sealers, if brought from a trusted eyelash brand, are effective in terms of maintaining the sleekness of your lashes. It reduces the risk of clumping and flaking that can happen as a result of using traditional mascara.
This ensures that both your natural lashes and extensions will remain beautifully defined and separated. Therefore, you will achieve a more polished and attractive look.
Step-by-Step Procedure On How to Apply a Lash Sealer
If it’s your first time applying a lash sealer, check out some of the most crucial steps you should take.
1. Prepare Your Lashes
To start, take the time to impeccably clean, dry lashes. Always make use of a gentle cleanser or an oil-free makeup remover to eliminate any traces of makeup, oil, and impurities. This early preparation matters most. So you can ensure optimal adhesion to the lash sealer.
2. Choose the Right Sealer
Next, you need to explore eyelash brands to choose a lash sealer tailored to your specific lash type—no matter extensions or natural lashes. Make the right formulation choice that best aligns with your desired finish.
Be on the lookout for water-resistant or waterproof options if you expect to be in particularly humid or sweat-inducing situations. Availing any of the suitable options will make a world of difference in terms of your eyes’ look and attractiveness.
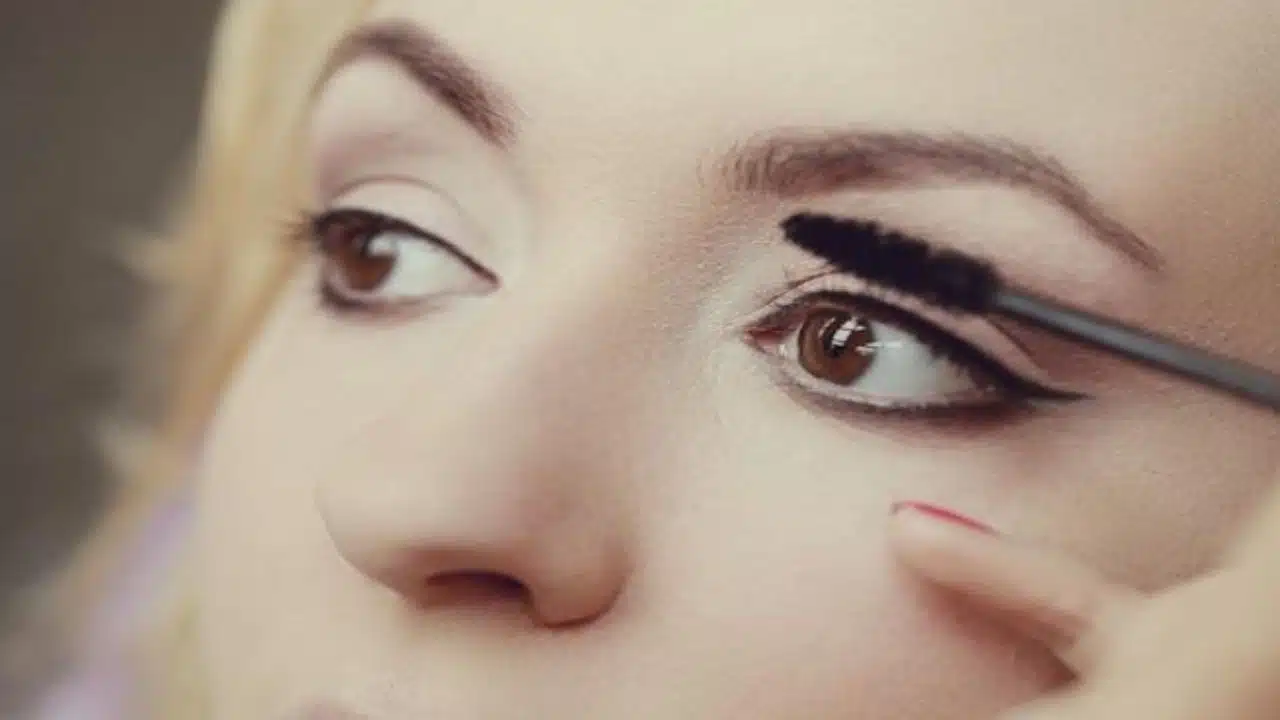
3. Application of the Sealer
– For Extensions – By using the provided applicator wand, you can apply the sealer by starting at the base of your lash extensions. Then, work your way to the tips. Make sure that you coat each lash evenly. It’s strongly advisable to take additional care to prevent the product from directly on the eyelids or surrounding skin. Otherwise, it can result in irritation in and around your eyes.
– For Mascara – if you are using the sealer over mascara, prioritize applying your mascara first and thoroughly. After the application, let it dry completely. Once dried, you need to apply the lash sealer using the same technique—from the base to the tips of the lashes. If you follow this technique, you can ensure an even distribution, refining your eyes’ overall looks.
4. Allow It to Dry
Now, you need to let the lash sealer dry completely for a few moments before you add any additional products or touch your lashes. This simple yet effective step is prudent when it comes to achieving the best seal. Moreover, it will help you prevent disruption of the product you applied.
5. Consider Maintenance
To gain optimal results, you can reapply the sealer every few days. It’s especially essential if you start to notice your eyelashes losing their vibrancy or shape. Consider incorporating this crucial step into your lash enhancement routine. Sticking to this routine can significantly contribute to prolonging the life and appearance of your eyelashes.