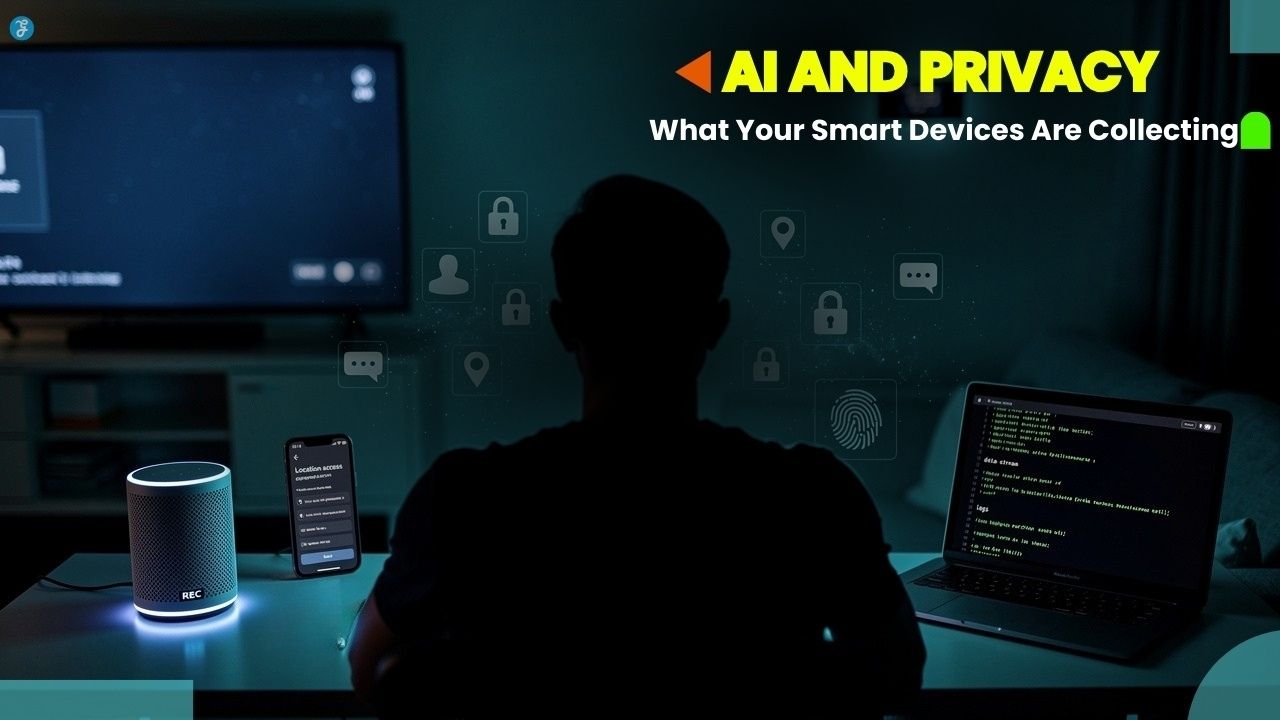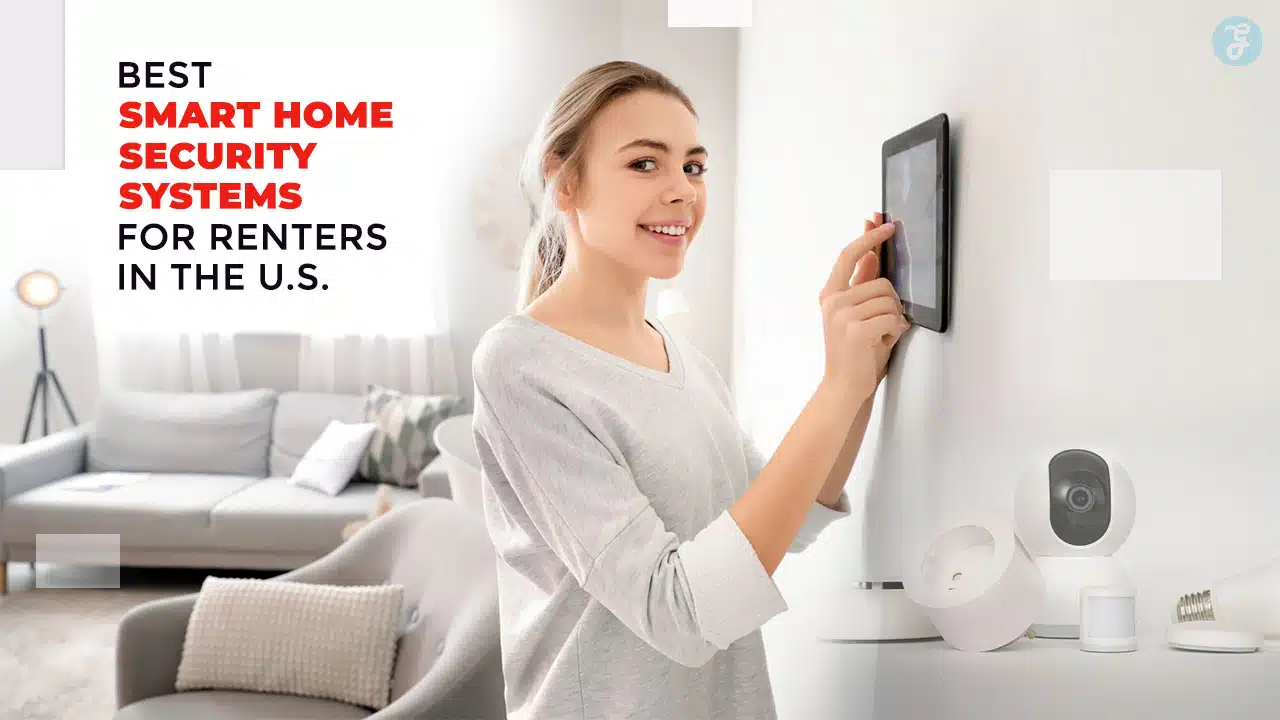
Renters face a weird security problem. You want real protection. But you cannot drill everywhere. You may not control locks or lighting. You may also move often. That is why the best smart home security systems for renters are built around flexibility, portability, and simple installation.
A good renter setup does not need to be complicated. It needs to cover the basics first. You want to know when a door opens. You want to know when motion happens near entry points. You want smart alerts that you can trust. You also want equipment you can remove when you leave.
This guide is designed for U.S. renters in apartments, condos, and rental houses. It focuses on DIY systems. It includes alarm kits and camera-forward setups. It includes options with self-monitoring and professional monitoring. It also includes privacy tips that matter in shared buildings.
You will see clear pros and cons. You will see practical “who it’s for” advice. You will also see cost breakdown guidance so you can avoid surprise fees. The goal is to help you buy once and feel confident.
| What you’ll get in this guide | Why it matters |
| Renter-friendly system picks | Avoid drilling and lease issues |
| Clear monitoring choices | Pay only for what you need |
| Apartment placement tips | Reduce false alerts and blind spots |
| Cost and plan clarity | Avoid hidden monthly costs |
| Privacy and neighbor-friendly setup | Stay respectful and safe |
What Renters Should Look For in a Smart Home Security System
Renters need a different checklist than homeowners. You are optimizing for moveability. You are optimizing for low damage. You are also optimizing for quick setup. You want strong basics, not fancy features you never use.
Think of security in layers. First layer is deterrence. Second layer is detection. Third layer is response. You can get all three without drilling. You can also build a strong setup with a small kit. The trick is to match devices to your layout.
Below are the most important features for renters. Use this section like a buying filter. If a system fails the basics, skip it. If it nails the basics, compare value and app quality.
Must-haves for renters
A renter system should feel like a “carry-on” kit. It should pop in and out easily. It should work with rental doors and windows. It should not require major electrical work. It should also let you scale up over time.
No-drill installation
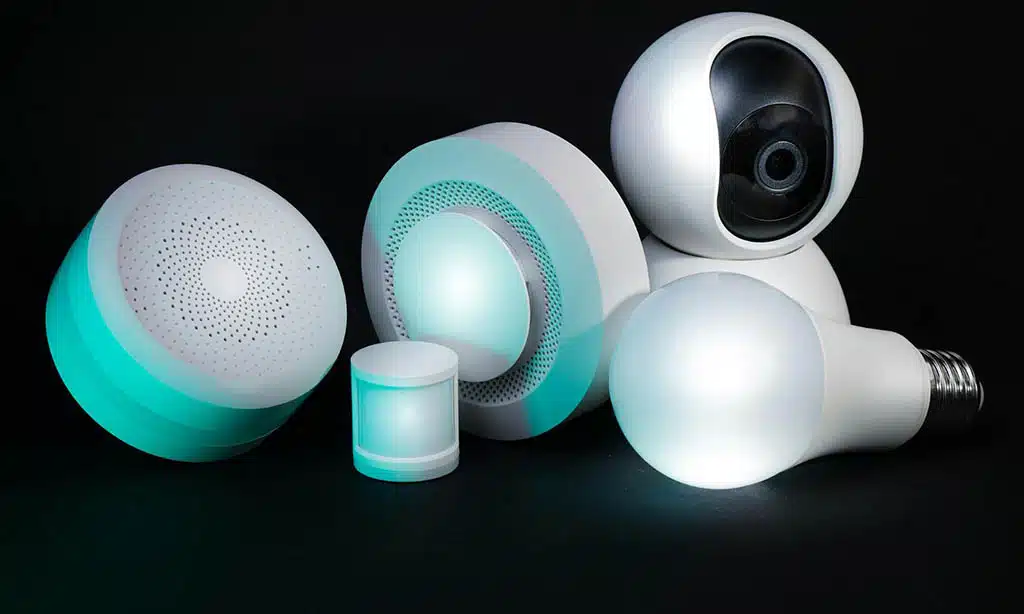
No-drill is not just about walls. It is also about doors and frames. Peel-and-stick sensors should sit flat and stay aligned. Camera mounts should be removable. Indoor cameras should work on shelves and furniture. You want options that do not require permanent holes.
Portability for moving day
Moving is stressful. Your security system should not add stress. You want a hub that can be unplugged. You want sensors that peel off cleanly. You want easy re-pairing after you move. You also want replacement adhesive to be affordable.
Flexible monitoring, no long contract
Renters often change jobs, cities, and budgets. A month-to-month option helps. Self-monitoring can work if you keep alerts on. Professional monitoring can help when you travel. The best choice is flexibility, not “always pay monthly.”
Reliable app alerts
A security app must be fast and clear. It should let you set notification types. It should let you name devices. It should show a readable event history. It should also support more than one user without password sharing.
Nice-to-haves for renters
Nice-to-haves matter when your building has risks. Ground-floor units have different needs. Package theft is another risk. Power outages are common in some areas. Think of these as “upgrade features.”
Cellular and battery backup
Wi-Fi can drop. Power can fail. Backups keep your system useful in those moments. Even basic battery backup helps. Cellular backup can matter more if your neighborhood has unstable internet.
Environmental sensors
In rentals, water damage is expensive. Smoke and CO alerts matter too. A leak sensor under a sink can be a lifesaver. A CO sensor is essential in buildings with gas appliances.
Smart home compatibility
Some renters want security to blend into routines. You might want “away mode” to also turn off smart lights. You might want smart speakers to announce alerts. Integration can help, but only if it is simple.
| Feature | Why it matters | Quick check |
| Adhesive sensors | No holes, easy removal | Can you replace adhesive easily? |
| Multi-user access | Roommates and partners | Are there roles and permissions? |
| Flexible monitoring | Budget-friendly control | Can you cancel anytime? |
| Backups | Works during outages | Does the hub have battery/cellular options? |
| Environmental sensors | Prevent expensive damage | Are add-on sensors available? |
Methodology: How We Chose These Systems
This list is built for real renter life. It favors systems that install quickly. It favors systems that can move with you. It favors systems with clear plan choices. It also favors systems with solid device ecosystems.
We included both alarm kits and camera-first systems. Some renters want a siren, keypad, and sensors. Other renters want video, package alerts, and remote check-ins. Both approaches can be valid, depending on your building and routine.
We also prioritized availability in the U.S. You should be able to buy the system without hunting rare hardware. You should also be able to get replacement sensors easily. Support and app updates matter too, because renters often rely on quick fixes.
Finally, we tried to keep the list diverse. There are premium options. There are budget options. There are systems built around sensors. There are systems built around cameras. The goal is not to crown one brand for everyone. The goal is to match the right kit to the right renter.
| Selection factor | What it means in practice |
| Renter install | Peel-and-stick sensors, removable mounts |
| Portability | Easy reset, pack-and-go hub |
| Monitoring choices | Self-monitoring and pro monitoring options |
| Value | Good coverage without endless add-ons |
| Ecosystem options | Works well with common smart home setups |
| Privacy controls | User access, camera privacy features, account security |
Best Home Security Systems for Renters: The 12 Top Picks
This is the main comparison section. It is designed to be scannable. Each pick includes who it fits best. Each pick includes key strengths and tradeoffs. Each pick also includes a simple “starter kit idea” to help you buy the right amount.
The focus keyword matters here, but the advice matters more. Do not buy the biggest bundle by default. Start with entry points. Then expand based on your layout. Add cameras only where they provide real value.
A small apartment can be protected well with just a few devices. A larger rental may need more sensors and one or two cameras. A ground-floor unit may need window coverage. A roommate setup may need better user controls. Use the “Best for” notes to decide faster.
| What to compare | Why it matters for renters |
| Starter cost | Helps you stay within a move-friendly budget |
| Monthly costs | Avoid surprise bills after the trial ends |
| Mounting style | Protect your deposit and your walls |
| App and alerts | Your system is only as good as its notifications |
| Expansion | Add sensors as your needs grow |
1. SimpliSafe
SimpliSafe is a clean choice for many renters because it is built around DIY alarm coverage. It is easy to set up in a small apartment. It can also scale to a larger rental house. It offers a straightforward path from self-monitoring to professional monitoring. It is also easy to pack and reinstall after a move.
It fits renters who want “alarm first.” That means sensors, a base station, and a siren. Cameras can be added later. The learning curve is low. The app is designed for everyday use. It is often a strong “first system” option.
Best for: Renters who want a balanced security kit that can move with them.
Key renter-friendly strengths
- Portable alarm kit with simple pairing
- Strong coverage for doors and windows
- Easy expansion with add-on sensors
Tradeoffs
- Smart home automation depth may be limited compared with pure smart-home hubs
Starter kit idea for a 1-bedroom
- Base + keypad
- 2 entry sensors (front door + balcony door)
- 1 motion sensor (hallway)
2. Ring Alarm
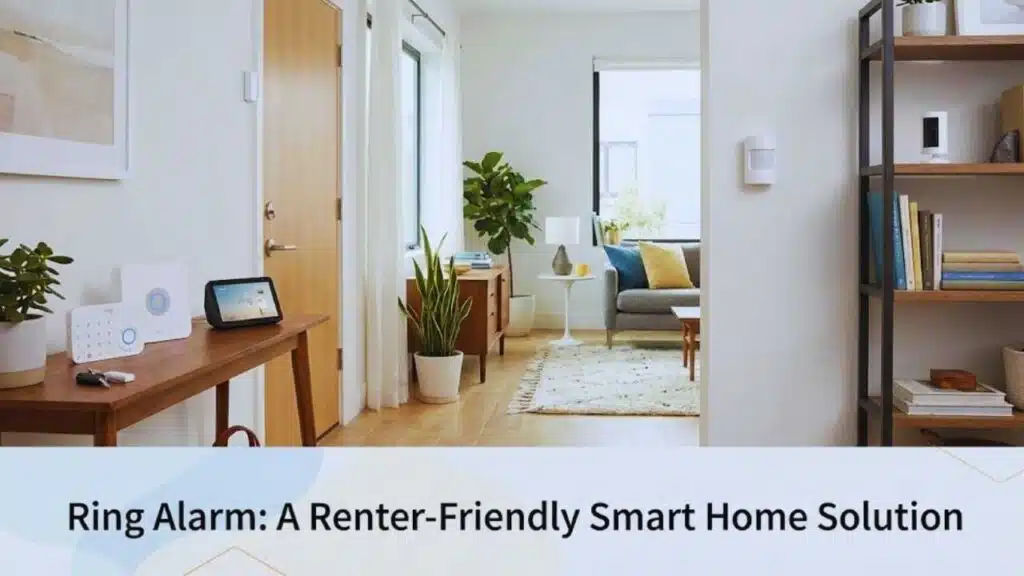
Ring Alarm is a popular renter choice because it connects easily with a wider Ring ecosystem. It fits renters who already use Alexa devices. It also fits renters who want video plus alarm devices in one app. It is easy to expand as your needs change. It works well for package-oriented setups.
Ring is a strong “ecosystem” pick. You can start with an alarm kit. Then you can add a doorbell camera (if your lease allows). You can add indoor cameras. You can also add outdoor cams in a rental house. For many renters, the biggest decision is subscription value and ongoing costs.
Best for: Alexa households and renters who want one ecosystem for alarms and cameras.
Key renter-friendly strengths
- Easy add-on options for cameras and doorbells
- Simple DIY installation and guided setup
- Strong ecosystem consistency for daily use
Tradeoffs
- Monthly plans can become a meaningful part of long-term cost
Starter kit idea for a studio
- Hub + keypad
- 1 door sensor
- 1 motion sensor
- 1 indoor camera facing entry
3. abode
abode works well for renters who enjoy automations. It can be a security system. It can also be a smart home controller for routines. It is designed for people who want rules like “arm when I leave” or “turn on lights when motion triggers.” It can also integrate with a variety of smart devices. It is more customizable than many basic alarm kits.
abode fits renters who like to tinker. It is less “plug and forget” than some options. But if you set it up well, it can feel very smooth. It can support both self-monitoring and professional monitoring approaches. It can also work well in multi-room apartments where you want precise control.
Best for
Smart-home-focused renters who want automations tied to security.
Key renter-friendly strengths
- Strong automation potential
- Good integration approach for connected homes
- Flexible setup for custom routines
Tradeoffs
- May require more setup time to get the best experience
Starter kit idea for a 2-bedroom
- Hub
- 3 entry sensors
- 1 motion sensor
- Optional indoor camera near entry
4. Cove
Cove is often chosen by renters who want a simple path to professional monitoring. It is designed to be easy to install. It focuses on the basics. It often appeals to renters who want quick, guided setup. It also works well for people who do not want to manage complex integrations.
Cove can be a good fit when you want an alarm system that “just works.” If you want fewer decisions, it can feel simpler. It can also be a good choice for renters who want a traditional security experience without professional installation.
Best for
Renters who want straightforward pro monitoring without complex setup.
Key renter-friendly strengths
- Simple DIY alarm kit model
- Strong focus on core alarm coverage
- Clean learning curve for first-time users
Tradeoffs
- Smart home depth can be lighter than smart-home-first brands
Starter kit idea for a 1-bedroom
- Hub + keypad
- 2 entry sensors
- 1 motion sensor
5. Frontpoint
Frontpoint is often seen as a premium-feel DIY security option. It is designed around monitored security service. It can feel closer to traditional alarm companies, but with DIY installation. It can appeal to renters who want more “security company” structure. It can also appeal to renters who want a broad sensor lineup.
Frontpoint can be a strong fit if you want monitoring and support. The main consideration is monthly price. If you value support and a traditional security approach, it can be worth it. If you are trying to minimize recurring costs, you may prefer other DIY brands.
Best for: Renters who want a monitored-security experience in a DIY format.
Key renter-friendly strengths
- Strong alarm-focused identity
- Solid selection of sensors
- Guided support style
Tradeoffs
- Monitoring can be more expensive than many DIY competitors
Starter kit idea for ground-floor units
- Hub + keypad
- 3–5 entry sensors (doors + accessible windows)
- 1 motion sensor
6. ADT Self Setup
ADT Self Setup is for renters who want a major monitoring brand but prefer DIY installation. It can feel reassuring for some renters. It can also be useful for renters who may later want more professional support. The DIY route helps avoid drilling and install scheduling.
ADT’s main decision is how much service you want. Some renters want professional monitoring for peace of mind. Some renters want a recognizable brand for insurance conversations. Others may choose ADT if they plan to stay longer in one rental.
Best for: Renters who value a major monitoring brand with DIY installation.
Key renter-friendly strengths
- Brand familiarity for monitored security
- DIY setup option reduces install friction
- Works for renters who may want upgrades later
Tradeoffs
- Monthly costs may be higher than budget DIY options
Starter kit idea for a 1-bedroom
- Hub + keypad
- 2 entry sensors
- 1 motion sensor
- Optional indoor camera
7. Google Nest (camera-first renter setup)
Some renters do not want a full alarm kit. They want video awareness. They want package alerts. They want motion zones. They want to check the door from their phone. A Nest-first setup can deliver that. It can also pair well with Google Home speakers and displays.
This approach works best when you live in a smaller space. It works well when you want visibility more than loud alarms. It can also work well when your lease limits what you can mount outside. Many renters use indoor cameras facing entry points instead of exterior cameras.
Best for: Google Home households and renters who prefer video-first security.
Key renter-friendly strengths
- Strong app and device ecosystem for many users
- Good for event history and smart alerts
- Works well with smart displays for quick checks
Tradeoffs
- Not a complete alarm kit unless paired with sensors from another system
Starter kit idea for a studio
- 1 indoor cam facing entry
- Optional second cam in main living area
- Optional smart speaker for alerts
8. Arlo (camera-forward)
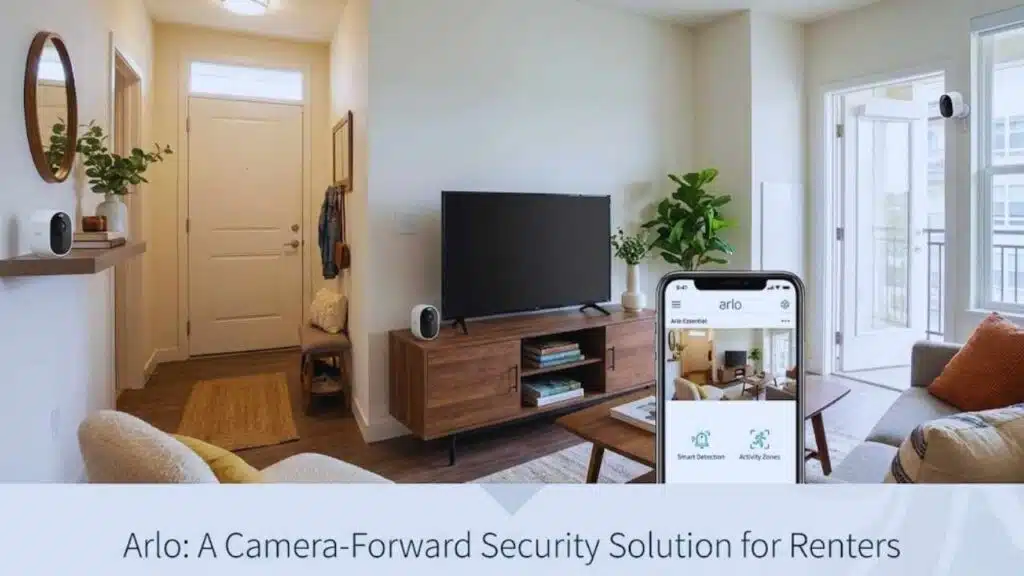
Arlo is a camera-forward option for renters who care about video quality and smarter detection. It can fit renters who want fewer devices but better video. It can also fit renters who want flexibility across indoor and outdoor cams. It is often used by renters who want a stronger “camera system” rather than a full alarm kit.
Arlo can be great when video is your main security tool. It can also be used alongside an alarm kit if you want both. The key decision is subscription value. If you want advanced detection and longer history, you may pay monthly.
Best for: Renters who want strong cameras and smarter video alerts.
Key renter-friendly strengths
- Camera ecosystem strength
- Good for motion and activity zones
- Easy to add cameras over time
Tradeoffs
- Best features may depend on a paid plan
Starter kit idea for a 2-bedroom
- 1 camera facing entry
- 1 camera in living room
- Optional third camera for hallway or patio
9. eufy Security
eufy is often picked by renters who want lower monthly costs. Many eufy setups lean on local storage. That can reduce dependence on cloud subscriptions. It can also feel privacy-friendly. It is a strong option for renters who want cameras and basic alerts without long-term plan commitments.
eufy can work well in apartments where you can place cameras inside. It can also work in rental houses depending on the model and mounting rules. The biggest job is choosing the right model. Some models focus on local storage. Some focus on cloud features.
Best for
Renters who want camera coverage with less subscription pressure.
Key renter-friendly strengths
- Local storage options
- Strong value for many camera setups
- Good fit for privacy-minded renters
Tradeoffs
- Feature sets vary widely by model, so you must compare carefully
Starter kit idea for a 1-bedroom
- 1 indoor cam facing entry
- 1 indoor cam for main living area
- Optional door sensor if supported by the chosen setup
10. Wyze
Wyze is often the budget on-ramp for renters. It is simple. It is low cost to start. It is easy to expand. It works well for renters who want basic video and sensors without a big upfront spend. It is also popular for small apartments where a few devices go a long way.
Wyze can be a good “starter system.” You can begin with one camera. Then add sensors if needed. Then decide if you want a low-cost monitoring plan. The tradeoff is that you should set expectations around premium features. You can get strong value, but you must pick devices carefully.
Best for: Budget-focused renters who want good basics at a low entry cost.
Key renter-friendly strengths
- Low entry price
- Simple DIY install
- Easy “add one device at a time” upgrade path
Tradeoffs
- Some advanced features and history options may require a plan
Starter kit idea for a studio
- 1 indoor camera facing entry
- 1 door sensor (if using sensors)
- Optional motion sensor
11. Aqara
Aqara is a strong sensor ecosystem for renters who want lots of door and window coverage. It is also great for automation fans. It can be used for “quiet security,” meaning you get alerts and routines without loud alarms. It can also integrate into a broader smart home setup depending on your hub and ecosystem choices.
Aqara shines when you want many sensors for a reasonable cost. It can also help with routines like lights when you enter. It can support water leak sensors too. It is a good option if you care about coverage density.
Best for
Renters who want lots of sensors and smart routines.
Key renter-friendly strengths
- Strong sensor ecosystem
- Great for multi-room coverage
- Excellent for automation-style setups
Tradeoffs
- It can feel like a smart home project, not a simple alarm kit
Starter kit idea for a 2-bedroom
- Hub
- 4–6 door/window sensors
- 1 motion sensor
- Optional leak sensor near sink
12. Xfinity Home (best if you already bundle Xfinity)
Xfinity Home can make sense if you already use Xfinity services. Bundling can reduce friction. It can also simplify billing. It can work well for renters who plan to stay in the same city. It is less ideal for frequent movers who may leave the service area.
This pick is not for everyone. It is a situational option. If you already pay Xfinity, it can be convenient. If you do not, you should compare carefully to DIY brands that travel with you.
Best for
Renters who already bundle Xfinity and want one-provider convenience.
Key renter-friendly strengths
- Convenience for existing customers
- Potential bundle simplicity
- Works for renters who stay put longer
Tradeoffs
- Portability and availability can be less flexible if you move often
Starter kit idea for a 1-bedroom
- Basic alarm kit
- 2 entry sensors
- Optional camera depending on lease rules
| Brand | Best for | Best renter strength |
| SimpliSafe | Most renters | Balanced DIY alarm kit |
| Ring Alarm | Alexa homes | Ecosystem and add-ons |
| abode | Automation fans | Smart routines and integrations |
| Cove | Simple monitoring | Straightforward pro monitoring path |
| Frontpoint | Premium monitored feel | Traditional security style |
| ADT Self Setup | Brand reassurance | Major monitoring brand + DIY |
| Google Nest | Video-first renters | Camera-based awareness |
| Arlo | Higher-end cameras | Smarter video alerts |
| eufy | Lower monthly costs | Local storage options |
| Wyze | Tight budgets | Cheap entry, easy scaling |
| Aqara | Sensor-heavy coverage | Many sensors + routines |
| Xfinity Home | Bundlers | One-provider convenience |
Best Picks by Renter Scenario
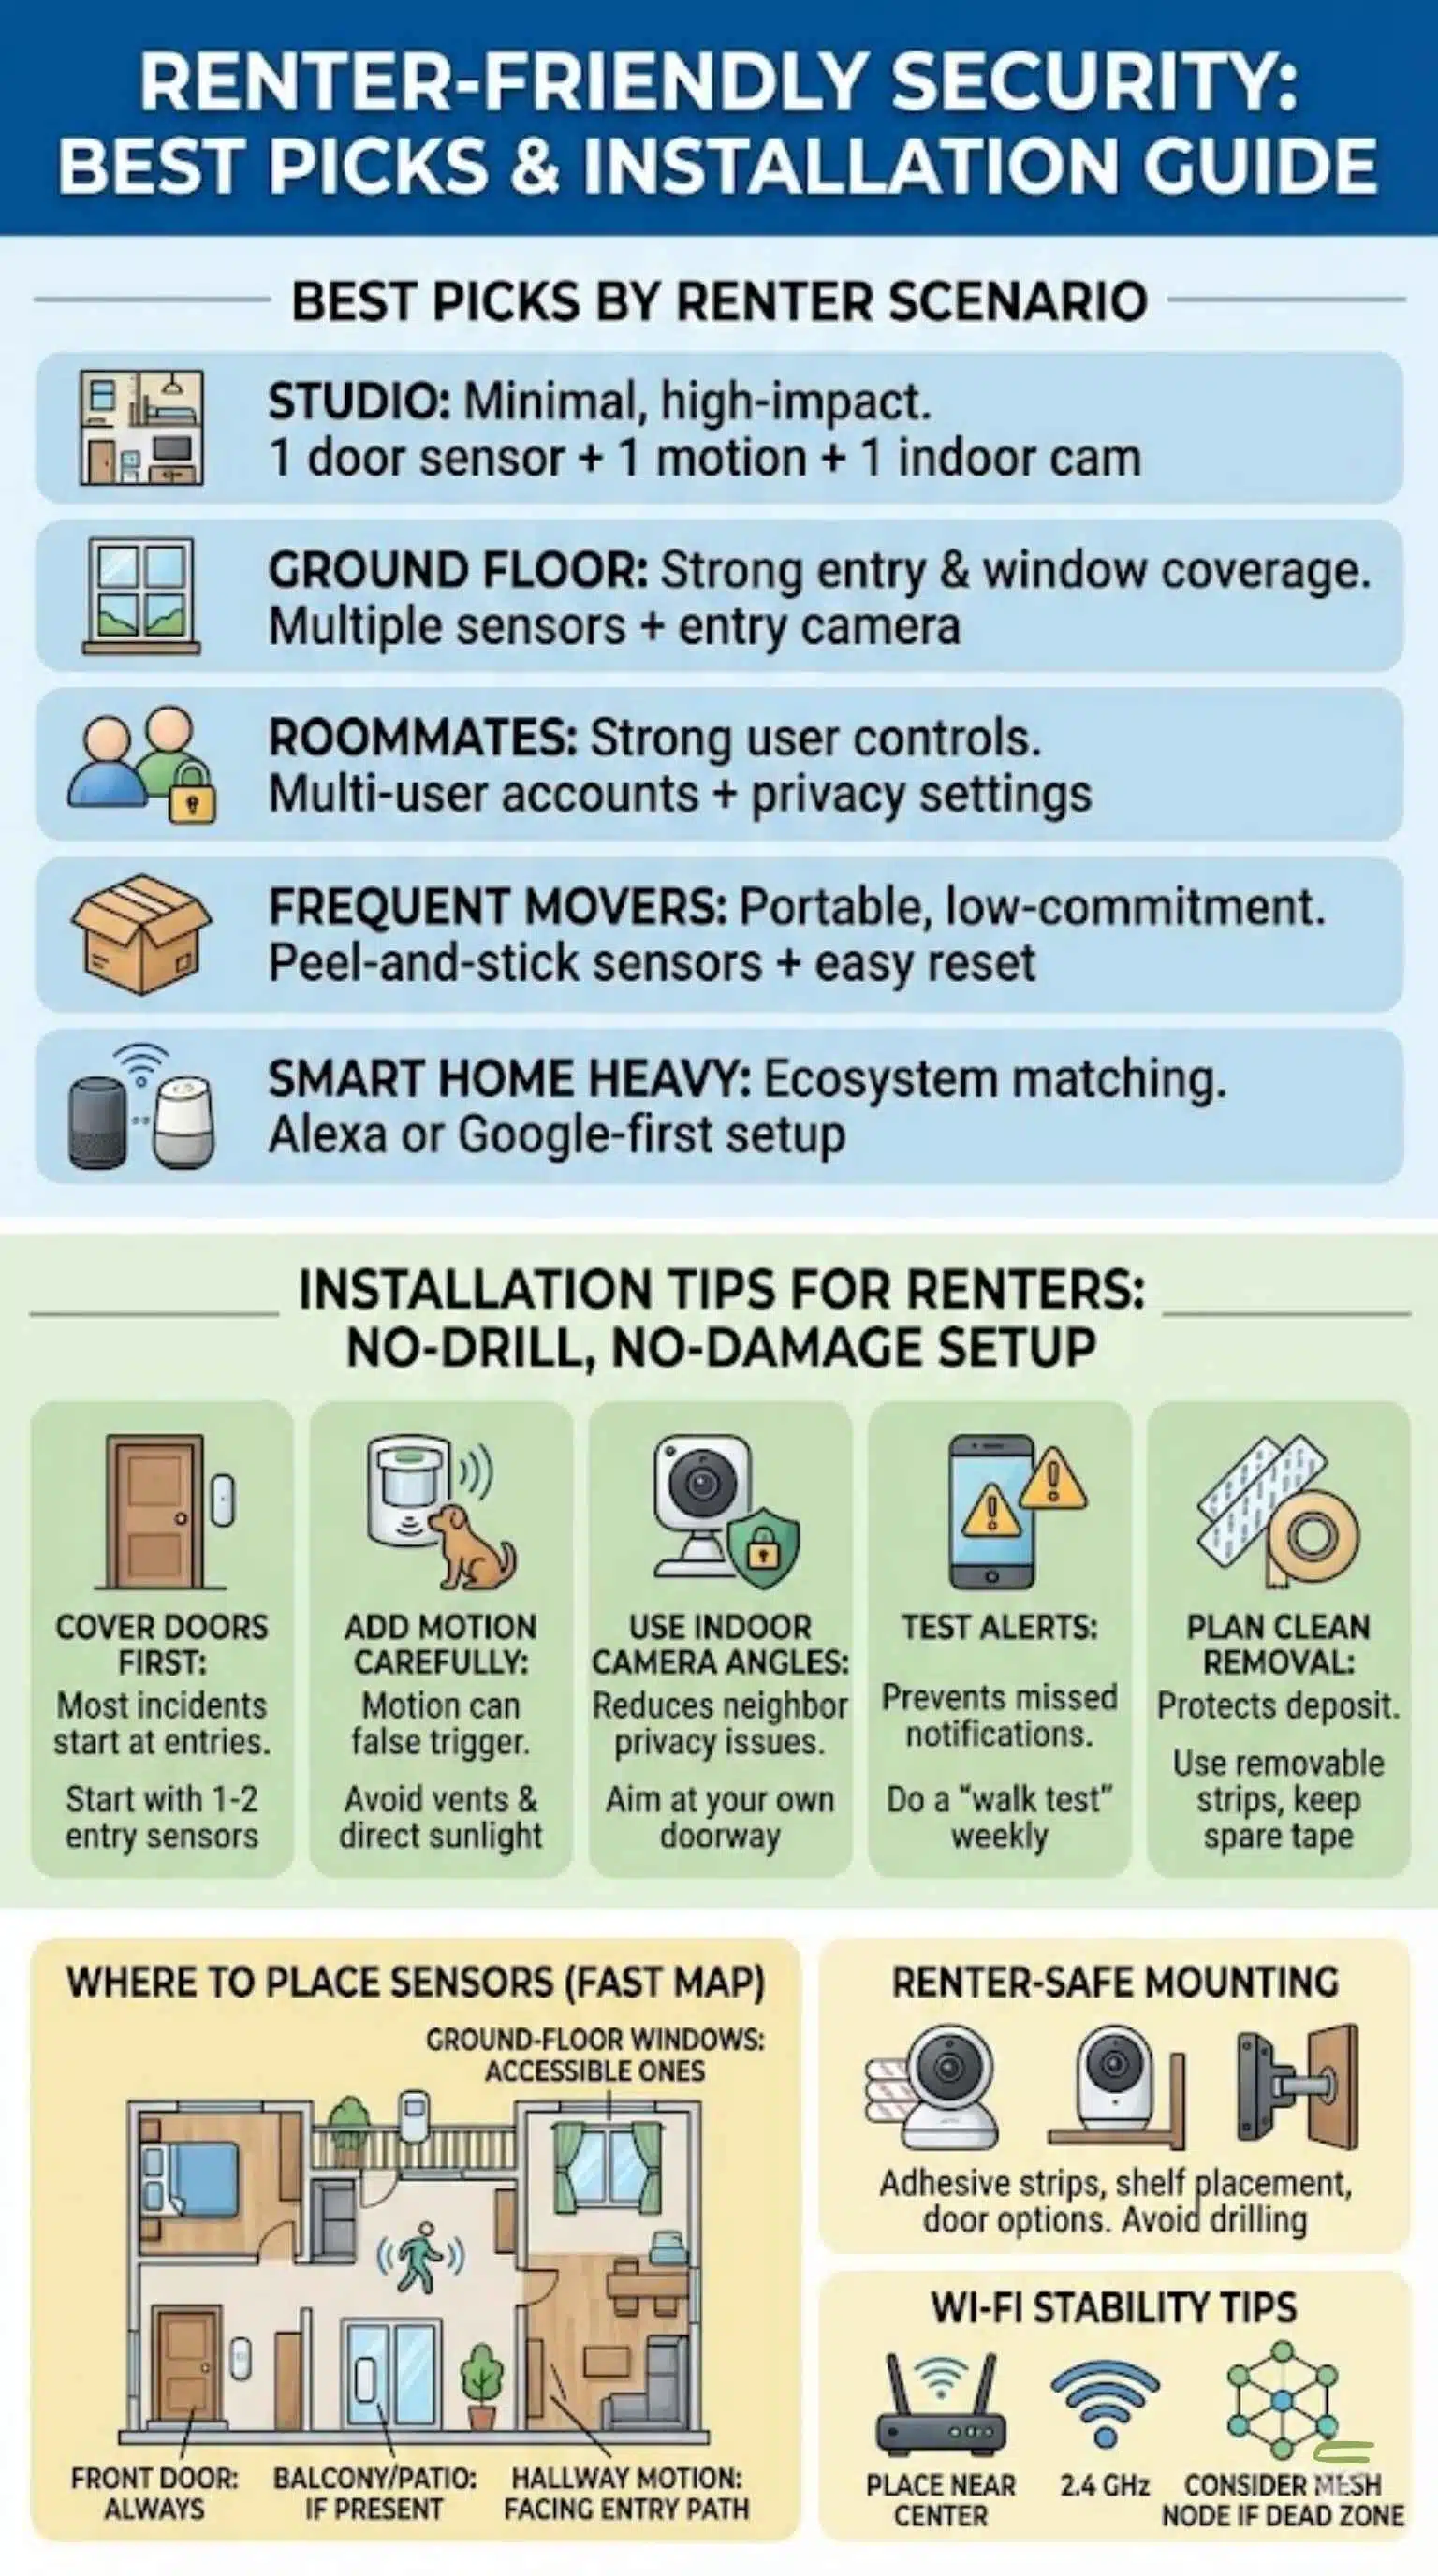
A good security choice depends on your living situation. Your layout shapes device needs. Your floor level changes risk. Your roommate situation changes permissions. Your move frequency changes what “best value” really means.
Start with your entry points. Then think about visibility. Then think about response. You can create a strong setup with minimal devices. You can also overspend quickly if you buy too much at once. This section helps you avoid that.
Also think about daily behavior. Do you come and go often? Do you travel for work? Do you get packages daily? Do you have pets that trigger motion sensors? These details matter more than brand names.
Finally, think about your comfort level. Some renters want loud alarms. Some want quiet alerts. Some want cameras. Some prefer sensors only. Your system should match how you live.
| Scenario | Best approach | Simple kit suggestion |
| Studio | Minimal, high-impact coverage | 1 door sensor + 1 motion + 1 indoor cam |
| Ground floor | Strong entry and window coverage | Multiple sensors + entry camera |
| Roommates | Strong user controls | Multi-user accounts + privacy settings |
| Frequent movers | Portable and low-commitment | Peel-and-stick sensors + easy reset |
| Smart home heavy | Ecosystem matching | Alexa or Google-first setup |
Studio apartment (simple and effective)
A studio is small, so you can cover it fast. Focus on the front door. Add one motion sensor only if it won’t false trigger. Use one indoor camera facing the entry for visual confirmation. Keep it simple so you actually use it.
Ground-floor unit (higher exposure)
Ground-floor units often have more accessible windows. Cover doors and windows first. Add glass-break style detection only if it fits the system. Use a camera that captures the main entry path. Use good lighting as a basic deterrent too.
Roommate setups fail when people share passwords. Use proper user invites if available. Agree on camera rules. Keep indoor cameras in shared areas only, or use privacy modes. Make arming/disarming habits clear so alarms don’t become drama.
Frequent movers (portability first)
If you move often, do not buy anything that needs drilling. Favor portable hubs. Favor adhesive sensors. Label sensors by room so reinstall is faster. Keep spare adhesive in your moving box so you can reattach quickly.
Smart home households (Alexa or Google)
If you already use Alexa everywhere, an Alexa-friendly system can feel seamless. If you already use Google Home displays, a Nest-first approach can feel natural. Just avoid forcing deep integrations if you want simplicity. Basic routines are enough.
Installation Tips for Renters: No-Drill, No-Damage Setup
Installation is where renters win or lose value. The right placement reduces false alerts. The right mount protects your deposit. The right layout gives you real coverage with fewer devices. You do not need a complex plan. You need a smart plan.
Start with the front door. Then cover the next most used entry. Then cover accessible windows if needed. Then decide if a camera adds value. Many renters overbuy cameras. Many renters underbuy sensors. Sensors are often cheaper and more reliable for entry detection.
Also pay attention to motion sensors. Pets, HVAC vents, and sunlight can trigger false alarms. Place motion sensors in stable spots. Use sensitivity settings. Test for a week before committing to more devices.
Finally, plan for removal. Use removable strips. Avoid superglue or permanent adhesives. Keep original packaging for small parts. Your future self will thank you.
| Install step | Why it matters | Renter-friendly tip |
| Cover doors first | Most incidents start at entries | Start with 1–2 entry sensors |
| Add motion carefully | Motion can false trigger | Avoid vents and direct sunlight |
| Use indoor camera angles | Reduces neighbor privacy issues | Aim at your own doorway from inside |
| Test alerts | Prevents missed notifications | Do a “walk test” weekly |
| Plan clean removal | Protects deposit | Use removable strips, keep spare tape |
Where to place sensors (fast map)
- Front door: always
- Balcony/patio door: if present
- Ground-floor windows: only the accessible ones
- Hallway motion: facing the entry path
- Bedroom door: optional for nighttime routines
Renter-safe mounting options
- Removable adhesive strips for lightweight cams
- Shelf placement for indoor cams
- Door-mounted options when permitted
- Avoid drilling unless your lease clearly allows it
Wi-Fi stability tips for apartments
- Place router near the center of the unit if possible
- Use 2.4 GHz for better range when needed
- Avoid placing hubs in cabinets or behind TVs
- Consider a mesh node if the entry area is a dead zone
Cost Breakdown: What Renters Really Pay
Security systems have two types of costs. First is equipment. Second is ongoing service. Equipment costs can look similar across brands, especially after discounts. Ongoing costs can vary a lot. That is why renters should always compare first-year cost, not just starter kit price.
Self-monitoring can be almost free monthly. But it demands attention. You must keep notifications on. You must respond quickly. Professional monitoring can add comfort. But it can also add a recurring bill that outlasts your lease.
Video storage is another key cost. Many camera systems push subscriptions for longer history and smarter detection. Some systems offer local storage. That can reduce ongoing costs but may require more hardware decisions.
A clean way to compare is the first-year formula. Equipment + (monitoring × 12) + (video/storage × 12). Use that. It prevents surprises.
| Cost item | What it includes | How renters control it |
| Equipment | Hub, sensors, cameras | Buy only what fits your layout |
| Monitoring | Pro response service | Choose month-to-month if possible |
| Video storage | Cloud history, smart alerts | Use local storage or shorter history |
| Add-ons | Extra sensors, keypads | Add slowly after testing |
| Replacement | Batteries, adhesive | Keep spares, buy in small batches |
Self-monitoring vs professional monitoring
Self-monitoring is best when you are home often and keep alerts active. It also works if you have a neighbor who can check on your place. Professional monitoring can help when you travel. It can also help when you want emergency calls handled without delay.
Hidden fees renters should watch for
- Extra camera history tiers
- “Smart detection” upgrades
- Cellular backup add-ons
- Extra users or extended storage (rare, but check)
- Equipment replacements after promotional periods
Can it lower renters insurance?
It might. It depends on your insurer. It depends on system type. Some insurers value professional monitoring more. Others give small discounts for alarms or safety devices. Always ask. Always keep proof of purchase.
Privacy, Data, and Apartment Rules
Security should not create new problems. Renters share walls. Renters share hallways. Renters share parking lots. Cameras can easily point at neighbors by accident. That can trigger complaints. It can also create stress. Good privacy choices protect you and your neighbors.
Start with the idea of “inside-first.” In many rentals, the safest approach is an indoor camera aimed at your door from inside. It captures entry events without filming shared hallways. It also avoids arguments about outdoor camera placement.
Account security is also critical. These apps control cameras and alarm states. Turn on two-factor authentication if available. Use strong passwords. Avoid sharing logins. Invite users properly so you can revoke access later.
Finally, check your lease. Some leases restrict exterior fixtures. Some buildings ban doorbell mounts. Some HOAs have rules for common areas. You do not need to panic. You just need to check before you mount anything outside.
| Privacy concern | Why it matters | Safer renter choice |
| Shared hallways | Neighbor privacy and complaints | Aim cameras from inside your unit |
| Roommate access | Breakups and disputes | Use individual accounts, not shared |
| Account takeover | Real security risk | Strong password + 2FA |
| Audio recording | Sensitive in some places | Disable audio if not needed |
| Guest Wi-Fi | Device instability | Use your own secured network |
Practical privacy checklist
- Use unique passwords and enable 2FA
- Give each roommate their own invite
- Keep cameras in your unit, not pointing outward
- Use privacy modes when you are home
- Review event history permissions
Takeaways
Renters have real options now. You can protect your space without drilling. You can get strong alerts without a long contract. You can build a system that moves with you. That is why the best home security systems for renters are the ones that prioritize flexible setup, clear app control, and practical coverage.
If you want a simple all-around choice, start with a DIY alarm kit and add devices only after a week of testing. If you want visibility, add one indoor camera aimed at the entry. If you want lower monthly costs, consider local storage options. If you want extra peace of mind, consider professional monitoring during high-risk periods like travel.
Do not overbuy. Cover entry points first. Keep your setup renter-safe. Use strong account security. And make sure your system fits your daily habits, not just your shopping cart.
FAQs
What are the best home security systems for renters?
The best choice is the one you will use daily. A balanced DIY alarm kit works for many renters. A camera-first approach works for renters focused on packages and visibility. A sensor ecosystem works for renters who want coverage without cameras. The “best” depends on your routine.
Can I install a security system in an apartment without drilling?
Yes. Many systems use adhesive sensors and removable mounts. Indoor cameras can sit on shelves. Many renters avoid exterior mounting and still get strong coverage. The key is smart placement and consistent alert settings.
Do renters need landlord permission for cameras or alarms?
Often not for indoor devices, but rules vary. Exterior devices can be sensitive. Shared spaces can be restricted by lease or building policy. If you plan to mount anything outside your door, check your lease first.
Is professional monitoring worth it in an apartment?
It can be. It helps if you travel. It helps if you work long hours. It helps if you want emergency calls handled even when you miss an alert. If you respond quickly and stay home often, self-monitoring may be enough.
Can I use a video doorbell if I can’t drill?
Sometimes yes. Some renters use no-drill mounts. Some use door mounts. Many renters simply place an indoor camera facing the entry. That can still provide strong visibility without violating building rules.
Will a security system lower renters insurance?
It might. It depends on your insurer and your setup. Some discounts are small. Some require professional monitoring. The best move is to ask your insurer and keep documentation.
What happens to my system when I move?
Portable systems move well. Remove sensors carefully. Pack the hub and cameras. Reset and reconnect in the new place. Label devices by room so reinstall is faster.