If you’ve ever felt like your knees were made of glass or your hips were rusted shut, the idea of “working out” probably sounds like a bad joke. It’s a frustrating cycle: your joints hurt, so you stop moving, but that lack of movement makes the stiffness even worse. In 2026, we’ve moved past the old-school “no pain, no gain” mentality.
We now know that the right kind of movement is actually the best medicine for cranky joints. By choosing low-impact exercises for joint pain, you can lubricate your cartilage, strengthen the muscles that support your bones, and finally get back to the activities you love without the looming fear of a flare-up. When you move, your body produces synovial fluid, which acts like high-quality engine oil for your skeletal system. This guide isn’t about pushing through sharp pain; it’s about finding that sweet spot where your heart gets pumping and your muscles get stronger without grinding your bones together.
1. Diving Into the Benefits of Aquatic Workouts
Water is essentially a giant, liquid shock absorber that provides an environment unlike anything on land. When you submerge yourself to chest depth, the buoyancy of the water effectively removes about 90% of your body weight from your lower-body joints. This means you can perform movements that would be excruciating on a sidewalk, such as jumping or high-stepping, with almost no mechanical stress. Beyond the weight relief, water provides 12 times the resistance of air, so every motion helps build muscle tone and cardiovascular endurance simultaneously. It is the gold standard for those dealing with severe osteoarthritis or recovering from surgery. The hydrostatic pressure of the water also helps reduce swelling in the lower limbs, which is a common byproduct of chronic joint inflammation.
Understanding Swimming and Water Aerobics
Swimming laps or taking part in a structured water aerobics class allows you to maintain a high heart rate without any “foot-strike” impact. Since your body is in a horizontal position during most swimming strokes, the vertical compression on your spine and hips is completely eliminated. For those who find even walking difficult, aquatic therapy offers a way to burn calories and improve mood through movement.
| Feature | Description | Joint Specific Benefit |
| Buoyancy | Supports up to 90% of body weight | Removes gravity-based compression |
| Natural Resistance | Water is 12x denser than air | Builds strength without heavy weights |
| Hydrostatic Pressure | Compression from surrounding water | Reduces joint swelling and edema |
| Temperature Control | Warm or cool pool options | Soothes nerves and reduces inflammation |
2. Cycling for Smooth Joint Articulation
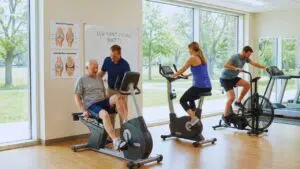
Cycling is one of the most effective low-impact exercises for joint pain because it is a closed-chain movement. In simple terms, your feet stay in a fixed position on the pedals, which prevents the sudden jarring or twisting that often causes injuries in sports like tennis or basketball. The circular motion of pedaling encourages the production of synovial fluid in the knees and hips, helping to wear down “rough spots” in the cartilage over time. Whether you choose a high-tech smart bike at home or a simple stationary bike at the gym, the benefits remain the same: you get a powerful leg workout that spares your connective tissue. It’s particularly helpful for building the quadriceps, which are the main muscles responsible for stabilizing and protecting the knee joint during daily life.
Stationary vs. Recumbent Biking Options
If you have lower back pain or balance issues, a recumbent bike is often the superior choice because of its reclined seat and lumbar support. For those looking for more of a core challenge, an upright stationary bike mimics a traditional outdoor ride while allowing you to stay in a controlled, indoor environment. Both options provide the same joint-friendly motion while allowing you to adjust resistance to your comfort level.
| Bike Type | Best For | Technical Advantage |
| Upright Bike | Core and cardio focus | Better for mimicking real-world cycling |
| Recumbent Bike | Lower back and hip pain | Distributes weight across a larger surface |
| Air Bike | High-intensity intervals | Uses arms and legs to share the load |
| Smart Trainer | Interactive training | Adjusts resistance automatically to avoid strain |
3. Walking with Better Mechanics and Intent
Walking is the most accessible activity we have, but many people avoid it because they think it’s too hard on their knees. The truth is that walking on level, soft terrain is one of the best ways to keep your joints healthy as you age. When you walk, you are performing a functional movement that strengthens the muscles surrounding your hips and ankles, which in turn acts as a natural shock absorption system. To keep it low-impact, you should focus on your stride—avoid overstriding, which causes you to land hard on your heel. Instead, keep your steps shorter and roll through the foot. This distributes the force of each step across the entire foot and lower leg rather than sending a shockwave directly up to the knee.
Choosing Surfaces and Walking for Joint Health
Walking on concrete sidewalks is significantly harder on your body than walking on a dedicated treadmill, a rubberized track, or a flat dirt trail. Treadmills are particularly useful because they offer a consistent, cushioned surface and allow you to avoid steep downhills, which put the most stress on the patella. If you are just starting out, even five minutes of walking several times a day can make a massive difference in how your joints feel.
| Surface Type | Impact Level | Strategy for Success |
| Concrete | High | Limit time and use highly cushioned shoes |
| Treadmill | Low | Use a slight incline (1-2%) to reduce knee shear |
| Grass/Dirt | Medium | Ensure ground is even to avoid ankle rolls |
| Rubber Track | Low | Best for consistent pacing and shock absorption |
4. The Elliptical Machine for Fluid Cardio
The elliptical machine was literally invented to solve the problem of high-impact running. It mimics the motion of a jog or a stride, but your feet never actually leave the pedals, which eliminates the “pounding” effect entirely. This makes it an ideal tool for anyone who misses the intensity of running but can no longer handle the aftermath of sore ankles or hips. Modern ellipticals allow you to move both forward and backward, which helps target different muscle groups like the hamstrings and calves. By using the moving handles, you also incorporate an upper-body “push and pull” motion that distributes the workload across your whole body, meaning no single joint has to work too hard to keep you moving.
Using the Elliptical for Maximum Joint Protection
To get the most out of an elliptical without hurting yourself, you should avoid leaning on the static handlebars, as this can lead to poor posture and back strain. Instead, stand tall and let the machine’s path dictate your movement. You can adjust the “ramp” or incline on many machines to shift the focus from your knees to your glutes, which is often a safer way to build strength if you are currently experiencing a flare-up.
| Machine Setting | Target Area | Joint Benefit |
| Forward Stride | Quads and Calves | Strengthens knee-supporting muscles |
| Reverse Stride | Hamstrings and Glutes | Improves hip mobility and balance |
| High Incline | Glutes and Hips | Reduces pressure on the front of the knee |
| Handle Use | Shoulders and Core | Reduces the perceived effort on the legs |
5. Ancient Wisdom: Tai Chi and Mindful Flow
Tai Chi is often described as “meditation in motion,” and for those with joint pain, it is a miracle worker. This ancient practice focuses on very slow, deliberate movements that flow into one another without stopping. Because the movements are so controlled, you are never putting sudden or jarring stress on your ligaments. Clinical research has shown that Tai Chi is particularly effective at improving balance and reducing the fear of falling, which is a major concern for people with stiff or painful joints. It teaches you how to shift your weight mindfully from one leg to the other, which builds the deep stabilizing muscles that we often forget to train in a traditional gym setting.
Implementing Tai Chi for Daily Mobility
You don’t need to master a complex routine to see the benefits; even a few basic “forms” done for ten minutes a morning can help wake up your nervous system and lubricate your joints. It’s an exercise that emphasizes the “internal” feel of the movement rather than how much weight you can lift or how fast you can go. This mental focus helps lower stress hormones like cortisol, which are known to contribute to systemic inflammation in the body.
| Principle | Practice | Result |
| Weight Shifting | Moving slowly between legs | Improves proprioception and balance |
| Continuous Motion | No jerky or sudden stops | Prevents micro-tears in connective tissue |
| Deep Breathing | Rhythmic, slow inhales | Increases oxygen flow to healing tissues |
| Soft Alignment | Keeping joints slightly bent | Avoids “locking” joints and bone-on-bone stress |
6. The Science of Yoga and Range of Motion
Yoga is a misunderstood tool for joint health; people often think it’s about twisting yourself into a pretzel, but it’s actually about controlled range of motion. For joint pain, styles like Hatha or Restorative yoga are perfect because they focus on holding gentle poses that stretch the muscles around the joint without over-extending the joint itself. By using props like blocks, straps, or even a sturdy chair, you can make every pose accessible regardless of your current flexibility level. Yoga helps break up “adhesions” in the fascia—the connective tissue that surrounds your muscles—which can often be the real culprit behind that feeling of being “stiff” in the morning.
Yoga Modifications for Sensitive Joints
If you have wrist pain, you can do many poses on your forearms; if your knees hurt, you can use a folded blanket for extra cushioning. The goal is to find “space” in the joint, which is achieved by strengthening the muscles on both sides of the bone. Regular practice helps realign your posture, ensuring that your weight is distributed evenly across your skeletal structure rather than dumping all the pressure into your lower back or knees.
| Yoga Pose | Target Joint | Modification for Pain |
| Cat-Cow | Spine and Neck | Do it seated in a chair to avoid wrist pressure |
| Warrior I | Hips and Knees | Keep the stride short and the back heel down |
| Tree Pose | Ankle and Balance | Keep one hand on a wall for safety |
| Child’s Pose | Back and Hips | Place a pillow between your thighs and calves |
7. Pilates for Core-Based Joint Stability
Pilates is often recommended by physical therapists because it focuses on the “powerhouse”—the deep muscles of the core, glutes, and inner thighs. When your core is strong and stable, your limbs don’t have to work as hard to keep you balanced, which directly reduces the load on your peripheral joints. Pilates movements are precise and low-repetition, focusing on the quality of the movement rather than “grinding” through sets. This makes it one of the premier low-impact exercises for joint pain. Whether you are using a mat or a Reformer machine, the emphasis is always on lengthening the body and creating a “girdle” of strength that protects your spine and hips from daily wear and tear.
Mat Pilates vs. The Reformer
Mat Pilates uses your own body weight and gravity as resistance, making it easy to do at home. The Reformer, on the other hand, uses a system of springs and pulleys that provide a unique “assistive” resistance. This can actually be easier for beginners with joint pain because the machine helps guide your limbs through the correct path, preventing the wobbling or misalignment that can sometimes lead to minor strains during floor exercises.
| Pilates Move | Joint Focus | Functional Benefit |
| The Hundred | Core and Neck | Builds endurance for holding upright posture |
| Leg Circles | Hip Sockets | Lubricates the hip joint and improves reach |
| Pelvic Tilt | Lower Back | Relieves compression in the lumbar spine |
| Scapular Isolations | Shoulders | Stabilizes the rotator cuff and upper back |
8. Rowing for Full-Body Engagement
Rowing is a unique low-impact exercise because it uses nearly 86% of the muscles in your body in a single stroke. Because you are seated throughout the entire movement, your knees and ankles are not bearing your body weight, which makes it a fantastic cardio alternative for those who find walking or running too painful. The motion of rowing is rhythmic and fluid; it involves a powerful leg drive followed by a core lean and a finishing pull with the arms. When done with proper form, it builds incredible strength in the posterior chain—the muscles along your back, glutes, and hamstrings—which are essential for maintaining a healthy, upright posture and protecting your joints.
Mastering the Rowing Stroke for Safety
The biggest mistake people make on a rowing machine is trying to pull with their arms first. To protect your joints, the movement must start with the legs. You should push off the footplates until your legs are nearly straight, then hinge at the hips, and finally pull the handle to your chest. This “legs-first” approach ensures that your largest muscles are doing the heavy lifting, keeping the stress away from the smaller, more vulnerable joints in your wrists and elbows.
| Stroke Phase | Muscle Focus | Joint Protection Key |
| The Catch | Shins and Back | Don’t over-compress the knees at the front |
| The Drive | Quads and Glutes | Push through the heels, not the toes |
| The Finish | Core and Lats | Avoid “snapping” the elbows at the end |
| The Recovery | Hamstrings | Move slowly to let the heart rate settle |
9. Resistance Band Training for Controlled Loading
If lifting heavy metal weights feels like it’s “grinding” your joints, resistance bands are your best friend. Bands provide “linear variable resistance,” which is a fancy way of saying the tension increases as the band stretches. This is much safer for joints because the hardest part of the exercise occurs when your muscles are in their strongest position. Bands are also incredibly versatile; you can attach them to a doorknob or step on them to create resistance in any direction. This allows you to perform “functional” movements—like a diagonal pull that mimics reaching for a seatbelt—that strengthen the joints in the specific ways we actually use them in real life.
Choosing the Right Bands for Your Needs
Resistance bands come in various shapes, including long flat bands, loops, and bands with handles. For those with arthritis in their hands, bands with padded handles are much easier to grip than thin rubber loops. You can easily adjust the “weight” of a band by simply moving your hands closer together or further apart, making it the most customizable tool in your fitness arsenal. They are also lightweight and portable, so you never have to skip a joint-maintenance session while traveling.
| Band Color/Type | Resistance Level | Best Exercise |
| Yellow/Light | Very Low | Shoulder rotations and physical therapy moves |
| Red/Medium | Moderate | Bicep curls and assisted squats |
| Blue/Heavy | High | Glute kickbacks and chest presses |
| Loop Bands | Variable | Lateral “monster walks” for hip stability |
10. The Power of Isometrics: Strength Without Motion
Sometimes, moving a joint through its full range is simply too much during a painful flare-up. This is where isometrics shine. An isometric exercise involves contracting a muscle without actually moving the joint it’s attached to. Think of pushing your palms together as hard as you can—your chest and arm muscles are working intensely, but your elbows and wrists aren’t moving an inch. This type of training is incredibly effective for building “static strength,” which helps stabilize joints that feel loose or “wobbly.” It allows you to maintain muscle mass even when you are sidelined by injury or significant inflammation.
Simple Isometric Moves to Try at Home
A classic isometric move is the wall sit. By leaning your back against a wall and lowering into a squat, you can fire up your quadriceps and glutes without the “grinding” sensation that sometimes happens during a dynamic squat. Another great one is the “plank,” which builds massive core and shoulder stability without requiring any repetitive joint motion. These exercises are the ultimate low-impact exercises for joint pain because they provide maximum muscle activation with zero joint wear and tear.
| Isometric Move | Target Area | Hold Time Goal |
| Wall Sit | Quads and Hips | 30 to 45 seconds |
| Plank (On Knees) | Core and Shoulders | 20 to 30 seconds |
| Glute Bridge Hold | Hips and Lower Back | 30 seconds |
| Palm Press | Chest and Wrists | 15 seconds of max effort |
11. Step-Ups on Low Platforms for Functional Power
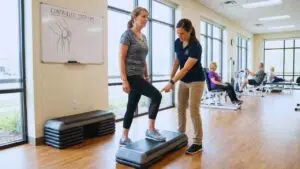
Many people with knee pain are terrified of stairs, but the best way to get better at stairs is to practice them in a controlled way. Using a very low aerobic step—perhaps only 2 to 4 inches high—allows you to practice the “step-up” motion without overwhelming the joint. This movement is vital because it builds the strength needed for “eccentric control,” which is your body’s ability to lower itself down slowly. Most joint injuries happen when we “drop” or fall into a movement; by practicing slow, controlled step-ups and step-downs, you are training your muscles to act as brakes, protecting your bones from sudden impacts.
Progressing Your Step-Ups Safely
As your strength improves, you can gradually increase the height of the step, but you should never go so high that your knee is higher than your hip. Keeping the movement small and focused on the “squeeze” of the glute at the top is more important than how high you can climb. If balance is an issue, perform these next to a wall or a sturdy kitchen counter so you can use one hand for support as you build your confidence.
| Step Height | Difficulty | Focus Point |
| 2 Inches | Beginner | Foot placement and balance |
| 4 Inches | Intermediate | Slow, controlled lowering (the “down” part) |
| 6 Inches | Advanced | Pushing through the heel to engage the glute |
| 8+ Inches | Expert | Mimicking standard household stair height |
12. TRX Suspension Training for Bodyweight Control
TRX uses a set of heavy-duty straps to allow you to use your own body weight as resistance, but with a major twist: you can “unload” your joints by leaning into the straps. For example, if a regular squat hurts your knees, you can hold onto the TRX handles and use your arms to pull yourself back up. This takes a significant portion of the weight off your lower body, allowing you to move through a full range of motion without pain. It is incredibly adjustable; simply moving your feet a few inches closer or further away from the anchor point changes the difficulty of the exercise instantly, making it perfect for people of all fitness levels.
Using TRX for Upper and Lower Body Support
TRX is especially good for shoulder health. By doing “rows” or “face pulls” with the straps, you can strengthen the muscles between your shoulder blades, which pulls your shoulders back and opens up the joint space. This can significantly reduce the “pinching” sensation that many people feel in their shoulders during daily activities. It’s a tool that emphasizes stability and “anti-rotation,” ensuring that your joints stay in their proper alignment even when you’re moving in different directions.
| TRX Movement | Joint Benefit | Modification |
| Assisted Squat | Protects knees/hips | Use more arm strength to pull up |
| Suspension Row | Stabilizes shoulders | Walk feet further back to make it easier |
| Chest Press | Low-impact push-up | Stand more upright to reduce load |
| Hamstring Curl | Strengthens knee back | Keep hips on the floor if back hurts |
13. Chair-Based Mobility for Low-Energy Days
We all have days where the idea of standing up to exercise feels impossible. On those days, chair-based exercises are your secret weapon. You can get a surprisingly effective workout just by sitting tall in a sturdy chair. Seated leg extensions—where you simply straighten one leg at a time—are one of the best ways to keep your quadriceps active without putting any weight-bearing pressure on the knee joint. Seated “marches” help keep the hip flexors mobile and improve circulation in the lower legs, which can reduce the heavy, stiff feeling that often comes with long periods of sitting.
Creating a “Desk-Side” Joint Routine
These exercises are also perfect for “movement snacks” during the workday. If you spend eight hours at a desk, your joints are likely to stiffen up. Spending two minutes every hour doing seated ankle circles or torso twists can prevent that end-of-day ache. It’s about keeping the “oil” (synovial fluid) flowing throughout the day rather than letting it settle and become stagnant.
| Chair Move | Target Area | Why It Works |
| Seated Extension | Knee Joint | Fires quads without vertical load |
| Seated Marching | Hip Flexors | Improves mobility for walking |
| Seated Twist | Spinal Facets | Gently rotates the vertebrae |
| Ankle Pumps | Ankle/Calf | Prevents stiffness and improves blood flow |
14. Glute Bridges for Hip and Lower Back Health
The glutes are the strongest muscles in your body, but in our modern sedentary world, they often “fall asleep.” When your glutes aren’t firing properly, your lower back and knees have to take over the work, which quickly leads to joint pain. The glute bridge is a low-impact superstar because it isolates and strengthens the posterior chain while you are lying safely on the floor. By lifting your hips toward the ceiling, you are opening up the front of your hips (which get tight from sitting) and strengthening the muscles that support your pelvis and spine.
Progressing the Glute Bridge
To do a standard bridge, lie on your back with knees bent and feet flat on the floor, then lift your hips until your body forms a straight line from knees to shoulders. If that feels too easy, you can try holding the position at the top or using a resistance band around your knees to engage your outer hips. This exercise is a staple in almost every physical therapy program because it provides massive structural benefits with almost zero risk of injury to the joints.
| Bridge Type | Level | Primary Benefit |
| Standard Bridge | Beginner | Wakes up the glutes and opens the hips |
| Single-Leg Bridge | Advanced | Fixes strength imbalances between legs |
| Weighted Bridge | Expert | Adds muscle mass to protect the hips |
| Banded Bridge | Intermediate | Targets the “glute medius” for knee stability |
15. The “Bird-Dog” and “Dead Bug” for Total Stability
These two exercises are often paired together because they are the “gold standard” for spinal stability. The Bird-Dog is performed on all fours, while the Dead Bug is performed on your back. Both exercises require you to move your opposite arm and leg at the same time while keeping your core perfectly still. This “anti-rotation” work is essential for protecting the small, sensitive joints in your spine. It teaches your body how to maintain a neutral back even when your limbs are moving, which is exactly what you need to do when you’re reaching for a grocery bag or picking something up off the floor.
Why They Are Essential for Joint Health
Most back pain comes from the spine twisting or arching in ways it isn’t supposed to. By mastering these two moves, you create a “natural corset” of muscle that keeps your vertebrae in their safest alignment. They are among the most effective low-impact exercises for joint pain because they improve your coordination and balance without requiring any heavy lifting or high-speed movement. They are the foundation upon which all other athletic movements are built.
| Exercise | Starting Position | Main Goal |
| Bird-Dog | All fours (Hands/Knees) | Keep back flat while limbs extend |
| Dead Bug | On back (Arms/Legs up) | Press lower back into floor while moving |
| Modification | Limbs only | Move only arms or only legs if coordination is tough |
| Safety Tip | Slow Tempo | Move as slowly as possible to maximize control |
Final Thoughts
Reclaiming your life from joint pain is a marathon, not a sprint. The most important thing to remember is that movement is a “use it or lose it” resource. While it’s tempting to stay on the couch when you’re hurting, that actually causes the supporting muscles to weaken and the joints to become even stiffer. By consistently choosing low-impact exercises for joint pain, you are essentially providing your body with the maintenance it needs to stay functional.
In 2026, we have the tools and the knowledge to stay active at any age. Start small, listen to your body’s signals, and focus on the long-term goal of staying mobile. Consistency will always beat intensity when it comes to the health of your joints.