Are you creating a website or a blog post? You will require images to make the website or a blog post look engaging and beautiful. But the images you are having might not fit perfectly which may result in an uglier look than what you were trying to achieve. Also, resizing the images may drastically reduce the size of the image which can increase the page speed of your website.
But the question is how to resize images?
Resizing images is easy and not that easy also. You might be scratching your head for which tool, software/app to use to achieve it. And it would be more difficult if you have too many images to resize to a particular size. But don’t worry! This article will guide you through how you can resize images using the existing software on your system and using an online tool on any device. Also, will share how you can resize a single image and what to do if you have too many images. So, let’s check out.
Resize Images On Windows System
Windows system comes with preinstalled app, MS Paint. Here we are going to use MS Paint which will help us achieve the task.
NOTE: You should only use MS Paint if you have 1 or 2 image files to resize because you cannot bulk resize images using it. If you have too many images to resize and you want to resize in bulk then you can use the online tool mentioned below.
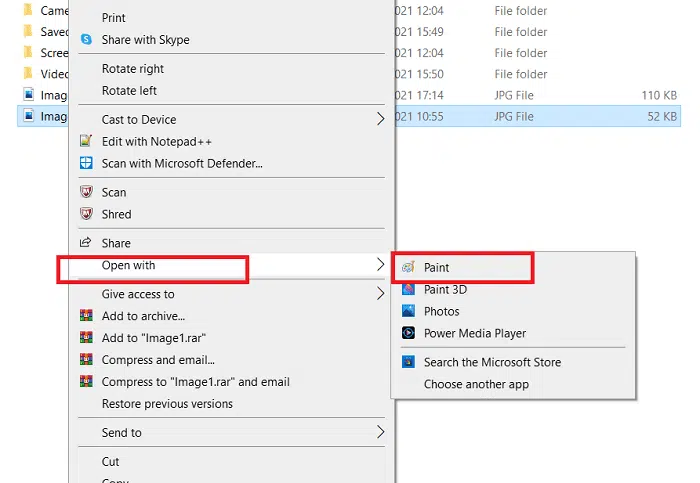
- On your computer, navigate to the folder where your images are located.
- Right click on the image and then click Open with -> Paint.

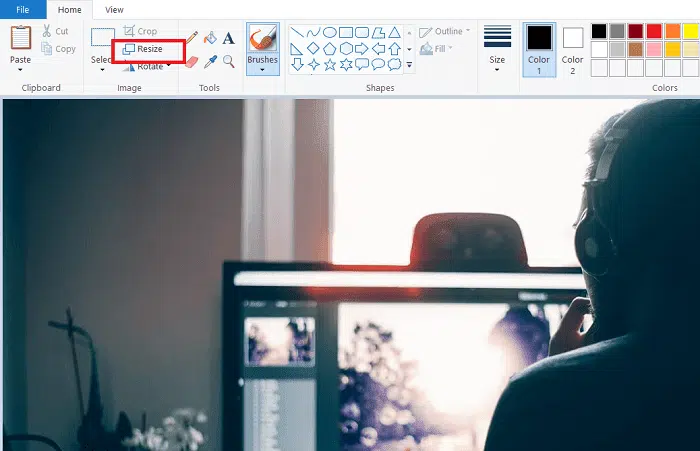
Photo: Collected - The picture will open in MS Paint. Now click on the Resize option at the top.

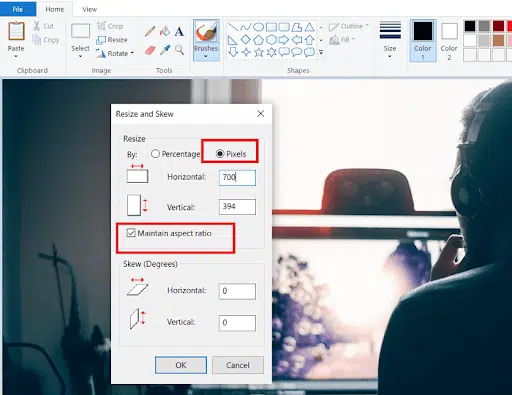
- Choose Pixels option and enter the desired pixel to which you want to resize and click on OK. You can also use percentage option when you don’t want to deal with exact pixels. Make sure to keep the “maintain aspect ratio” box checked, otherwise, the image may distort.

- The image is now resized!
- Either you can use “Ctrl + S” to override the original image or to save it separately, click on File->Save as and then navigate to the folder where you want to save the file and then click Save.
- Repeat the same steps to resize another image.
As I said earlier, if you have too many images then using MS Paint is not a good option as it will require a lot of time to resize the images. You can use the below method to batch resize image files.
For Mac: Mac users can use the “Preview” app to resize the image. You need to use the “Adjust Size” button and enter the height and width to which you want to resize. Make sure to keep the “Scale proportionally” box checked to keep the proportion the same like the original picture.
Using Online Photo Resizer Tool
We are going to use tool from ImageLR here which is completely free to use and can be accessed from any device. So, let’s begin.
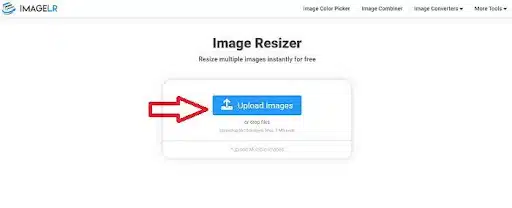
- Open the tool, photo resizer, on your browser from any device. (You need an internet connection).
- Drag and drop or click on Upload Images button to upload images.

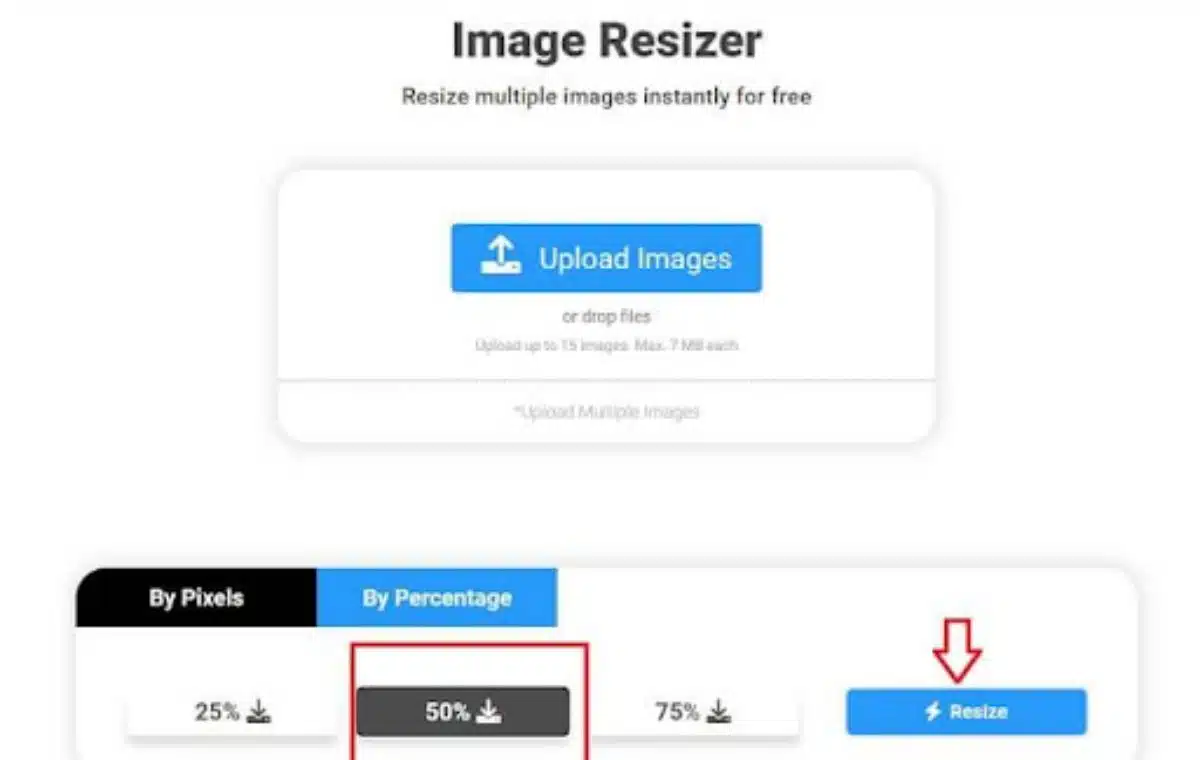
- Now you can resize all the images according to the percentage or by the pixels. Choose either option.

- Now click on Resize button. The processing will start.
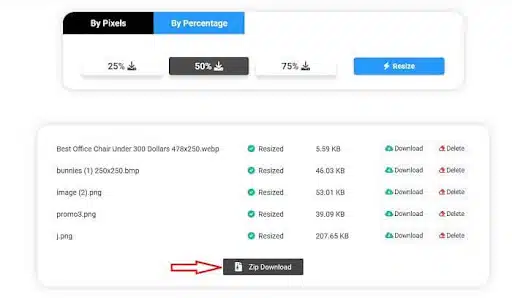
- Once the processing is completed, it will list all the resized images with download option.
- Now click on “Zip Download” button to download all the images at once.

- Once downloaded, you can also delete your images.
Isn’t it pretty easy to resize images using the online tool!
Now you can use the resized image on our website. We also recommend compressing the images without losing quality and the use them on the website for quick load and fast performance of the website.
So, this is how you can resize single image or in bulk for your website or blogs. Now, make your website load fast and stand out from others with uniform resized images. Let us know which method you liked the most, the inbuilt app on your system or the online tool.