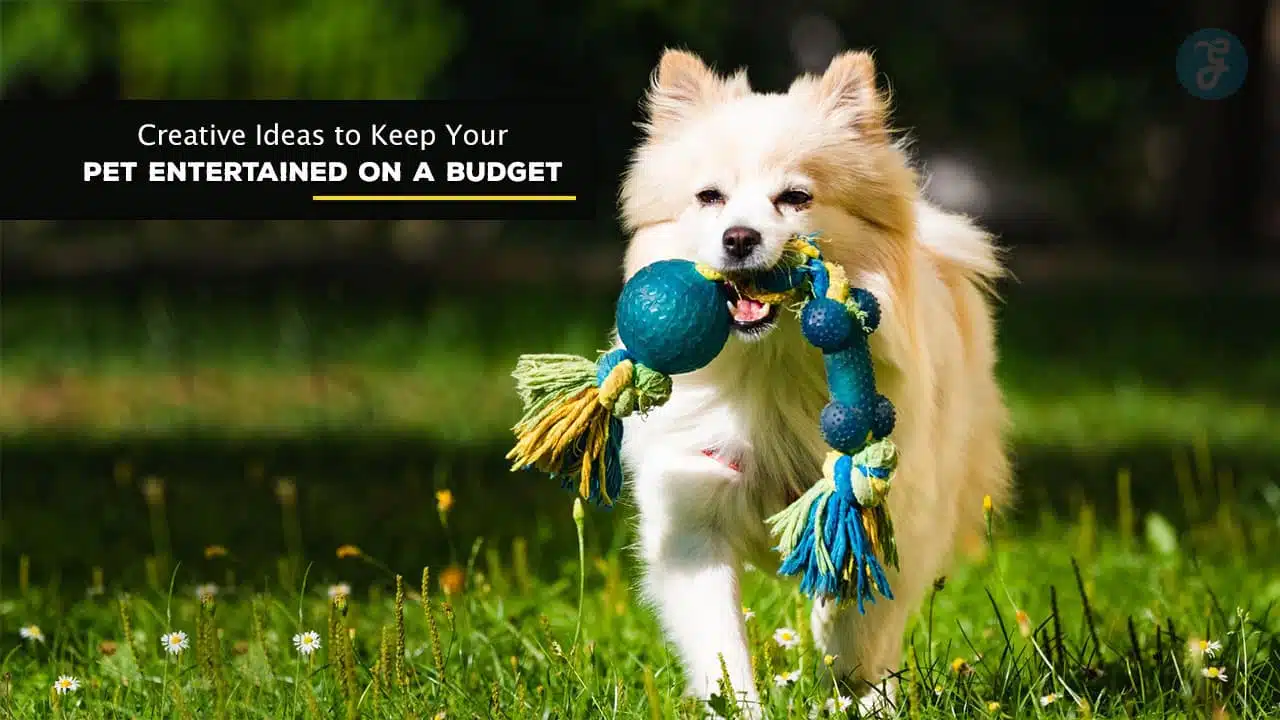
In pet ownership, few things are as rewarding as seeing your furry friend’s eyes light up with excitement over a new toy. However, frequent trips to the pet store for the latest gadgets and gizmos can quickly strain your wallet. Enter the world of DIY pet toys – a creative, cost-effective, and personalized solution to keep your pets entertained and engaged.
This comprehensive guide will explore the wonderful world of DIY pet toys. We’ll delve into the numerous benefits of homemade toys, crucial safety considerations to remember, and a treasure trove of creative ideas for dogs, cats, and small pets.
We’ve got something for everyone, from simple no-sew projects that can be whipped up in minutes to more involved creations for crafty pet parents.
So, whether you’re a seasoned crafter or a complete novice, grab your supplies and prepare to embark on a journey of pet toy creation. Let’s dive in and discover how you can become your pet’s favorite toy designer!
Benefits of DIY Pet Toys
Creating your pet toys comes with a multitude of advantages. Let’s explore these benefits in detail:
1. Cost-Effectiveness
Store-bought pet toys can be surprisingly expensive, especially if you have a pet that quickly destroys their playthings. DIY toys often utilize materials you already have at home, significantly reducing costs. Even when you need to purchase supplies, you can usually make multiple toys for the price of one store-bought item. This cost-effectiveness allows you to provide more toys for your pet without breaking the bank.
2. Customization
Every pet has unique preferences for textures, sounds, and play styles. When you create toys yourself, you can tailor them to your pet’s specific likes and needs. Does your dog love crinkly sounds? You can incorporate that element. Does your cat prefer feathers to bells? No problem! This level of customization ensures that your pet gets toys they’ll genuinely enjoy.
3. Environmental Friendliness
Many DIY pet toys repurpose items that might otherwise be in the trash. Old t-shirts, empty plastic bottles, cardboard tubes – all of these can be transformed into exciting pet toys. By upcycling household items, you’re saving money, reducing waste, and being kind to the environment.
4. Bonding Opportunity
Creating toys for your pet can be a fun and rewarding experience that strengthens the bond between you and your furry friend. The time and effort you put into making something special for your pet is a tangible expression of your love and care. Many pets have a particular affinity for toys their humans have made for them, perhaps sensing the personal touch.
5. Mental Stimulation for Pets
Homemade toys often have unique scents, textures, and designs that can be extra stimulating for pets. This novelty factor can help keep your pet mentally engaged, preventing boredom and its destructive behaviors. Puzzle toys, in particular, can provide excellent cognitive stimulation.
6. Easy Replacement and Modification
If a homemade toy gets destroyed (as pet toys often do), it’s easy and inexpensive to replace. You can also modify the design based on how your pet interacts with it, improving it over time. This iterative process allows you to create toys suited to your pet’s play style.
7. Promotes Physical Activity
Many DIY toys can encourage physical activity, which is crucial for maintaining your pet’s health. For dogs, toys like rope pulls can promote tugging and running. For cats, wand toys stimulate jumping and pouncing. This physical engagement helps maintain a healthy weight and improves cardiovascular health.
8. Stress Relief
Playing with toys, especially those with familiar scents from home, can be a great stress reliever for pets. This is particularly beneficial for animals with anxiety or adjusting to new environments. For example, the comfort of a toy made from a familiar t-shirt can be very soothing.
9. Dental Health Benefits
DIY toys, particularly chew toys for dogs and small animals, can contribute to dental health. Chewing on appropriate materials can help clean teeth and massage gums, potentially reducing the risk of dental diseases.
10. Sense of Accomplishment
Creating something your pet enjoys establishes a sense of accomplishment for pet owners. Seeing your pet happily playing with a toy you’ve made can be incredibly satisfying and motivating.
Safety Considerations
While DIY pet toys can be great fun, safety should always be your top priority. Here are some crucial safety considerations to keep in mind:
1. Choose Pet-Safe Materials
Always use materials that are non-toxic and safe for pets. Avoid small parts that could be swallowed, sharp edges, or anything that could splinter or break into harmful pieces. Be particularly cautious with the following:
- Avoid toxic glues or adhesives. Opt for pet-safe alternatives or sewing instead.
- Don’t use materials treated with chemicals, such as leather or treated wood.
- Be careful with string or yarn, especially for cats, as these can cause intestinal problems if ingested.
2. Size Appropriately
Ensure the toy is the right size for your pet. Toys that are too small could be choking hazards, while toys that are too large might be frustrating for your pet to play with. A good rule of thumb is that the toy should be larger than your pet’s mouth to prevent accidental swallowing.
3. Supervise Play
Always supervise your pet when introducing a new toy, especially a homemade one. Watch how they interact with it and look for any potential safety issues. Some pets may try to eat parts of the toy, which could be dangerous.
4. Regular Inspections
Regularly check homemade toys for signs of wear and tear. Replace them if they start to fall apart to prevent your pet from ingesting any pieces. Pay special attention to seams coming undone, stuffing out, or any parts becoming loose.
5. Avoid Harmful Substances
Don’t use materials treated with chemicals, paints, or other substances that could be harmful if ingested. Stick to natural, pet-safe materials whenever possible. If you’re unsure about a material, err on caution and don’t use it.
6. Consider Your Pet’s Play Style
If your pet is a strong chewer, avoid materials that could break into sharp pieces. For pets that like to eat stuffing, consider unstuffed toy options. Tailor your toy designs to your pet’s specific play habits to minimize risks.
7. Be Cautious with Food-Based Toys
If you’re making toys that incorporate food or treats, ensure that the edible components are appropriate for your pet’s diet. Also, ensure the toy design doesn’t risk your pet consuming inedible parts while trying to get to the food.
8. Avoid Choking Hazards
Be wary of any small parts that could come loose and be swallowed. This includes things like bells, buttons, or eyes on stuffed toys. If you’re using these elements, make sure they’re securely fastened.
9. Mind the Strings
For toys with strings or ropes, ensure they’re not so long that they can wrap around your pet’s neck or limbs. This is especially important for cats, who can get tangled in long strings.
10. Clean Regularly
Keep homemade toys clean to prevent the buildup of bacteria. Have a plan for cleaning each toy before you make it, and stick to your cleaning schedule.
By considering these safety considerations, you can ensure that your DIY pet toys provide fun and stimulation without unnecessary risks.
DIY Toys for Dogs
Dogs are often enthusiastic players, and many DIY toy options can keep them entertained. Here are some creative ideas:
1. T-Shirt Rope Toy
Materials needed:
- Old t-shirts
- Scissors
Instructions:
- Cut the t-shirts into long strips, about 2-3 inches wide.
- Gather three strips and tie them together at one end.
- Braid the strips tightly.
- Tie off the other end when you reach it.
- Trim any excess fabric.
This toy is excellent for tug-of-war and fetch. The familiar scent of your t-shirt can be comforting for your dog.
2. Tennis Ball Treat Puzzle
Materials needed:
- Tennis ball
- Sharp knife or box cutter
- Small treats
Instructions:
- Carefully cut a small slit in the tennis ball.
- Insert small treats into the ball through the slit.
- Give to your dog and watch them figure out how to get the treats.
This toy provides mental stimulation as your dog works to get the treats out. It’s excellent for problem-solving skills.
3. Plastic Bottle Crinkle Toy
Materials needed:
- Empty plastic bottle (remove cap and label)
- Old sock or fabric
- Treats (optional)
Instructions:
- If using treats, put a few small, dry treats inside the bottle.
- Place the bottle inside the sock or wrap it in fabric.
- Tie off the end of the sock or secure the fabric.
The crinkly sound of the bottle is often very appealing to dogs. Just ensure your dog doesn’t try to eat the plastic.
4. Muffin Tin Puzzle
Materials needed:
- Muffin tin
- Tennis balls
- Small treats
Instructions:
- Place small treats in some of the muffin tin cups.
- Cover all cups with tennis balls.
- Let your dog figure out how to remove the balls to get to the treats.
This is an excellent mental stimulation game that can keep your dog occupied for quite a while.
5. Fleece Pull Toy
Materials needed:
- Fleece fabric (about 1 yard)
- Scissors
Instructions:
- Cut the fleece into three long strips, about 4 inches wide.
- Tie the strips together at one end.
- Braid the strips tightly.
- Tie off the other end.
- Cut the remaining fabric into fringe at both ends.
This soft toy is excellent for gentler players and can be used for fetch or tug-of-war.
6. Snuffle Mat
Materials needed:
- Rubber sink mat with holes
- Fleece fabric strips
- Scissors
Instructions:
- Cut fleece into 6-8 inches long and 1-inch wide strips.
- Push the center of each strip through a hole in the mat from the top.
- Tie a knot on the underside to secure it.
- Repeat until the mat is full and fluffy.
- Hide treats in the fleece for your dog to sniff out.
This toy engages your dog’s sense of smell and provides mental stimulation as they search for treats.
7. PVC Pipe Puzzle Feeder
Materials needed:
- PVC pipe (4-6 inches in diameter)
- PVC end caps
- Drill
- Dry dog food or treats
Instructions:
- Drill several holes in the PVC pipe, large enough for treats to fall through.
- Clean the pipe thoroughly to remove any plastic shavings.
- Cap one end of the pipe.
- Fill with dry food or treats.
- Cap the other end.
Your dog must roll and manipulate the pipe to get the treats to fall out, providing mental and physical stimulation.
8. Frozen Treat Toy
Materials needed:
- Plastic container (like a yogurt cup)
- Water
- Dog-safe treats or kibble
- String
Instructions:
- Place treats or kibble in the container.
- Fill with water.
- Tie a string through the center (this will be used to hang the toy).
- Freeze overnight.
- Remove from the container and hang it outside for your dog to lick and chew.
This toy is excellent for hot days and provides long-lasting entertainment.
DIY Toys for Cats
Cats are natural hunters and love toys that appeal to this instinct. Here are some DIY cat toy ideas:
1. Toilet Paper Roll Puzzle
Materials needed:
- Empty toilet paper rolls
- Small treats
- Box or tray
Instructions:
- Stand the toilet paper rolls upright in the box.
- Drop treats into some of the rolls.
- Let your cat figure out how to get the treats.
This puzzle toy engages your cat’s problem-solving skills and hunting instincts.
2. Sock Fish
Materials needed:
- Old sock
- Scissors
- Catnip
- Needle and thread (or fabric glue)
Instructions:
- Cut the sock into a fish shape.
- Sew or glue the edges, leaving a small opening.
- Fill with catnip.
- Sew or glue the opening closed.
The combination of an exciting shape and catnip makes this toy irresistible to many cats.
3. Feather Wand
Materials needed:
- Stick or dowel rod
- String
- Feathers
- Bell (optional)
Instructions:
- Tie one end of the string to the stick.
- Tie feathers and a bell (if using) to the other end of the string.
This classic toy mimics prey and encourages your cat to jump and pounce.
4. Cardboard Box Castle
Materials needed:
- Cardboard boxes of various sizes
- Scissors or box cutter
- Tape
Instructions:
- Cut doorways and windows in the boxes.
- Arrange and tape the boxes together to create a multi-level structure.
- Place some of your cat’s favorite toys inside.
Cats love to explore and hide, making this DIY castle a perfect playground.
5. T-Shirt Yarn Ball
Materials needed:
- Old t-shirt
- Scissors
Instructions:
- Cut the t-shirt into long, thin strips.
- Roll the strips into a ball, securing the end by tucking it under other layers.
This soft ball is perfect for batting around and carrying. The familiar scent can be comforting for your cat.
6. Puzzle Treat Box
Materials needed:
- Cardboard box
- Toilet paper rolls
- Treats
- Tape
Instructions:
- Cut holes in the cardboard box, slightly larger than the toilet paper rolls.
- Tape the toilet paper rolls to the inside of the box, aligning with the holes.
- Place treats inside some of the rolls.
- Close the box and let your cat know how to get the treats.
This toy engages your cat’s problem-solving skills and hunting instincts.
7. Crinkle Ball
Materials needed:
- Aluminum foil
- Colorful yarn
Instructions:
- Crumple aluminum foil into a ball about the size of a golf ball.
- Wrap colorful yarn around the foil ball, covering it completely.
- Tie off the end of the yarn securely.
The crinkly sound and erratic movement of this toy will attract most cats.
8. Cat Tent
Materials needed:
- Old t-shirt
- Two wire hangers
- Cardboard
- Safety pins
Instructions:
- Bend the wire hangers into two large arches.
- Cross the arches to form a dome shape.
- Cut a piece of cardboard into a circle for the base.
- Stretch the t-shirt over the wire frame and secure it with safety pins.
- Place the structure on the cardboard base.
This cozy hideout doubles as a play space when you dangle toys through the openings.
DIY Toys for Small Pets
Small pets like rabbits, guinea pigs, and hamsters also enjoy toys. Here are some ideas:
1. Cardboard Tube
Materials needed:
- Cardboard tubes (from toilet paper or paper towels)
- Hay
- Small treats
Instructions:
- Stuff the tube with hay and treats.
- Fold the ends to close.
- Make small holes along the tube for added interest.
This toy provides both entertainment and a healthy snack. It encourages natural foraging behaviors and helps wear down teeth, crucial for small pets’ dental health.
2. Willow Ball
Materials needed:
- Thin, flexible willow branches
- Small treats
Instructions:
- Weave the willow branches into a loose ball shape.
- Place treats inside the ball.
- Ensure no sharp ends are sticking out.
This toy is great for chewing and foraging. Willow is safe for most small pets and provides a natural chewing material that’s good for their teeth.
3. Paper Bag Hideout
Materials needed:
- Paper bag
- Scissors
- Hay and treats
Instructions:
- Cut a few small holes in the paper bag.
- Fill with hay and treats.
- Fold the top of the bag over.
This creates a fun hideout and foraging toy. It appeals to small pets’ instincts to burrow and explore.
4. PVC Pipe Tunnel
Materials needed:
- PVC pipe (make sure it’s wide enough for your pet)
- Saw (to cut the pipe if required)
Instructions:
- If needed, cut the PVC pipe to an appropriate length.
- Clean thoroughly.
- Place in your pet’s play area.
This simple tunnel provides a fun place to run and hide. It can be especially appealing if you place treats at the ends or inside the tunnel.
5. Wooden Block Chew Toy
Materials needed:
- Untreated, pet-safe wooden blocks
- Twine
- Drill (to make holes in the blocks)
Instructions:
- Drill holes through the center of the wooden blocks.
- Thread the blocks onto the twine.
- Tie knots between each block to keep them in place.
- Hang in your pet’s cage or play area.
This toy provides entertainment and helps keep your pet’s teeth trimmed. The dangling nature of the toy also encourages movement and play.
6. Cardboard Castle
Materials needed:
- Various sizes of cardboard boxes
- Scissors
- Non-toxic glue
Instructions:
- Cut doorways and windows in the boxes.
- Arrange the boxes to create multiple levels and rooms.
- Glue the boxes together securely.
- Place hay and treats in different areas of the castle.
This multi-level playground provides exercise and exploration opportunities for small pets. It satisfies their natural curiosity and desire to climb and explore.
7. Hanging Treat Mobile
Materials needed:
- Wooden dowel or stick
- String
- Various safe treats (like carrot pieces, apple slices, hay cubes)
Instructions:
- Tie strings of varying lengths to the dowel.
- Attach different treats to the ends of the strings.
- Hang the mobile in your pet’s enclosure.
This toy encourages stretching and jumping to reach the treats, providing mental and physical stimulation. It’s a great way to make treat time more engaging and active.
8. Dig Box
Materials needed:
- Shallow cardboard box or plastic container
- Pet-safe digging substrate (like shredded paper, hay, or coconut fiber)
- Small treats or toys
Instructions:
- Fill the box with the digging substrate.
- Hide treats or small toys throughout the substrate.
- Place in your pet’s play area.
This toy allows small pets to dig naturally while searching for treats. It’s especially beneficial for pets like rabbits and guinea pigs who enjoy foraging.
Choosing the Right Materials
When making DIY pet toys, choosing suitable materials is crucial. Here are some detailed guidelines:
Safe Fabrics
- Cotton and fleece are generally safe for pets. They’re durable and don’t fray easily.
- Avoid fabrics with tiny fibers that can be ingested, like wool or certain synthetics.
- Make sure there are no loose threads that could be swallowed or wrapped around limbs.
- For stuffing, use pet-safe polyester fiberfill or natural materials like cotton balls.
Safe Plastics
- Use sturdy, BPA-free plastics that won’t crack or splinter easily.
- Permanently remove labels, caps, and rings from plastic bottles.
- Avoid plastics that contain toxic substances.
- PVC pipes can be used for specific toys, but ensure they’re thoroughly cleaned and have no sharp edges.
Natural Materials
- Untreated wood, coconut shells, and sisal rope are good options for chew toys.
- Make sure the wood hasn’t been treated with chemicals or pesticides.
- Avoid toxic plants or woods (like cedar, which can harm small pets).
- Willow branches are safe for most pets and make great chew toys.
Food-Safe Materials
- For toys that involve treats, use food-safe materials that won’t absorb odors or bacteria.
- Stainless steel or ceramic dishes are suitable for treat-dispensing toys.
- Avoid porous materials that can harbor bacteria when used with food.
Size Considerations
- Choose materials that will make appropriately sized toys for your pet.
- What’s safe for a large dog might be a choking hazard for a cat or small dog.
- For small pets, ensure any openings in toys are either large enough for the pet to pass through easily or too small to get stuck in.
Durability
- Consider your pet’s chewing strength and play style when selecting materials.
- Opt for stricter materials like thick rubber or dense rope for aggressive chewers.
- Softer materials like fleece or thin cotton may be suitable for gentler pets.
Avoid Harmful Substances
- Never use materials treated with harmful chemicals, including certain glues, paints, or varnishes.
- Be cautious with dyes – use only pet-safe, non-toxic options if coloring is necessary.
- Avoid materials with a strong odor, as these may contain volatile compounds harmful to pets.
Cleaning and Maintaining DIY Pet Toys
Regular cleaning and maintenance are essential to keep your DIY pet toys safe and hygienic. Here are some detailed tips:
Fabric Toys
- Most can be machine-washed on a gentle cycle. Use a mesh bag to prevent damage.
- Use pet-safe detergent and avoid fabric softeners, which can irritate your pet’s skin.
- Air dry thoroughly before giving back to your pet to prevent mold growth.
- Spot clean with a pet-safe disinfectant for toys that can’t be machine-washed.
Plastic Toys
- Clean with hot, soapy water. Use dish soap that’s free from harsh chemicals.
- Rinse thoroughly to remove all soap residue, which can upset your pet’s stomach if ingested.
- For deeper cleaning, soak in a solution of water and pet-safe disinfectant.
- Check for cracks or damage during cleaning and discard if the toy’s integrity is compromised.
Wooden Toys
- Wipe clean with a damp cloth. For tougher dirt, use a mild soap solution.
- Rinse well and dry thoroughly to prevent wood from warping or developing mold.
- Sand down any rough spots that develop to prevent splinters.
- Replace them when they become too worn or splintered.
Rope Toys
- These can harbor bacteria, so clean them regularly.
- Soak in a mixture of water and pet-safe disinfectant, then rinse thoroughly.
- For a deeper clean, you can microwave damp rope toys for a minute to kill bacteria (but let them cool before giving them to your pet).
- Replace rope toys when they start to fray significantly.
Catnip Toys
- These should be replaced regularly as catnip loses its potency over time.
- Store unused catnip toys in an airtight container in the freezer to maintain freshness.
- Spot clean the outside of the toy, but avoid getting the catnip wet.
Treat-Dispensing Toys
- Clean these after each use to prevent bacteria growth from food residue.
- Use hot, soapy water and a bottle brush to clean inside crevices.
- Rinse very thoroughly to remove all soap and food particles.
- Allow to dry completely before refilling with treats.
Regular Inspections
- Check toys regularly for signs of wear and tear.
- Look for loose parts, tears, or anything that could be swallowed.
- Pay attention to your pet’s chewing habits – if they’re destroying toys quickly, you may need to choose more durable materials.
- Replace toys that are falling apart or have become too dirty to clean effectively.
Rotation System
- Implement a toy rotation system to keep your pet interested and extend the life of the toys.
- This also gives you a chance to clean toys thoroughly between uses.
Remember, no toy is indestructible. Always supervise your pet during playtime, especially with new or homemade toys, and be prepared to replace toys for your pet’s safety.
Making Toy Creation a Family Activity
Creating DIY pet toys can be a fun activity for the whole family. Here are some expanded ideas to get everyone involved:
Toy-Making Contests
- Have each family member create a toy, then see which one your pet likes best.
- Set themes for each contest, like “Quietest Toy” or “Most Colorful Toy.”
- Create categories so everyone can win something, like “Most Innovative” or “Pet’s Favorite.”
Assembly Line
- Assign tasks to different family members for more complex toys to create an efficient toy-making process.
- This teaches teamwork and allows everyone to contribute based on their skills and interests.
- Rotate roles so everyone gets to try different aspects of toy-making.
Educational Opportunity
- Use toy-making to teach children about pet care, recycling, and crafting.
- Discuss pet safety and why certain materials are chosen over others.
- Incorporate lessons about animal behavior and why certain toys appeal to pets.
Seasonal Themes
- Create toys with seasonal themes, like pumpkin-shaped toys for fall or snowman toys for winter.
- This can be a fun way to mark holidays and the change of seasons with your pet.
- Use safe, seasonal materials like pine cones (for large dogs only) in autumn or make cooling toys for summer.
Donation Project
- Make extra toys to donate to local animal shelters, teaching children about giving back to the community.
- Research what types of toys shelters need most and focus on creating those.
- Involve children in the delivery process so they can see the impact of their work.
Pet Toy Story Time
- Encourage children to create stories about the toys they make.
- They can draw pictures or write short stories about the “adventures” of the toys.
- This combines creativity with pet care in a fun, engaging way.
Photography Session
- After making toys, have a family photo session with your pets and their new toys.
- Create a scrapbook or digital album to document your creations over time.
- This can be a fun way to track your pet’s favorites and your family’s improving skills.
Upcycling Challenge
- Challenge family members to create toys using only items that would otherwise be thrown away.
- This teaches resourcefulness and environmental responsibility.
- Set a time limit, like a craft show challenge, to make it more exciting.
Pet Toy Repair Workshop
- Instead of always making new toys, have sessions where you repair old favorites.
- This teaches children about maintenance and prolonging the life of items.
- Discuss which toys can be safely repaired and when to replace them.
Multi-Pet Toy Creation
- If you have multiple pets, create toys that different species can enjoy.
- This encourages thinking about the needs and preferences of different animals.
- It can lead to exciting discussions about animal behavior and pet care.
By involving the whole family in creating DIY pet toys, you’re not just saving money and entertaining your pets – you’re creating valuable family bonding time, teaching essential skills and values, and fostering creativity and compassion for animals.
Takeaways
Creating DIY pet toys is a cost-effective, customizable, and environmentally friendly way to entertain your pets. Homemade toys allow you to tailor designs to your pet’s preferences, ensure safety, and reuse household items.
Regular vet check-ups, proper nutrition, and safe materials are essential considerations. Creative toy-making strengthens the bond between you and your pet and provides mental and physical stimulation.
Involving the whole family in making these toys can be a fun, educational, and rewarding experience, fostering teamwork and creativity while emphasizing the importance of pet care. You can craft enjoyable, safe pet toys with these tips and ideas.


