
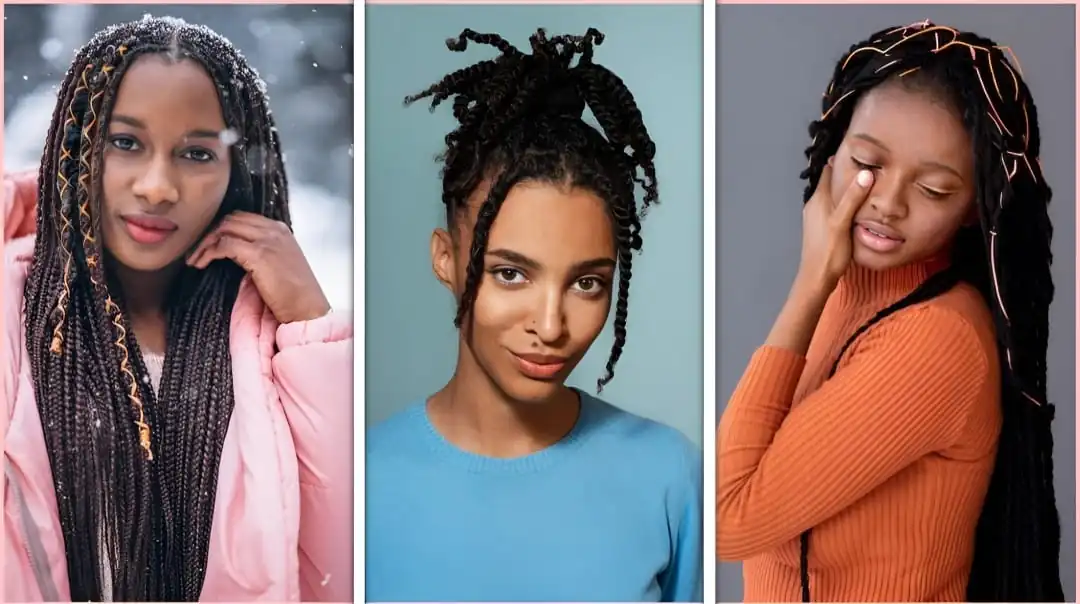
Due in large part to social media influencers and the natural hair movement, Jayda Wayda braids have taken the beauty and fashion worlds by storm. These chunky, statement braids are more than just a style—they’re an expression of personality and have become synonymous with the trendsetter Jayda Wayda herself. They embody a blend of practicality and panache, making them a favored choice for those wanting to stay on-trend while giving their natural hair a protective styling option.
When you decide to embark on this striking look, one of the first considerations might be the longevity of the style. Understanding the durability of Jayda Wayda braids is crucial, as it’s not just about looking good on day one but also about maintaining that fresh, influencer-level appearance over time. The lifespan of these braids can be influenced by several factors, including the braiding technique used, the texture and health of your natural hair, and how the braids are cared for post-installation.
Let’s explore how to maximize the life of your Jayda Wayda braids and keep them looking fashion-forward and beautiful.
Basics of Jayda Wayda Braids
Jayda Wayda braids stand out for their distinctive flare and versatility. Jayda Wayda braids are often characterized by their chunky, knotless box braid styling. This particular braiding technique involves creating jumbo-sized braids with a knotless start to prevent tension on the scalp. It’s a style that’s gained popularity not only for its striking look but also for its ability to protect natural hair.
Comparison with Traditional Braids
Traditional box braids are typically installed with a small knot at the base, which can sometimes cause tension and stress on the scalp. In contrast, Jayda Wayda braids utilize a knotless technique, presenting a less damaging alternative. While both styles offer a protective solution for hair, Jayda Wayda’s version is often recognized for its comfort and innovative, edgy look.
| Feature | Jayda Wayda Braids | Traditional Braids |
|---|---|---|
| Braiding technique | Hand-braided with a unique knotting technique | Hand-braided in basic 3-strand technique |
| Hair extensions used | High-quality kanekalon hair | Synthetic hair |
| Weight | Very lightweight, even with long lengths | Can feel heavy, especially when long |
| Durability | Extremely durable, lasts 6–8 weeks | It lasts 4-6 weeks, typically |
| Price | Expensive, $150+ even for shorter styles | More affordable, often $100 or less |
| Style versatility | Offered in various creative styles and colors | Typically, they come in basic styles and solid colors |
| Maintenance | Very low maintenance; just tie down at night | It requires some upkeep, like occasional tightening |
| Protective qualities | Less manipulation of natural hair, less tension | Pulling on edges can damage hair over time |
Table: Jayda Wayda Braids vs Traditional Braids
Pros and Cons of Jayda Wayda Braids
Pros:
- Protective Style: They help protect your natural hair from environmental damage.
- Tension-Free: The knotless technique ensures reduced scalp tension and less breakage.
Cons:
- Time Consumption: Application can be time-intensive due to the intricacy of the braids.
- Maintenance: Requires consistent upkeep to maintain a neat appearance.
Jayda Wayda Braids: Preparation and Installation

Achieving a stunning Jayda Wayda braid style starts with proper preparation and meticulous installation. Selecting quality hair extensions, preparing your natural hair for the braiding process, and following a thorough installation routine are key for both the longevity and the look of your braids. Let’s guide you through each step.
Choosing the Right Hair Extensions
When opting for Jayda Wayda braids, selecting the right hair extensions is crucial. You’ll want to look for extensions that match your hair texture for a seamless blend. Extensions come in various materials, from synthetic to human hair, each offering a different look and feel. Synthetic hair is cost-effective and readily available, while human hair offers a more natural appearance and greater durability.
Recommended Extension Types:
- Synthetic Hair: Budget-friendly; choose high-temperature variants if you wish to apply heat.
- Human Hair: Higher cost; reacts to styling and environmental factors like your own hair.
Steps for Preparing Natural Hair
Before braiding, your natural hair needs to be thoroughly washed, conditioned, and detangled. Moisturize your hair well to ensure it’s hydrated and protected. A leave-in conditioner or a hair oil can help keep your natural hair healthy underneath the braids. Use a wide-tooth comb or a detangling brush to remove any knots, starting from the ends and working your way up to the roots.
Preparation Checklist:
- Wash: Use a clarifying shampoo to cleanse your scalp and hair.
- Condition: Apply a deep conditioner to replenish moisture.
- Detangle: Carefully comb through your hair to prevent breakage during installation.
- Moisturize: Seal in the moisture with your choice of oil or leave-in product.
How to Apply Jayda Wayda Braids
[Video Credits @braidsbycaylah]
The installation of Jayda Wayda braids is a precise art. Begin by parting your hair into the desired sections, usually five large ones—two in front and three in the back. Apply a small amount of gel to each section to smooth down flyaways and maintain neatness. Then, intricately braid your hair, attaching the extensions as necessary to achieve the characteristic long, chunky look.
For a protective style that lasts, it’s important that the braids are not too tight; this can lead to tension and potential hair damage. Taking your time during this process will not only protect your natural hair but also ensure a polished final appearance.
Installation Steps:
- Parting: Use a tail comb for precise parts.
- Gel Application: Apply gel to each section for sleekness.
- Braiding: Attach extensions (if using) and braid each section neatly.
- Securing: Ensure each braid is secure without excessive tension.
DIY Styling and Personalization
Customizing your Jayda Wayda braids is an excellent way to showcase your creativity and self-expression. Whether it’s through the addition of colorful beads or choosing a palette of colors and highlights that complements your personal style, there are numerous ways to make these stunning braids your own.
Incorporating Beads and Accessories
To add a playful twist to your Jayda Wayda braids with curls, consider incorporating beads and accessories. Specifically, you can thread beads onto the ends of each braid, choosing styles that resonate with your personal taste. Here’s a simple guide:
- Selection: Choose beads that can easily slide onto your braids.
- Attachment: Secure them at the end or along the braid for a unique look.
Pro Tip: Small elastic bands can help keep beads in place, ensuring your style remains both functional and fashionable.
Creative Styling Options
What about trying new braiding patterns or adding curls? Jayda Wayda braids with curls at the ends add a touch of softness and femininity to the overall style. Here are some variations you might consider:
- Jumbo Braids: Larger braids make a bold statement and provide a striking contrast to the curls.
- Braid Patterns: Experiment with different braid placements and parting styles to suit your face shape and personal preference.
Remember: The use of braiding foam or mousse can help maintain the neatness while providing a hold to the curls.
Choosing Colors and Highlights
When it comes to selecting colors for your Jayda Wayda braids, the sky is the limit. From blonde Jayda Wayda braids to red hues or even braids with color throughout, the options allow for full customization. Consider these points:
- Blonde Tones: Blonde highlights can create a warm and radiant contrast, perfect for sunny seasons.
- Vibrant Colors: Intense colors like red can present an audacious and energetic feel.
| Color Choice | Suggested Style |
|---|---|
| Blonde | Subtle highlights for a sun-kissed look |
| Red | Bold all-over color for a statement |
By choosing the right color and highlight placement, you can create a look that uniquely represents your individual style.
How Long Do Jayda Wayda Braids Last
Jayda Wayda braids can be a stylish and protective hairstyle choice, but understanding their longevity is crucial to maintaining them. How you install, maintain, and take care of your hair on a daily basis all affect how long your braids last.
Typically, your Jayda Wayda braids can last anywhere from 4 to 6 weeks. Factors like your hair texture, maintenance routine, and daily activities play significant roles in this lifespan.
Factors Affecting Braid Longevity
Hair Type and Texture: Your natural hair’s type and texture play a significant role in how long your braids can last. Finer or silkier hair tends to slip more easily than coarser textures, potentially leading to a shorter braid lifespan.
Installation Technique: Opting for knotless braids can influence the duration of your style due to reduced tension and less stress on the hair roots, promoting longer-lasting wear and hair growth.
Maintenance Routine: Keeping your braids low-maintenance but clean is key. A buildup of products and oils can shorten the lifespan by causing the braids to appear dull and encouraging slippage.
Use of Rubber Bands: If your style includes rubber bands at the base or ends, they can cause tension that may lead to breakage. Keeping them loose will help your braids last longer while mitigating damage.
Extending the Life of Your Jayda Wayda Braids
To prolong the life of your Jayda Wayda braids, consider these tips:
- Sleep with a Silk Scarf or Bonnet: This minimizes frizz and reduces the moisture loss from your hair.
- Moisturize Regularly: Use lightweight sprays or oils to keep your scalp hydrated without causing buildup.
- Minimal Manipulation: The less you touch your braids, the better they will hold their form.
When to Redo Your Braids?
It’s time to redo your braids when:
- Noticeable Growth: If your hair growth has led to significant new growth at the base of the braids, consider a touch-up.
- Build-Up Becomes Visible: When products and oils build up at the base of your braids or along the scalp, it can signal it’s time for a fresh start.
By monitoring these factors and providing consistent care, you can enjoy your Jayda Wayda braids for approximately 4 to 6 weeks. Regular salon visits for maintenance and touch-ups will keep your braids looking fresh and neat, ensuring you display your braided style confidently.
Care and Maintenance for Jayda Wayda Braids
Ensuring that your Jayda Wayda braids last and look fresh involves a set commitment to routine care. Proper washing, safeguarding at night, and scalp hydration are pivotal.
Routine Washing and Conditioning
You might question how often to wash your braids. It’s ideal to wash your braids once a week to maintain cleanliness without causing frizz. Use a gentle shampoo, then a hydrating conditioner. Focus on your scalp to remove buildup, and rinse thoroughly to prevent residue.
Nightly Protection Methods
Ever wonder why your braids look rough after waking up? It’s likely due to friction. Employ a satin pillowcase or silky scarf to reduce this overnight. Alternatively, consider a bonnet that prevents tangles and keeps braids intact.
Moisturizing and Scalp Care
Is your scalp feeling dry between washes? Hair oils and leave-in conditioners are your allies in keeping your scalp nourished. Lightly apply these products to your scalp and edges to moisturize and promote healthy hair beneath your braids. Remember, less is more; avoid buildup that can cause itching and discomfort.
Takeaways
Jayda Wayda braids, a distinctive and trendy hairstyle, allow for both self-expression and versatility. When considering this protective style for your natural hair, it’s important to understand its longevity.
Remember, a consistent care routine can optimize the lifespan of your braids. If you notice any tension on your scalp or if the braids start to appear frizzy, it’s a sign they might need to be redone. Enjoy your Jayda Wayda braids as a statement of your personal style while giving your natural hair the protection it deserves.