Creating an organized home can feel overwhelming, but with some simple DIY projects, you can reclaim your space and reduce clutter.
Below, you’ll find 15 detailed DIY organization ideas tailored for every room in your home.
Each idea is designed to enhance functionality and bring a sense of calm to your surroundings.
1. Under-Bed Storage Bins
The space under your bed often becomes a neglected area filled with dust bunnies.
However, it can be a treasure trove for storage, perfect for items you don’t use daily.
By utilizing this space, you can keep your bedroom clutter-free while maximizing your storage potential.
Materials Needed
- Plastic bins or wooden crates:
Choose clear bins for visibility or decorative crates for a rustic touch.
- Labels:
Use a label maker or handmade tags to easily identify contents.
- Measuring tape:
To ensure your bins fit comfortably under your bed.
Instructions
- Measure the Space:
Use a measuring tape to check the height and length of the space under your bed. This will help you select appropriately sized bins.
- Select Your Bins:
Choose bins that can easily slide in and out. Consider bins with wheels for effortless access.
- Organize Your Items:
Sort items into categories, such as seasonal clothing, extra linens, or shoes. This will help you find what you need quickly.
- Label Each Bin:
Clearly label the contents of each bin to make retrieval a breeze.
Tips
- Consider using vacuum-sealed bags for bulky items like winter jackets to save even more space.
- If you have a high bed frame, consider using stackable bins to maximize vertical space.
2. Mason Jar Organizers
Mason jars are not only for canning; they are also versatile storage solutions that add charm to your home.
They can be used in various rooms to store everything from kitchen ingredients to bathroom essentials, providing both organization and aesthetic appeal.
Materials Needed
- Mason jars of various sizes:
Choose small jars for spices and larger jars for pasta or cotton balls.
- Wooden board (optional):
To create a wall-mounted display.
- Paint (optional):
To customize the jars or board.
- Mounting hardware:
If you plan to attach jars to a board.
Instructions
- Select Your Jars:
Choose jars based on the items you want to store.
For example, small jars work great for spices, while larger ones can hold dry goods or toiletries.
- Decorate the Jars:
If desired, paint the jars or the wooden board to match your decor.
Chalkboard paint on lids allows for easy labeling.
- Mounting the Board:
If using a board, secure it to the wall using appropriate mounting hardware.
- Fill the Jars:
Organize your items into jars and attach them to the board or place them on shelves.
Tips
- Group jars by type (e.g., cooking, baking) for a cohesive look.
- Use different sizes and colors of jars for visual interest.
3. Pegboard Wall Organizer

A pegboard offers an incredibly versatile way to organize tools, kitchen utensils, or craft supplies.
Its customizable nature allows you to rearrange items as needed, making it an excellent solution for keeping frequently used items within easy reach.
Materials Needed
- Pegboard:
Available at hardware stores; choose a size that fits your wall space.
- Pegboard hooks and shelves:
Purchase additional hooks and shelves as needed to hold various items.
- Paint (optional):
To personalize the pegboard.
- Wall mounting hardware:
To securely attach the pegboard to the wall.
Instructions
- Choose Location:
Identify a wall space in your garage, kitchen, or craft room for your pegboard.
- Cut and Paint:
If necessary, cut the pegboard to your desired size.
Paint it to match your decor for a cohesive look.
- Mount the Pegboard:
Use appropriate wall anchors to secure the pegboard to the wall, ensuring it can hold the weight of items you’ll hang.
- Add Hooks and Shelves:
Arrange hooks and shelves based on your storage needs, customizing the layout to suit your style.
Tips
- Use colored hooks for a pop of color.
- Hang frequently used tools or utensils at eye level for easy access.
4. Repurposed Shoe Rack
An old shoe rack can serve many purposes beyond storing shoes.
By repurposing it, you can create a stylish and functional organization solution for various items throughout your home.
Materials Needed
- Old shoe rack:
Ensure it’s sturdy and in good condition.
- Bins or baskets (optional):
For a neater appearance.
- Paint (optional):
To refresh the look of the shoe rack.
Instructions
- Clean the Shoe Rack:
Remove any dust and ensure it’s ready for use.
- Decide on Usage:
Consider how you want to repurpose it. It can store cleaning supplies, craft materials, or even kitchen items.
- Reorganize:
Place items directly on the rack or use bins for a cleaner look.
- Customize:
Optionally, paint the rack to match your decor style, adding a personal touch.
Tips
- Hang the rack in a closet, laundry room, or entryway for easy access.
- Use the top of the rack for decorative items or plants.
5. Hanging Fruit Basket
A hanging fruit basket not only saves counter space but also keeps your fruits visible and accessible.
It adds a decorative element to your kitchen while promoting healthy snacking.
Materials Needed
- Wire fruit basket or tiered hanging basket:
Choose based on your kitchen size.
- Ceiling hook or wall-mounted hook:
Ensure it can support the weight of the basket filled with fruits.
Instructions
- Select Location:
Choose a spot in your kitchen that is easy to reach, such as near your prep area.
- Install Hook:
Secure the hook in the ceiling or on the wall, ensuring it’s sturdy enough to hold the basket.
- Hang the Basket:
Attach the fruit basket to the hook.
- Fill with Fruit:
Organize fruits in the basket, keeping it colorful and appealing.
Tips
- Use separate baskets for fruits and vegetables to prevent spoilage.
- Choose a decorative basket that complements your kitchen decor for added style.
6. Baskets for Shelves
Incorporating baskets into your shelving units not only helps keep your items organized but also adds a stylish touch.
They are perfect for grouping similar items together, making your space look more curated.
Materials Needed
- Various sizes of decorative baskets:
Choose baskets that suit your style and fit your shelves.
- Shelving units:
Bookcases or dedicated shelving systems work well.
Instructions
- Select Baskets:
Choose baskets in different sizes and colors to create visual interest on your shelves.
- Organize Items:
Group similar items together (books, toys, office supplies) and place them in the baskets.
- Label Baskets:
Consider labeling each basket for easy identification and to maintain organization.
Tips
- Opt for baskets with handles for easy movement.
- Mix and match sizes and colors for a dynamic look.
7. DIY Drawer Dividers
Creating your own drawer dividers is a simple yet effective way to maintain organization in any drawer.
This project helps to keep smaller items from becoming a jumbled mess.
Materials Needed
- Cardboard or foam board:
For creating dividers.
- Scissors:
To cut the dividers to size.
- Ruler:
To measure and ensure accuracy.
- Tape or glue:
To secure the dividers if necessary.
Instructions
- Measure Drawers:
Measure the dimensions of your drawers to determine how many dividers you need.
- Cut Dividers:
Cut cardboard or foam board to the desired dimensions for your dividers.
- Arrange in Drawer:
Place the dividers in the drawer to create separate sections for different items (utensils, office supplies).
- Secure if Necessary:
Use tape or glue to hold dividers in place if needed.
Tips
- Customize the sizes of the sections based on your specific needs.
- Use decorative paper to cover the dividers for a more polished appearance.
8. Label Everything
Labels are an essential tool in maintaining organization.
By clearly labeling bins, drawers, and shelves, you can quickly find what you need and keep clutter at bay.
Materials Needed
- Label maker or printer:
For creating clear, professional labels.
- Labeling tape or paper:
Choose a type that suits your labeling needs.
- Scissors:
To cut labels to size.
Instructions
- Identify Areas to Label:
Determine which items or areas need labeling (bins, shelves, drawers).
- Create Labels:
Use a label maker or print labels from your computer, ensuring they are easy to read.
- Apply Labels:
Affix labels to the corresponding items or storage solutions.
Tips
- Use color-coded labels for different categories to enhance organization.
- Regularly update labels as items change or are added.
9. Wall-Mounted Shelf
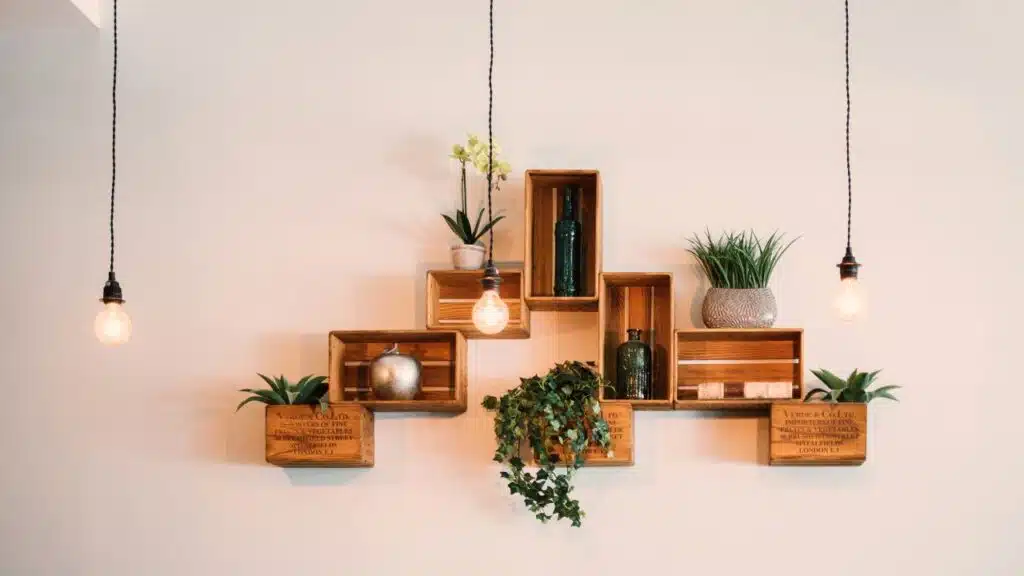
Installing wall-mounted shelves is a great way to create additional storage without sacrificing floor space.
This solution can enhance the look of any room while providing practical storage.
Materials Needed
- Wall-mounted shelves:
Choose shelves that fit your style and space.
- Brackets:
To support the shelves.
- Wall anchors and screws:
To securely attach the shelves to the wall.
- Drill:
For installation.
Instructions
- Choose Location:
Identify a wall space that could benefit from additional storage.
- Mount Brackets:
Install brackets according to manufacturer instructions, ensuring they are level and securely anchored.
- Attach Shelves:
Secure the shelves onto the brackets.
- Organize Items:
Place books, plants, or decorative items on the shelves.
Tips
- Use floating shelves for a sleek, modern look.
- Arrange items by height and size for a visually pleasing display.
10. Over-the-Door Hooks
Over-the-door hooks are a fantastic way to maximize storage in closets or entryways.
They provide an easy solution for hanging bags, coats, or towels without taking up additional space.
Materials Needed
- Over-the-door hook rack:
Choose one with multiple hooks for maximum utility.
- Measuring tape:
To ensure the rack fits the door without obstruction.
Instructions
- Select Door:
Choose a door that needs additional storage, such as a closet or bathroom door.
- Measure:
Ensure the rack will fit the door without interfering with its operation.
- Install:
Hang the over-the-door hook rack and adjust it as necessary.
- Organize:
Use hooks to hang bags, coats, or towels.
Tips
- Choose a rack with adjustable hooks for added versatility.
- Use decorative hooks to add a touch of style to your space.
11. File Organizers for Mail and Papers
File organizers are essential for managing mail, documents, and important papers, preventing clutter from accumulating on countertops and tables.
Materials Needed
- File organizer or magazine holder:
Choose one that suits your decor.
- Labels:
To categorize different types of documents.
- Paper clips or binder clips:
For sorting papers.
Instructions
- Select Location:
Place the file organizer in your entryway, home office, or wherever you manage paperwork.
- Sort Papers:
Organize papers by category (bills, personal documents, receipts) to streamline the process.
- Label Sections:
Use labels to mark each section for easy identification.
- Maintain Organization:
Regularly check and sort through mail to prevent buildup.
Tips
- Consider using a decorative file organizer to enhance your decor.
- Schedule regular times to declutter and organize your file system.
12. Tension Rod for Cleaning Supplies
Using a tension rod to organize cleaning supplies helps maximize space under the sink or in a closet.
This solution keeps bottles easily accessible while freeing up valuable shelf space.
Materials Needed
- Tension rod:
Choose one that fits your under-sink area.
- S-hooks:
To hang spray bottles and cleaning tools.
Instructions
- Choose Location:
Identify a space under the sink or in a closet where a tension rod can fit.
- Install Tension Rod:
Adjust the rod to fit snugly in the chosen space.
- Hang Supplies:
Use S-hooks to hang spray bottles and cleaning tools on the rod.
- Organize:
Arrange items for easy access while keeping them tidy.
Tips
- Use clear containers to store smaller items, such as sponges and brushes, for a neat appearance.
- Label the containers for added organization.
13. Magazine Holder for Cutting Boards
Repurposing a magazine holder can effectively store cutting boards, preventing them from becoming cluttered in drawers or on countertops.
Materials Needed
- Magazine holder:
Choose a sturdy holder that can accommodate cutting boards.
- Cutting boards:
Ensure they fit vertically in the holder.
Instructions
- Select Holder:
Choose a magazine holder that fits your kitchen space and can hold your cutting boards.
- Place Holder:
Position the holder vertically in a cabinet or on the countertop.
- Insert Cutting Boards:
Place cutting boards in the holder to keep them upright and easily accessible.
Tips
- Consider using a decorative holder that complements your kitchen decor.
- Use the holder for other kitchen items, like baking sheets or cookbooks.
14. DIY Jewelry Organizer
Creating a jewelry organizer using a picture frame not only keeps your accessories untangled but also allows you to display them beautifully.
This project can be both functional and decorative.
Materials Needed
- Picture frame:
Choose a size that suits your jewelry collection.
- Mesh or lace fabric:
For hanging jewelry.
- Stapler or glue:
To secure the fabric.
- Hook for hanging:
To mount the frame on the wall.
Instructions
- Prepare the Frame:
Remove the backing and glass from the picture frame.
- Attach Fabric:
Cut a piece of mesh or lace fabric to fit the frame and staple or glue it onto the back.
- Hang Frame:
Use a hook to mount the frame on the wall, ensuring it is securely fastened.
- Organize Jewelry:
Hang earrings and necklaces on the mesh or lace for easy access.
Tips
- Customize the frame with paint or decorative elements to match your decor.
- Use small clips or pins to hang bracelets and rings.
15. Utilize Vertical Space
Maximizing vertical space in your home can lead to significant improvements in organization.
By taking advantage of wall space, you can store items without cluttering your floors.
Materials Needed
- Shelving units or wall-mounted shelves:
Choose shelves that fit your style and available space.
- Hooks or pegboards:
For hanging items vertically.
- Baskets or bins:
To store smaller items.
Instructions
- Identify Vertical Areas:
Look for walls or corners where you can add shelves or hooks.
- Install Shelves:
Mount shelves to hold items like books, plants, or decorative pieces.
- Add Hooks:
Use hooks for hanging items like bags, coats, or tools.
- Utilize Baskets:
Place baskets on higher shelves to store items you don’t use frequently.
Tips
- Use clear bins for easy visibility of contents.
- Arrange items based on frequency of use, keeping the most accessed items within easy reach.
Conclusion
By implementing these 15 DIY organization ideas, you can transform your home into a well-organized sanctuary.
Each project not only enhances functionality but also adds a personal touch to your decor.
Take the time to customize these solutions to fit your style and needs, and enjoy the benefits of a tidy, stress-free living environment.
Whether it’s repurposing everyday items or creating new storage solutions, your organized home is just a few DIY projects away!