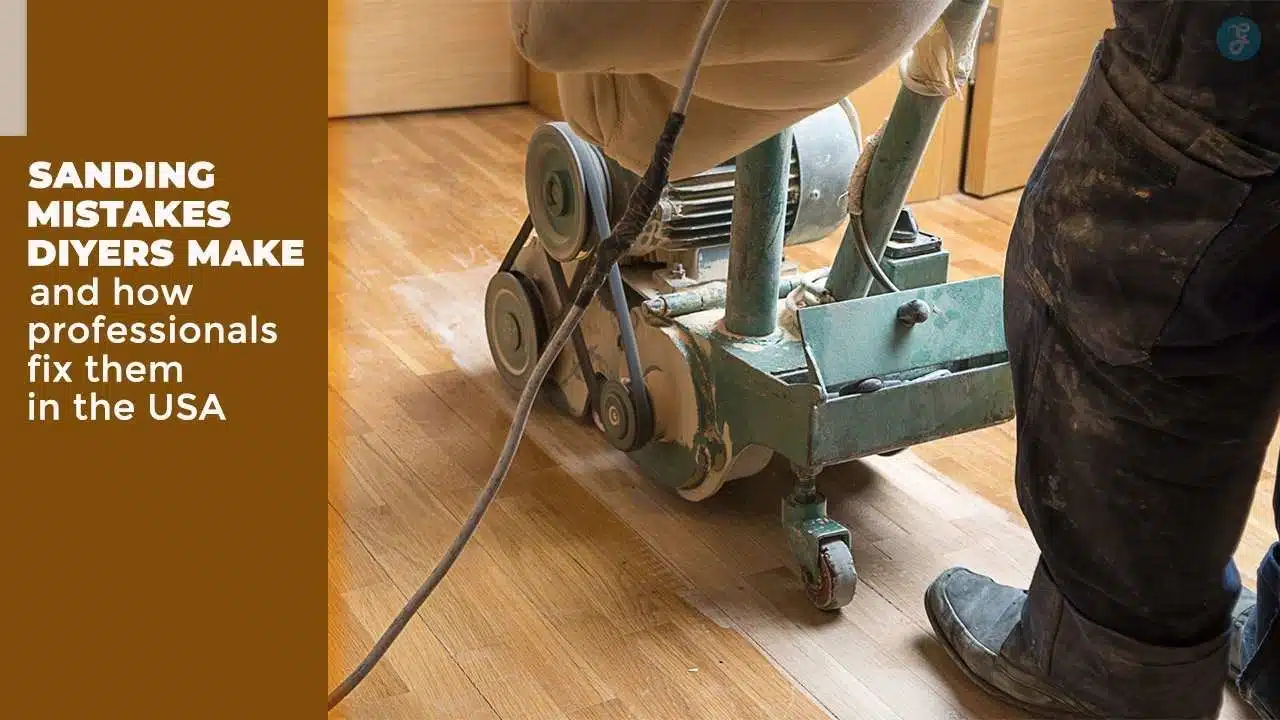
Refinishing hardwood floors is one of the most rewarding home improvement projects you can undertake, but it is also one of the most unforgiving. There is a reason professional floor refinishers charge a premium for their services: the margin for error is razor-thin. While the internet is full of “weekend warrior” success stories, the reality is often different. Many homeowners wake up to find their beautiful oak floors riddled with chatter marks, blotchy stains, and uneven edges.
If you are considering tackling this project, you must be aware of the specific hardwood floor sanding mistakes that can ruin your investment. Understanding these pitfalls before you rent that drum sander can save you thousands of dollars in repairs. This guide delves deep into the physics of sanding, the mechanics of the machinery, and the expert techniques professionals use to achieve that glass-smooth showroom finish.
Key Takeaways
-
Respect the Sequence: Never skip more than one grit level. The sequence 36-50-80-100 is your roadmap to a scratch-free floor.
-
Feather Your Starts: Never stop the drum sander on the floor. Moving before dropping the drum prevents divots.
-
Blend the Edges: The transition between the center (drum sanded) and the wall (edger sanded) is the most common failure point. Blend it with a random orbital sander.
-
Light Reveals All: Don’t trust overhead lights. Use a low-angle work light to find “shiners” and defects before you finish.
-
Clean Like a Surgeon: Vacuuming isn’t enough. You must tack the floor to remove the microscopic dust that ruins adhesion.
Before You Start: Two Critical Checks
Most sanding disasters happen before the machine is even turned on. Before you rent equipment, you must verify that your floor is actually capable of being refinished and that you are choosing the right tools for the job.
1. The “Go/No-Go” Test: Is Your Floor Thick Enough?
Not all wood floors can be sanded. If you sand a floor that is too thin, you will expose the plywood core or the nails, requiring a full (and expensive) replacement.
-
Solid Hardwood: Standard 3/4-inch solid planks can be sanded 4–6 times in their lifespan.
-
Engineered Hardwood: This is where most mistakes happen. Engineered floors have a thin veneer of real wood over plywood.
-
The 3mm Rule: You generally need a wear layer of at least 3mm (1/8 inch) to safely sand a floor.
-
How to Check: Remove a floor vent (register) and look at the side profile of the wood. If the top layer of solid wood is thinner than a nickel (approx. 2mm), do not sand it. You should screen and recoat instead.
-
2. The Equipment Trap: 110V vs. 220V Sanders
The quality of your rental equipment often dictates the quality of your finish.
-
The “Big Box” Rental (110V): Most home improvement stores rent 110-volt belt or drum sanders that plug into a standard wall outlet. These are lightweight and often lack the torque to cut perfectly flat, leading to “chatter marks” (waves) if not handled perfectly.
-
The Pro Rental (220V): Specialized tool rental shops often offer 220-volt belt sanders (which plug into your dryer or stove outlet). These heavier, more powerful machines cut significantly smoother and flatter because their weight prevents them from bouncing over hard grain. If you can find one, the upgrade is worth it.
The “Silent” Killer: Two Safety Mistakes to Avoid
Before you touch a piece of sandpaper, you must address the two biggest dangers in floor refinishing: fire and your lungs.
1. Spontaneous Combustion (The House Fire Risk)
This is not a myth; it is the number one cause of fires related to floor refinishing.
The Danger: Oil-based stains and finishes dry through oxidation, a process that generates heat. If you ball up oil-soaked rags and throw them in a trash can, the heat gets trapped, and the rags can burst into flames—sometimes hours after you’ve gone to bed.
The Fix: Never throw wet stain rags in the trash.
- Option A: Hang them outside singly (not touching) to dry until stiff.
- Option B: Submerge them fully in a metal bucket filled with water and seal it with a lid.
2. The Silica Dust Hazard
Wood dust, especially from older homes, may contain lead (if the house was built before 1978) or simply fine silica and wood particles that are carcinogenic.
The Mistake: Using a standard paper dust mask.
The Fix: Wear a NIOSH-approved N95 respirator at a minimum. If you are sanding for hours, a half-face respirator with P100 cartridges is significantly better for your long-term health.
9 Sanding Mistakes DIYers Make and How Professionals Fix Them
Achieving a flawless hardwood finish demands more than just renting a machine; it requires specific techniques to avoid lasting damage. While DIYers often focus on speed, professionals prioritize the grit sequence and machine control to ensure longevity. This section breaks down the nine most critical sanding errors and provides the expert solutions needed to achieve a smooth, defect-free result.
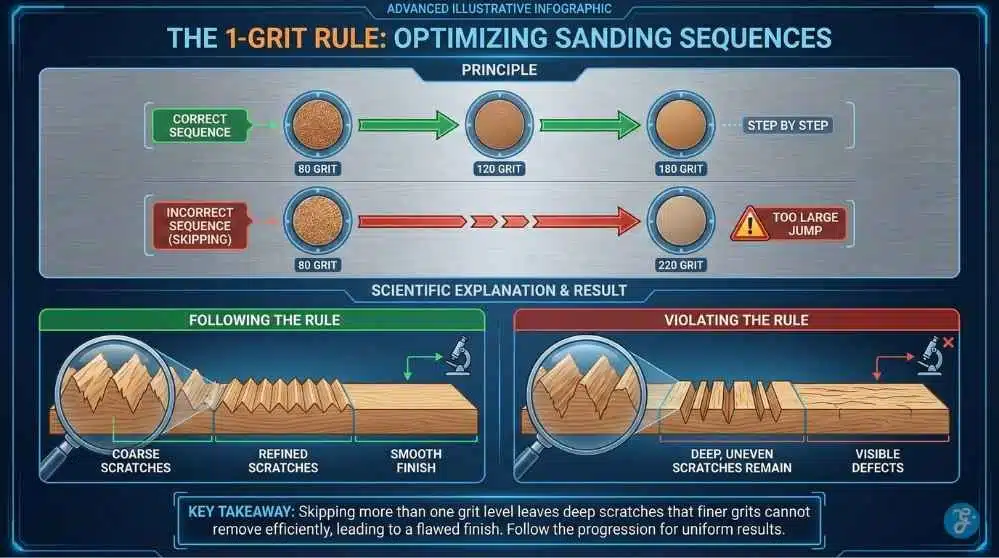
1. The “Grit Skip”: Jumping Sequence Too Quickly
The most pervasive myth in floor sanding is that coarse sandpaper is just for “removing the old finish” and fine sandpaper is for “smoothing.” In reality, every single grit level has a specific mechanical purpose.
The Mistake
To save money on abrasive belts or to speed up the process, DIYers often skip critical steps in the sanding sequence. A common error is jumping from a coarse 36-grit directly to an 80-grit.
Why It Ruins Your Floor
Sanding is essentially a process of replacing deep scratches with progressively shallower ones. A 36-grit belt leaves deep “valleys” in the wood grain. An 80-grit belt is not aggressive enough to sand down to the bottom of those 36-grit valleys; it simply shaves the peaks off.
The result? The floor looks smooth to the naked eye, but as soon as you apply stain, the pigment settles into those deep, leftover 36-grit scratches, creating dark, ugly streaks known as “bristle marks.”
The Professional Fix: The 1-Grit Rule
Professionals follow a strict “1-Grit Rule,” meaning they never skip more than one grit size in the standard sequence.
| Standard Grit Sequence | Purpose | Professional Note |
| 36 or 40 Grit | Flattening & Stripping | Cuts through old varnish and levels uneven boards. |
| 50 or 60 Grit | Scratch Refinement | Removes the deep gouges left by the 36/40 grit. |
| 80 Grit | Preparation | Removes 50/60 scratches; the floor begins to feel smooth. |
| 100 or 120 Grit | Final Polish | Polishes the wood surface for staining or sealing. |
Pro Tip: If you start with 36, you must hit 50 or 60 before going to 80. You cannot skip the middle step without compromising the finish.
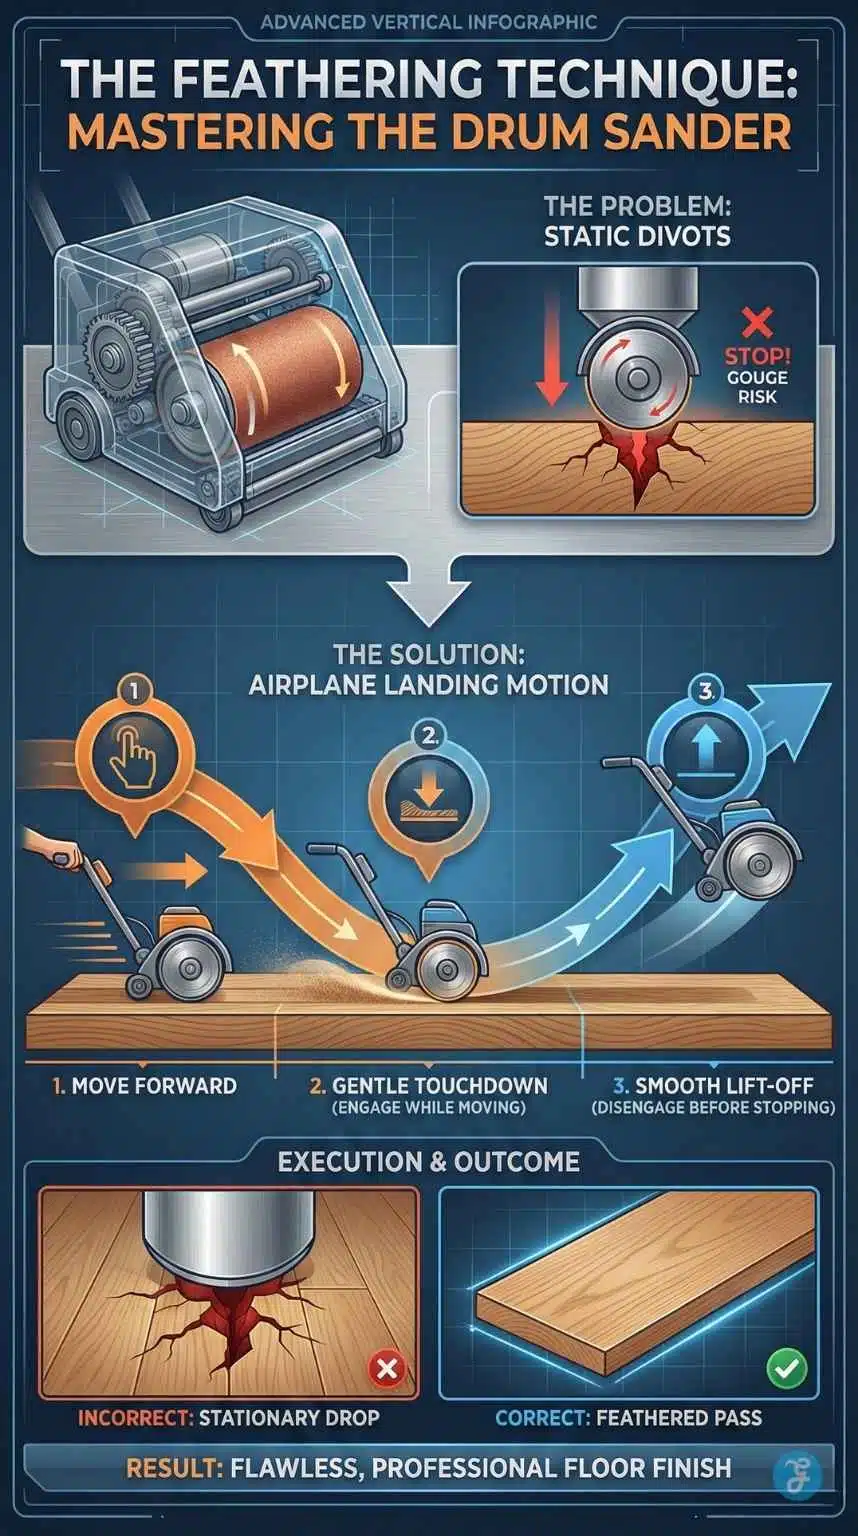
2. The “Drum Mark”: Stopping the Sander on the Floor
The drum sander is the workhorse of the operation, often weighing over 100 pounds. It relies on a heavy, rapidly spinning drum to cut into the wood.
The Mistake
A common rookie error is pausing, hesitating, or stopping the machine while the drum is still in contact with the floor. Because the drum spins at thousands of RPMs, even a split-second pause will dig a horizontal trench (divot) into the wood. These divots are nearly impossible to sand out without lowering the entire floor level.
The Professional Fix: The “Airplane” Technique
Pros treat the drum sander like an airplane landing and taking off.
-
The Takeoff: As you approach the end of a pass, you must swiftly raise the drum lever while the machine is still moving forward.
-
The Landing: When starting a pass, you begin walking forward first, and then gently lower the drum onto the wood while in motion.
This “feathering” technique ensures the drum never engages the wood while stationary, preventing deep stop marks.
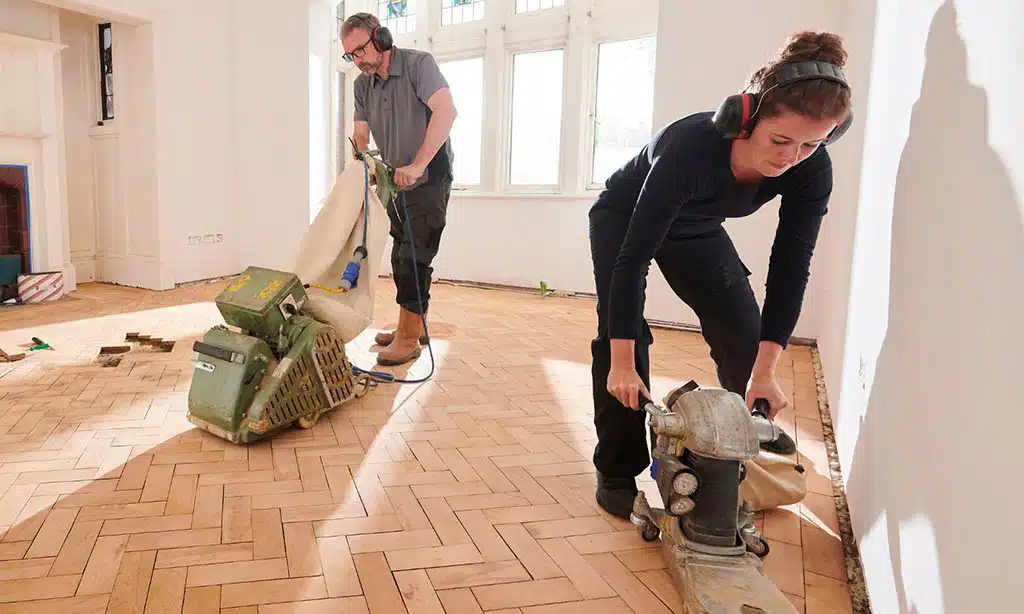
3. The “Halo Effect”: Inconsistent Edging
Sanding the main field of the floor requires a big drum sander, but the perimeter requires a smaller, handheld disc sander called an edger.
The Mistake
The drum sander (linear sanding) and the edger (rotary sanding) create different scratch patterns. If these aren’t blended perfectly, the stain will absorb differently around the edges of the room. This creates a “picture frame” or “halo” effect where the borders of the room look darker or lighter than the center.
The Professional Fix: Blending with a Random Orbital Sander (ROS)
The edger is a necessary evil, but it leaves circular scratches (swirls). To fix this, professionals add an extra step that most rental guides ignore.
The Blending Process:
-
Match the Grit: If you finished the main floor with 100-grit on the drum, you must finish the edges with 100-grit on the edger.
-
The Great Equalizer: After the heavy sanding is done, use a heavy-duty Random Orbital Sander (ROS) with the final grit (e.g., 100).
-
Blend the Zone: Run the ROS over the perimeter of the room where the drum work meets the edger work. This “erases” the linear scratches of the drum and the circular swirls of the edger, replacing them with a consistent, non-directional scratch pattern that blends the two zones seamlessly.
4. Sanding Against the Grain
Wood fibers are like a bundle of straws. Sanding with the grain (parallel to the straws) keeps them intact. Sanding across them cuts them open.
The Mistake
In a rush to remove stubborn old shellac or varnish, DIYers sometimes run the sander diagonally or perpendicular to the grain direction. While this does cut faster, it severs the wood fibers, leaving “cross-grain scratches.” These scratches act like open veins, absorbing massive amounts of stain and turning black.
The Professional Fix: The Straight Cut
Professionals do sometimes sand at a slight angle (15-45 degrees) during the initial coarse cut to flatten a severely warped floor. However, they always realign for the subsequent medium and fine passes.
-
Rule of Thumb: Your final two sanding passes (e.g., 80 and 100 grit) must be perfectly parallel to the grain.
-
Visual Check: Inspect the floor from a low angle. If you see any diagonal lines, they must be sanded out before finishing.
5. Leaving “Shiners” (Under-Sanding)
“Shiners” are patches of the old finish that remain in the low spots of the floorboards.
The Mistake
Old floorboards are rarely perfectly flat; they often cup or warp slightly. When you run a sander over them, the sandpaper hits the high spots first. DIYers often stop sanding as soon as the floor looks raw, missing the valleys where the old polyurethane still sits. These shiny spots will repel the new stain and finish, leaving blotchy, unsealed patches.
The Professional Fix: Lighting & Pencil Marks
Professionals don’t rely on overhead lighting, which washes out defects.
-
Low-Angle Light: Turn off the overhead lights and place a bright LED work light on the floor, shining horizontally across the boards. This casts shadows in the low spots, revealing the shiners instantly.
-
The Pencil Trick: Before your final sanding pass, lightly scribble pencil marks across the entire floor. Sand until all the pencil marks are gone. If a mark remains, you know the sander hasn’t touched that low spot yet.
6. The “Dust Trap”: Inadequate Cleaning
Dust is the enemy of a smooth finish.
The Mistake
Many homeowners believe a quick sweep and a pass with a shop vac is sufficient. However, microscopic wood dust left in the pores can cause “grain raise,” resulting in a finish that feels like sandpaper. Worse, dust can prevent the polyurethane from bonding to the wood, leading to peeling later.
The Professional Fix: The 3-Stage Clean
Professionals use a cleaning protocol that goes beyond simple vacuuming.
| Stage | Tool | Method |
| 1. Extraction | Industrial Vac | Use a brush attachment to pull dust out of the grain and from between boards. |
| 2. Tacking | Microfiber/Tack Cloth | Wipe the floor with a dry microfiber mop to grab static dust. |
| 3. Chemical Wipe | Mineral Spirits | For oil-based finishes, wipe the floor with a rag dampened in mineral spirits. This picks up the finest dust and reveals any missed sanding scratches. |
7. Over-Sanding Soft Woods (The Washboard Effect)
Not all wood is created equal. Pine, Fir, and other softwoods require a delicate touch compared to Oak or Maple.
The Mistake
Softwoods have distinct “spring wood” (soft) and “summer wood” (hard) rings. If you use a soft foam pad on your sander or press too hard, the abrasive will dig out the soft spring wood while riding over the hard summer wood. This creates a wavy, textured surface known as “dishing out” or “washboarding.”
The Professional Fix: Hard Plating
To keep a softwood floor perfectly flat, professionals swap the soft foam pad on their buffer for a “hard plate” or use a planetary sander (like a Lagler Trio).
-
Why it works: The rigid plate forces the sandpaper to cut the hard grain flat rather than following the contours of the soft grain. It bridges the gaps, ensuring a tabletop-flat surface.
8. Improper Filler Timing
Wood filler is essential for closing gaps and nail holes, but timing is everything.
The Mistake
Applying filler after the final sanding is a disaster. The filler will smear around the hole, and because you’ve already finished sanding, you won’t be able to remove the excess residue without scratching the floor again.
The Professional Fix: Trowel Filling
Pros perform “trowel filling” (also called slurry filling) before the final sanding cut (usually before the 80 or 100-grit pass).
-
The Method: They mix fine wood dust with a binder (or use a pre-mixed filler) and trowel it over the entire floor, forcing it into every micro-crack.
-
The Result: The subsequent sanding pass removes 100% of the filler from the surface, leaving it only inside the cracks. This ensures the wood looks like wood, and the holes are invisible.
9. Ignoring “Water Popping” (For Dark Stains)
If you have ever tried to stain a Maple or Pine floor dark, you likely ended up with a blotchy, uneven mess.
The Mistake
High-grit sanding (100+) closes the pores of the wood tightly. When you apply a dark pigment, the closed pores refuse to absorb it, or they absorb it unevenly. The result is a color that looks much lighter than the color can promise, or inconsistent.
The Professional Fix: Water Popping
“Water popping” is a technique where pros wipe the raw, sanded wood with a damp rag or spray it with water before staining.
-
The Science: The water causes the wood fibers to swell and “pop” open.
-
The Benefit: When the stain is applied to the “popped” wood, it penetrates deep into the open pores, resulting in a rich, dark, and incredibly even color.
-
Caution: This makes the wood very rough and sensitive. You must not walk on it with shoes or sand it again before staining, or you will ruin the effect.
Comparison: DIY vs. Professional Workflow
To visualize the difference in complexity, here is a breakdown of a typical weekend warrior’s workflow versus a master craftsman’s approach.
| Step | Typical DIY Approach | Professional Craftsman Approach |
| Prep | Punch nails, sweep. | Punch nails, secure loose boards, and check moisture content. |
| Rough Sanding | 36 grit (often skipped). | 36/40 grit (angled if uneven). |
| Leveling | 60 grit (maybe). | 50/60 grit (straight cut). |
| Finishing | 80 grit (stop here). | 80 grit, then 100/120 grit. |
| Edging | Done last, often mismatched grit. | Done between cuts, blended with ROS. |
| Filling | Spot filled with a putty knife. | Full trowel fill before final cut. |
| Cleaning | Shop vac. | Vac, dry tack, solvent tack. |
| Conditioning | None. | Water popping (if staining dark). |
| Finish | 2 coats, no buffing between. | 3 coats, “screen and recoat” buffing between layers. |
The “Hidden” Costs of DIY Sanding
Many homeowners take on this project to save money, but the savings are often less than expected when you calculate the “hidden” costs.
| Cost Factor | Description | Estimated Cost (USA) |
| Rental Equipment | Drum sander, edger, buffer (3-5 days). | $300 – $500 |
| Abrasives | Belts, discs, screens (you will use more than you think). | $150 – $250 |
| Finish & Stain | High-quality Polyurethane (3 coats). | $150 – $300 |
| Sundries | Brushes, rollers, rags, mineral spirits, safety gear. | $100+ |
| Total DIY Cost | Materials only. | $700 – $1,200+ |
| Professional Cost | Full service (Materials + Labor). | $3 – $6 per sq. ft. |
If you are refinishing a single room (approx. 200 sq. ft.), DIY is significantly cheaper. However, if you are doing a whole house (1,000+ sq. ft.), the savings shrink when compared to the physical labor, time off work (3-5 days), and risk of mistakes. Analyze your budget and energy levels honestly before committing.
Frequently Asked Questions (FAQ)
Can I fix sanding marks without re-sanding the whole floor?
Unfortunately, usually not. If you spot sanding marks (like chatter or swirl marks) after you’ve applied stain or finish, spot-fixing them will result in a patch that looks different from the rest of the floor. The only true fix is to re-sand the entire affected room to ensure an even appearance.
How do I know if I have sanded enough?
Perform the “water test” or visual inspection. If the floor is uniformly raw wood with no shiny patches (old finish) and no dark spots (old stain), you are close. Wet your finger and wipe a small spot; if the wood turns a uniform color without blotches, the old finish is gone. Also, use the pencil test mentioned in Mistake #5 to ensure you’ve leveled the floor.
Is it better to use a drum sander or a vibrational (orbital) sander for DIY?
Vibrational (square) sanders are safer for DIYers because they are less likely to gouge the floor, but they are incredibly slow and often not powerful enough to remove old, thick finishes or flatten warped boards. For a true refinish, a drum sander is necessary, despite the steeper learning curve.
How long should I wait between sanding and staining?
You should stain as soon as possible after your final cleaning—ideally within the same day. Changes in humidity can raise the grain or cause the wood to absorb moisture from the air, affecting how the stain takes. If you water pop the floor, wait until it is 100% dry (usually 2-4 hours) before staining.
Why does my floor look wavy after sanding?
This is likely “chatter” or “wave” marks caused by the drum sander. It can happen if the machine’s wheels were dirty, the drum is out of balance, or the sandpaper belt has a seam defect. It can also happen if your subfloor is loose, causing the floor to vibrate as the heavy machine passes over it. To fix it, you often need to use a rotary buffer with a hard plate or a planetary sander to flatten the waves.
Final Thoughts: The Difference Between Good and Great
Refinishing hardwood floors is a marathon, not a sprint. The difference between a DIY disaster and a showroom finish isn’t the brand of stain you choose—it is patience and preparation.
Most sanding mistakes stem from rushing: skipping a grit sequence to save an hour or ignoring the final clean. But in flooring, “fast” is expensive. By respecting the process and avoiding these nine common pitfalls, you elevate your results from amateur to expert.
Take the time to inspect your work with a low-angle light. Treat every pass of the sander with intention. When you finally apply that first coat of finish and the grain reveals itself in perfect clarity, you will know the extra effort was worth it.