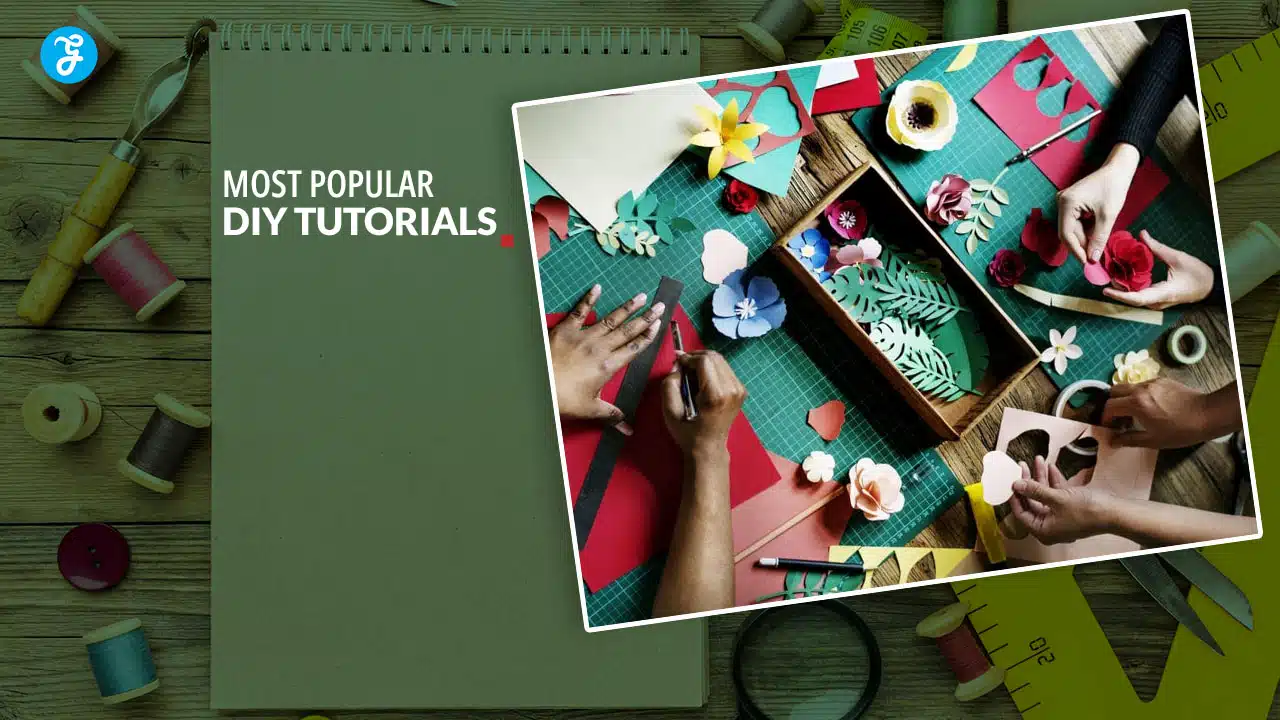
DIY projects are a fun way to express your creativity and make unique items. With so many tutorials available online, you can learn how to craft almost anything. From jewelry and home decor to clothing and gifts, DIY tutorials offer endless possibilities for makers of all skill levels.
The 20 most popular DIY tutorials give you a great starting point for your crafting journey.
These projects have gained popularity for good reasons. They’re often easy to follow, use common materials, and result in items you’ll love. Whether you’re new to DIY or an experienced crafter, these tutorials can inspire you to create something special with your own hands.
1. Build a Treehouse
Building a treehouse is a fun DIY project that can create lasting memories. You’ll need to start by choosing the right tree. Look for a strong, healthy tree with sturdy branches.
Safety is key when building a treehouse. Make sure to use proper support methods and secure attachment techniques. This will keep your treehouse stable and safe for years to come.
Plan your design carefully. Consider the tree’s shape and size when deciding on the layout. A simple square or rectangle shape works well for beginners.
Gather your materials. You’ll need lumber, screws, bolts, and tools. Don’t forget safety gear like gloves and goggles.
Start with the main support beams. These form the foundation of your treehouse. Attach them securely to the tree using special treehouse fasteners.
Next, build the floor. Use pressure-treated wood to resist rot and insects. Add walls and a roof to protect against the elements.
Include a safe way to enter and exit. A sturdy ladder or rope ladder can work well. For extra fun, you might add a slide or fireman’s pole.
Finish your treehouse with personal touches. Paint it, add windows, or hang curtains. You can even add solar-powered lights for nighttime use.
Remember to check local building codes before starting. Some areas have rules about treehouses. With careful planning and hard work, you’ll soon have an amazing backyard retreat.
2. Knit a Scarf
Knitting a scarf is a great way to start your crafting journey. You can create a cozy accessory that’s perfect for chilly days.
To begin, you’ll need some yarn and knitting needles. Choose thick yarn and large needles for an easier project. This combo will help you finish your scarf faster.
Start by casting on about 30 stitches. This creates the base of your scarf. Don’t worry if it’s not perfect – practice makes better!
Next, you’ll use the knit stitch for the entire scarf. It’s simple: insert the needle, wrap the yarn, and pull through. Repeat this for each row.
Keep knitting until your scarf reaches your desired length. Most scarves are around 5 feet long, but you can make yours shorter or longer.
When you’re happy with the length, it’s time to finish. Cast off your stitches to secure the end of your scarf. Weave in any loose ends of yarn.
You can add flair to your scarf with fringe or by using different colored yarns. These touches make your scarf unique.
Remember, your first scarf might not be perfect. That’s okay! Each project helps you improve your skills.
Knitting is relaxing and rewarding. You’ll feel proud wearing a scarf you made yourself. Plus, handmade scarves make great gifts for friends and family.
3. Make Your Own Soap
Making soap at home is fun and easy. You can create custom soaps with your favorite scents and ingredients. It’s a great way to avoid harsh chemicals found in store-bought soaps.
There are two main ways to make soap at home. The first is melt-and-pour soap. This method uses pre-made soap bases that you melt down and customize. It’s perfect for beginners.
The second method is cold process soap making. This involves mixing oils with lye to create soap from scratch. It takes more time and skill, but gives you full control over ingredients.
To get started, gather your supplies. You’ll need a soap base or oils, molds, and fragrance or essential oils. Don’t forget safety gear like gloves and goggles.
Popular ingredients to add include oatmeal, honey, and goat’s milk. These make your soap extra nourishing for your skin. You can also add natural colorants like mica powders.
Try making lavender and rosemary soap for a relaxing scent. Or make an exfoliating bar with coffee grounds. The options are endless when you make your own soap.
Remember to let your soap cure fully before using it. This usually takes 4-6 weeks for cold process soap. Melt-and-pour soap is ready to use as soon as it hardens.
Making soap is a rewarding hobby. You’ll save money and have full control over what goes on your skin. Plus, handmade soaps make great gifts for friends and family.
4. DIY Macrame Plant Hanger
Want to add a touch of boho charm to your home? A macrame plant hanger is the perfect project for you. It’s easy, fun, and lets you show off your green thumb in style.
To start, you’ll need some cord and a few basic knots. The square knot and half hitch are key for most designs. Don’t worry if you’re new to this – there are lots of beginner-friendly patterns out there.
First, cut your cords. You’ll usually need about 8 long pieces, around 14 feet each. The exact length depends on how big you want your hanger to be.
Next, you’ll start knotting. Begin at the top with a gathering knot. This holds all your cords together. From there, work your way down, creating patterns with your knots.
As you go, think about where you want to place the pot. You’ll need to leave space for it and make sure your knots can support its weight.
Remember, practice makes perfect. Your first hanger might not be flawless, but each one you make will get better. Soon, you’ll be creating beautiful plant hangers for every room in your house.
5. Create a Photo Collage
Photo collages are a fun way to display your favorite memories. You can make one easily with just a few supplies.
First, gather your photos. Choose pictures that tell a story or share a theme. You’ll want about 10-20 images for a good-sized collage.
Next, pick a background. This could be a large piece of paper, cardboard, or even a canvas. The size depends on how many photos you have.
Now arrange your photos on the background. Try different layouts until you find one you like. You can overlap pictures or leave space between them.
Once you’re happy with the arrangement, it’s time to stick them down. Use glue or tape to secure each photo in place. Be careful not to use too much adhesive.
For a digital collage, you can use free online tools. These let you upload photos and arrange them in templates. You can then save or print your creation.
Adding decorations can make your collage more personal. Try using stickers, washi tape, or small drawings between the photos.
Remember, there’s no right or wrong way to make a collage. The goal is to create something that makes you happy when you look at it.
6. Build a Birdhouse
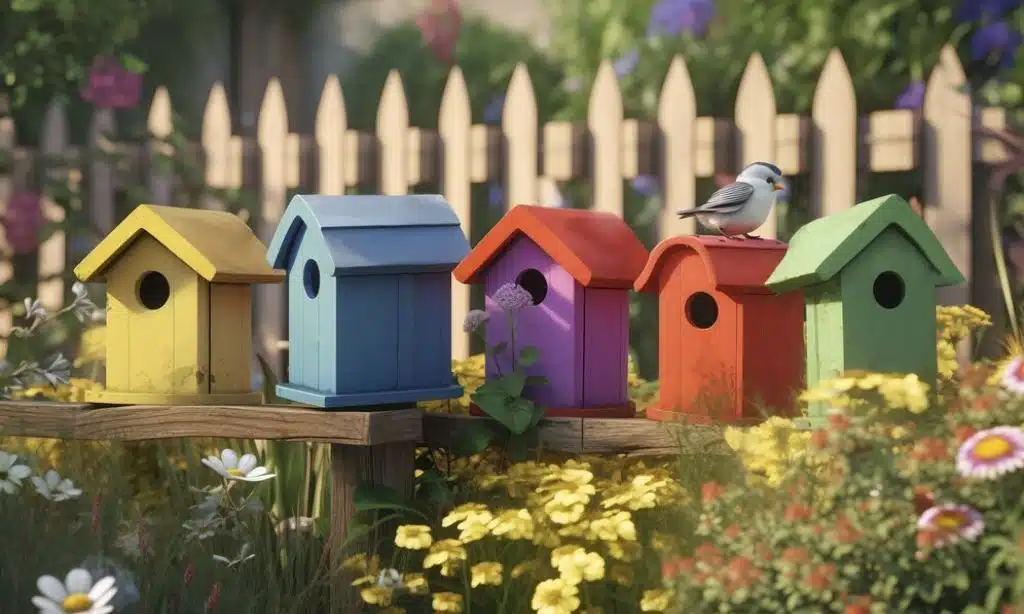
Want to attract feathered friends to your backyard? Building a birdhouse is a fun and rewarding project. You’ll create a cozy home for birds while honing your DIY skills.
First, choose the type of birdhouse you want to make. Simple nesting boxes work well for many bird species. You can also try multi-room houses for larger birds.
Gather your materials. You’ll need wood planks, screws or nails, and basic tools. A saw, drill, and sandpaper are essential. Consider adding a hinge for easy cleaning.
Start by cutting the wood pieces. You’ll need a base, sides, front, back, and roof. Sand all edges to keep birds safe.
Assemble the pieces. Attach the sides to the base, then add the front and back. Make sure everything is secure.
Next, create the entrance hole. Mark the center of the front piece, about 3 1/2 inches from the top. Use a hole saw to cut a 1 3/4 inch opening.
Add the roof last. You can use wood or other weather-resistant materials. Make sure it overhangs slightly to keep rain out.
Finally, decorate your birdhouse if you like. Natural wood looks great, or you can paint it with non-toxic paint.
Place your finished birdhouse in a quiet spot away from predators. Soon, you’ll have happy bird tenants in your handmade home!
7. Make a Terrarium
Want to bring a piece of nature indoors? Try making your own terrarium! It’s a fun DIY project that lets you create a mini garden in a glass container.
To start, pick a clear glass container. It can be a jar, bowl, or even an old fish tank. Make sure it has a wide opening for easy planting.
Next, add a layer of small rocks or pebbles at the bottom. This helps with drainage. On top of that, put a thin layer of activated charcoal. It keeps the soil fresh.
Now for the soil. Use potting mix made for terrariums. Fill the container about a third of the way up. This gives your plants room to grow.
Time to add plants! Choose small plants that like humidity. Ferns, mosses, and air plants work well. Gently place them in the soil and arrange them how you like.
You can add decorations too. Small figurines, pretty rocks, or miniature garden items make your terrarium unique. Just don’t overcrowd it.
Water your terrarium lightly. The soil should be damp, not soaked. Put the lid on if your container has one. This traps moisture and creates a mini ecosystem.
Place your terrarium in a spot with indirect light. Too much direct sun can harm the plants. With a little care, your terrarium will thrive for years to come!
8. DIY Candle Making
Making your own candles is a fun and rewarding DIY project. You can create custom scents and designs to match your home decor or give as gifts.
To get started, you’ll need some basic supplies. These include wax, wicks, containers, and fragrance oils. Soy wax is a popular choice because it’s natural and easy to work with.
Melt the wax using a double boiler setup. While it’s melting, prepare your containers by securing the wicks in place. You can use popsicle sticks or pencils to hold them straight.
Once the wax is melted, add your chosen fragrance oil. Stir it in well. Then carefully pour the wax into your prepared containers. Let them cool completely before trimming the wicks.
For a personal touch, try adding color or decorating the outside of your containers. You can use dyes, dried flowers, or even crayons to create unique looks.
Candle making offers endless creativity. You can experiment with different scents, colors, and container types. From simple votives to elaborate layered designs, the possibilities are vast.
With practice, you’ll develop your own techniques and styles. Soon you’ll be creating beautiful candles that rival store-bought versions.
9. Paint a Canvas
Want to create your own artwork? Painting a canvas is a fun and easy DIY project. You don’t need to be an artist to make something beautiful.
Start by gathering your supplies. You’ll need a canvas, acrylic paints, brushes, and a palette. Choose colors that match your home decor or express your personality.
Before you start painting, think about what you want to create. Simple designs like abstract shapes or landscapes work well for beginners. You can also find inspiration online or in nature.
Apply a base coat to your canvas first. This gives you a solid background to work on. Let it dry completely before adding more colors.
Now it’s time to get creative! Use different brush strokes to add texture and interest. Try blending colors for a unique effect. Don’t worry about perfection – imperfections can make your art more interesting.
If you’re not confident in your freehand skills, use painter’s tape to create clean lines and shapes. You can also use stencils for more complex designs.
Remember, there’s no right or wrong way to paint a canvas. It’s all about expressing yourself and having fun. Your finished piece will be a one-of-a-kind addition to your home decor.
10. Create a Memory Jar
A memory jar is a fun DIY project that helps you save special moments. It’s an easy way to keep track of good times throughout the year.
To make a memory jar, you’ll need a few simple items. Get a large mason jar, some paper, and a pen. You can also use decorations like stickers or paint to make your jar look nice.
Start by cleaning your jar and drying it well. Then, cut small pieces of paper to write on. These will be for your memories.
Next, decorate your jar if you want. You can paint it, add stickers, or tie a ribbon around the top. Make sure to label it with the year.
When something good happens, write it down on a piece of paper. Fold it up and put it in the jar. You can add photos or small objects too.
At the end of the year, open your jar and read all your memories. It’s a great way to remember the good times you had.
You can make a new jar each year or keep adding to the same one. It’s up to you how you want to save your memories.
This project is perfect for families, couples, or anyone who wants to focus on positive moments. It’s a simple way to practice gratitude and mindfulness.
11. Make Your Own Jewelry
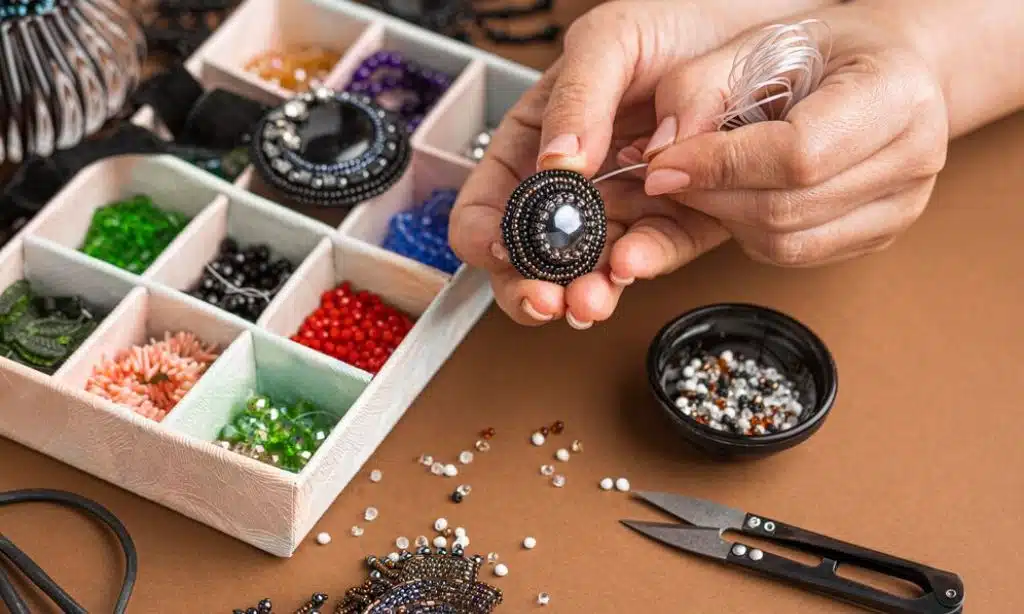
Creating your own jewelry is a fun and rewarding hobby. You can make unique pieces that match your style perfectly. Plus, it’s often cheaper than buying ready-made jewelry.
To start, you’ll need some basic tools. These include pliers, wire cutters, and a jewelry hammer. You can find these at craft stores or online.
Next, choose your materials. Beads, wire, and clasps are common choices for beginners. You can also use polymer clay to make custom shapes and designs.
Start with simple projects like bead bracelets or wire-wrapped pendants. These are easy to make and don’t require many tools. As you gain skills, you can try more complex designs.
You can make all sorts of jewelry at home. Earrings, necklaces, bracelets, and rings are all popular choices. Mix and match different materials to create your own unique style.
Don’t be afraid to experiment. Try different color combinations or unusual materials. You might surprise yourself with what you can create.
Making your own jewelry is also a great way to personalize gifts. Your friends and family will love receiving one-of-a-kind pieces made just for them.
Remember, practice makes perfect. Your first attempts might not be perfect, but you’ll improve quickly with time and effort. Soon, you’ll be wearing your own custom creations with pride.
12. DIY Pallet Furniture
Pallet furniture is a great way to save money and be creative. You can make many things with old wooden pallets.
Want to build a couch? Pallets can help. Stack them up and add cushions for a comfy seat. You can even make an L-shaped sofa for more seating.
Beds are another easy project. Put pallets together to form a base. Add a mattress on top, and you’ve got a new bed frame.
Tables are simple too. Line up pallets side by side. Put a glass top on for a smooth surface. Now you have a coffee table or dining table.
Don’t forget about storage. Make shelves by hanging pallets on your wall. They’re perfect for books or decorations.
Outdoor furniture is fun to make. Create chairs and benches for your patio. Add wheels to make them easy to move around.
Headboards can give your bedroom a new look. Stand pallets up behind your bed. Paint them to match your style.
Remember to sand the wood and remove nails first. This keeps your furniture safe to use. With some creativity, you can furnish your whole house using pallets.
13. Create a Wall Mural
Want to add some wow factor to your home? A DIY wall mural might be just what you need. This project lets you unleash your creativity and transform a plain wall into a stunning work of art.
First, measure your wall carefully. Knowing the exact dimensions helps you plan your design and get the right amount of supplies.
Next, choose your design. You can go for something geometric, abstract, or even a landscape scene. Sketch it out on paper first to get a clear idea.
Gather your materials. You’ll need paint, brushes, painter’s tape, and a pencil. Don’t forget drop cloths to protect your floor!
Start by drawing your design lightly on the wall with pencil. Use painter’s tape to create clean lines and edges where needed.
Now comes the fun part – painting! Work in sections, starting from the top and moving down. This helps avoid smudges.
Mix your colors beforehand and store them in small jars. This ensures you have enough of each shade and can easily touch up later if needed.
Take your time and enjoy the process. Creating a wall mural is a great way to add a personal touch to your space. Your finished mural will be a unique conversation starter for years to come.
14. Build a Bookshelf
Building your own bookshelf is a great DIY project. You can create a custom piece that fits your space and style.
To start, choose your materials. Wood is the most common choice. Pine and plywood are budget-friendly options. For a sturdier shelf, go with hardwoods like oak or maple.
Measure your space carefully. Decide how tall and wide you want your bookshelf to be. Plan out the number of shelves you need.
Cut your wood to size. You’ll need pieces for the sides, top, bottom, and shelves. Sand all the pieces smooth.
Assemble the frame first. Attach the sides to the top and bottom. Use wood glue and screws for strength.
Add support pieces for the shelves. These can be small strips of wood or shelf pins. Make sure they’re level.
Slide in your shelves. Secure them with nails or screws if needed.
For a polished look, add trim to the front edges. This hides any rough cuts.
Finish your bookshelf by painting or staining it. Choose a color that matches your decor.
With some basic tools and patience, you can create a beautiful, functional bookshelf for your home.
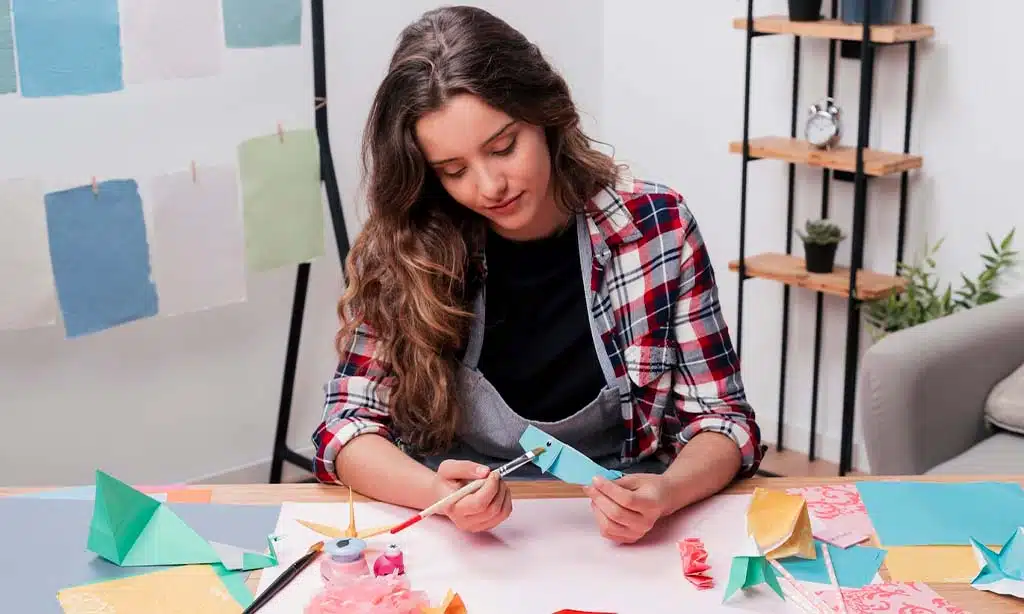
15. DIY Screen Printing
Screen printing is a fun way to make custom t-shirts and other items at home. You can create unique designs and print them onto fabric with just a few supplies.
To start, you’ll need a screen, frame, squeegee, and ink. You can buy these items or make your own screen using mesh fabric and a wooden frame.
Next, create your design. Draw it by hand or print it out. Place the design under the screen and trace it with a special blocking fluid. This creates the stencil on your screen.
When the stencil is dry, place your shirt on a flat surface. Put the screen on top of the shirt where you want the design. Spread ink across the top of the screen.
Use the squeegee to push the ink through the open parts of the screen onto the shirt. Press firmly and evenly to get good coverage. Carefully lift the screen straight up when done.
Let the ink dry completely before wearing or washing your new custom shirt. With practice, you can create all kinds of cool designs to wear and share with friends.
16. Make Homemade Lip Balm
Making your own lip balm is easy and fun. You only need a few simple ingredients to get started. Beeswax, cocoa butter, and oils like olive or sweet almond are the main components.
To begin, melt the beeswax in a double boiler or microwave. Add cocoa butter and your chosen oil, then stir until everything is combined. The typical ratio is 1 part beeswax, 1 part cocoa butter, and 2 parts oil.
You can customize your lip balm by adding honey for sweetness or essential oils for scent. Just a few drops will do. Pour the melted mixture into small containers or tubes and let it cool completely.
Store your homemade lip balm in a cool, dark place. It will stay fresh for several months. You’ll love how soft and smooth your lips feel with your very own natural lip balm.
This project is perfect for beginners and takes less than an hour to complete. You’ll save money and avoid harsh chemicals found in some store-bought options. Plus, you can make unique flavors and scents just for you.
17. Create Your Own Perfume

Making your own perfume is fun and easy. You can create a unique scent that matches your personality.
To start, you’ll need some basic ingredients. Get essential oils, alcohol, and a carrier oil like coconut oil. These form the base of your perfume.
Choose your scents carefully. Pick a mix of top, middle, and base notes. Top notes are light and fresh. Middle notes are the heart of the perfume. Base notes last the longest.
Mix your oils in a 30/50/20 ratio. Use 30% top notes, 50% middle notes, and 20% base notes. This creates a balanced scent.
Add the oil mixture to your alcohol. Let it sit for a few weeks. This helps the scents blend together.
After waiting, your perfume is ready to use. Put it in a small spray bottle. Now you have a custom scent to enjoy.
You can make different types of perfume. Eau de parfum is stronger. Eau de toilette is lighter. Choose based on how strong you want your scent to be.
Experiment with different oil combinations. You might create a floral scent or a woodsy one. The options are endless.
18. Build a Fire Pit
Want to add warmth and coziness to your backyard? A DIY fire pit is the perfect project for you. With some basic materials and tools, you can create a gathering spot for friends and family.
Start by choosing a safe location away from structures and overhanging trees. Mark out a circular area about 3-4 feet wide. Dig down about 6 inches to create a stable base.
Line the bottom with gravel for drainage. Then start stacking fireproof retaining wall blocks or pavers in a circle. Use masonry adhesive between layers for stability.
Build up the walls 2-3 feet high. For the top layer, use flat capstones that overhang slightly on the inside and outside. This creates a finished look.
No mortar or concrete is needed, making this an easy beginner project. You can customize the size and style to fit your yard. Add seating around it with chairs or benches.
Remember to check local regulations before building. Always practice fire safety when using your new pit. Now you’re ready for cozy evenings under the stars!
19. DIY Garden Bench
Want to add a cozy spot to your outdoor space? A DIY garden bench is the perfect project for you. It’s a fun way to spruce up your yard and create a place to relax.
Building your own bench lets you customize it to fit your style. You can choose the size, shape, and materials that work best for your garden.
Start by picking a design that suits your skill level. Simple benches can be made with just a few boards and some basic tools. More complex designs might include curved backs or built-in planters.
Next, gather your materials. Wood is a popular choice, but you can also use recycled items like old doors or pallets. Don’t forget screws, nails, and any special hardware your design needs.
Measure and cut your pieces carefully. This step is key to making sure your bench turns out sturdy and level. Take your time to get it right.
Assembly is the fun part. Follow your plan step by step. You’ll see your bench take shape as you put the pieces together.
Once it’s built, you can paint or stain your bench to protect it from the weather. Pick a color that matches your garden or go bold with a bright shade.
Place your finished bench in a spot where you can enjoy the view. Add some cushions for extra comfort. Now you have a perfect place to sit and admire your handiwork.
20. Make a Dream Catcher
Dream catchers are fun and easy to make. You can create your own unique design with just a few supplies.
To start, you’ll need a hoop. This can be made from wire or a pre-made embroidery hoop. Choose the size you want for your dream catcher.
Next, gather some string or yarn. This will be used to weave the web inside the hoop. Pick colors that match your style.
Feathers and beads add a nice touch to dream catchers. You can find these at craft stores or online. They come in many colors and sizes.
To make the web, tie your string to the hoop. Then weave it across in a pattern. There’s no right or wrong way to do this. Let your creativity guide you.
Add beads as you weave for extra sparkle. Once the web is done, tie off the end of the string.
Now it’s time for decorations. Tie feathers and more beads to strings. Hang these from the bottom of the hoop.
You can also add ribbon or lace around the edge of the hoop. This gives a soft, pretty look.
Your dream catcher is ready to hang! Put it near your bed or in a window. It will catch bad dreams and let good ones through.
Essential Tools and Materials
Having the right tools and materials is key for successful DIY projects. You’ll need basic craft supplies for simple tasks and specialized items for more complex builds.
Basic Craft Tools
Every DIY enthusiast should have a set of essential tools. A cordless drill is a must-have for drilling holes and driving screws. Get a good set of screwdrivers in various sizes for smaller jobs. A measuring tape and level are crucial for accuracy.
Safety gear is important too. Always use safety goggles to protect your eyes. Gloves can prevent cuts and scrapes while working.
For cutting tasks, invest in a utility knife and a set of scissors. A hammer is useful for many projects. Don’t forget pliers – they come in handy for gripping and bending.
Specialized DIY Materials
As you take on more advanced projects, you’ll need specialized tools. A brad nailer is great for attaching trim and molding. It’s faster and neater than hammering nails by hand.
For detailed work, a rotary tool like a Dremel is invaluable. It can sand, cut, and engrave various materials. A stud finder helps you locate wall studs for secure mounting.
Consider getting a set of drill bits in different sizes. This lets you work with various materials. For woodworking, wood glue and clamps are essential.
Paint brushes, rollers, and trays are needed for painting projects. Sandpaper in various grits helps smooth surfaces before finishing.
Safety Tips for DIY Projects
Staying safe during DIY projects is key. Using the right gear and following good practices can prevent accidents and injuries.
Personal Protective Equipment
Wear safety glasses to shield your eyes from debris. Choose goggles for tasks involving dust or chemicals. Use earplugs or earmuffs in noisy environments to protect your hearing.
Wear work gloves to guard your hands. Pick gloves that fit well and match your task. Leather gloves work for rough materials, while rubber gloves are best for chemicals.
Put on a dust mask when working with dusty materials. For more harmful substances, use a respirator. Make sure it fits snugly on your face.
Wear sturdy, closed-toe shoes to protect your feet. Steel-toed boots offer extra protection for heavy objects.
Safe Work Practices
Keep your workspace clean and organized. Put tools away when you’re done using them. Clean up spills right away to prevent slips.
Use tools correctly. Read the manual before using new tools. Keep tools sharp and in good condition.
Work in a well-lit area. Use extra lights if needed. Good lighting helps you see what you’re doing and avoid mistakes.
Take breaks often. Fatigue can lead to accidents. Stay hydrated and rest when you feel tired.
Don’t rush. Take your time and focus on each task. Hurrying increases the risk of mistakes and injuries.
Ask for help with heavy lifting or tricky tasks. It’s safer to work with a partner on challenging projects.
Takeaway
The 20 most popular DIY tutorials provide a diverse range of ideas, from simple crafts to more advanced builds, ensuring there’s something for everyone, regardless of skill level.
These projects not only offer a sense of accomplishment but also allow you to personalize your home with unique touches that reflect your style. Whether you’re building a treehouse, crafting homemade soap, or creating a wall mural, each project brings the satisfaction of making something with your own hands.
As you dive into these DIY adventures, remember that patience and practice are key. Don’t be afraid to experiment and make mistakes—they’re part of the learning process.
With each project, you’ll gain new skills and confidence, turning your home into a personalized haven filled with your handcrafted creations.