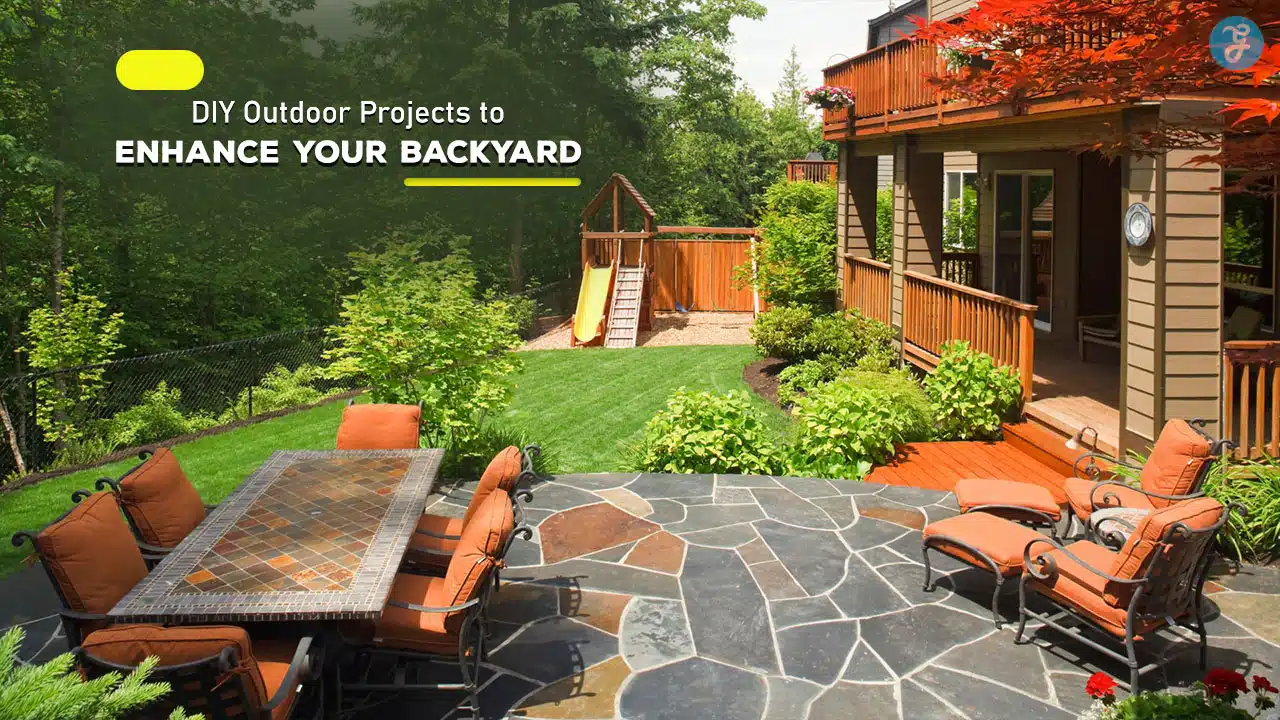
Transforming your backyard into a functional, beautiful, and relaxing outdoor space doesn’t always require a massive budget or professional help.
With a little creativity and effort, you can create stunning features that enhance your backyard and increase its usability, making it a place you’ll want to spend more time in, whether for relaxation, family gatherings, or entertaining guests.
Here are 15 detailed DIY outdoor projects that will enhance your backyard, each with step-by-step instructions, necessary materials, and benefits to help you create the perfect outdoor space.
1. DIY Fire Pit
Why It’s Worth It:
A fire pit adds a focal point to your backyard and extends its usability into the evening or cooler months.
It creates a warm, inviting space for gatherings, storytelling, and relaxation.
Building a fire pit is an affordable and straightforward project that offers significant value.
How to Do It:
1. Choose a safe location:
Make sure the fire pit is placed at least 10 feet away from any structures, trees, or wooden fences to avoid fire hazards.
2. Excavate the area:
Dig a circular hole about 36-44 inches in diameter and 6-12 inches deep.
3. Add a gravel base:
Fill the bottom of the hole with gravel to ensure proper drainage.
4. Build the wall:
Use fire-resistant bricks, pavers, or concrete blocks to construct the wall of the pit.
Stack them evenly in a circle, using heat-resistant mortar to secure them if necessary.
5. Secure the fire pit:
After building the wall, ensure the structure is sturdy and level.
Add a metal ring if desired for extra durability.
Materials Needed:
- Fire-resistant bricks or pavers
- Gravel
- Shovel
- Heat-resistant mortar
- Metal fire pit ring (optional)
Benefit:
A DIY fire pit enhances your backyard’s functionality, creating a cozy outdoor space for family gatherings and evening relaxation, perfect for year-round use.
2. DIY Outdoor Bar
Why It’s Worth It:
An outdoor bar is a perfect addition for entertaining guests during barbecues, pool parties, or casual get-togethers.
It serves as a stylish, functional space for preparing and serving drinks, appetizers, and snacks.
How to Do It:
1. Design the bar:
Decide on the size and style of the bar. Use wooden pallets for a rustic look, or 2x4s and plywood for a more polished finish.
2. Build the frame:
Start by constructing a sturdy rectangular frame using 2x4s or repurposed pallets.
Ensure the frame is solid enough to support the countertop.
3. Add a countertop:
Use materials like wood, concrete, or tile for the countertop, depending on your aesthetic preferences.
4. Create storage:
Install shelves or hooks beneath the bar for storing glassware, bottles, and bar accessories.
5. Personalize the bar:
Add lighting, bar stools, or decorations to make it uniquely yours.
Materials Needed:
- Wooden pallets or 2x4s and plywood
- Countertop material (wood, tile, or concrete)
- Nails, screws, and tools for assembly
- Shelving or hooks for storage
Benefit:
An outdoor bar adds both aesthetic value and functionality, providing a designated area for serving drinks and snacks, making your backyard the go-to spot for entertaining.
3. DIY Garden Pathway
Why It’s Worth It:
A garden pathway enhances the flow and organization of your backyard.
It can guide foot traffic through the space, protect plants, and add visual interest to your landscape.
It also helps prevent the yard from becoming muddy during rainy weather.
How to Do It:
1. Plan the layout:
Determine the path’s location, considering how it will flow through the yard and connect key areas like patios, seating areas, or garden beds.
2. Clear the area:
Remove grass, weeds, and debris from the path area, then dig down about 2-3 inches deep to create the base.
3. Install a base:
Add a layer of gravel or sand to the path to improve drainage.
4. Lay the stones or pavers:
Place stepping stones, wood slices, or gravel along the path, ensuring they are level.
Space them evenly for a balanced look.
5. Secure the edges:
Use landscape edging or metal strips to define the path’s edges and keep everything in place.
Materials Needed:
- Stepping stones, pavers, or wood slices
- Gravel or sand
- Landscape fabric to prevent weeds
- Edging materials
Benefit:
A garden pathway adds structure and accessibility to your backyard, making it easier to navigate while protecting your plants and grass from foot traffic damage.
4. DIY Raised Garden Beds
Why It’s Worth It:
Raised garden beds make gardening easier by improving soil drainage, reducing weed growth, and minimizing back strain.
They allow you to have more control over the quality of the soil and are perfect for growing vegetables, herbs, or flowers.
How to Do It:
1. Choose a location:
Pick a sunny spot with good drainage.
2. Build the frame:
Use untreated wood, cinder blocks, or bricks to build the rectangular frame.
Keep the bed’s height between 12-18 inches for best results.
3. Prepare the base:
Line the bottom with landscape fabric to prevent weeds from growing through.
4. Fill with soil:
Add high-quality soil or a mix of compost and soil to fill the raised bed.
5. Start planting:
Plant your choice of vegetables, flowers, or herbs, ensuring proper spacing and care.
Materials Needed:
- Untreated wood, cinder blocks, or bricks
- Landscape fabric
- Soil and compost
- Screws or nails for securing the frame
Benefit:
Raised garden beds offer a convenient, organized space for growing plants, making them easier to manage and helping you achieve a bountiful harvest while adding beauty to your backyard.
5. DIY Outdoor String Lights
Why It’s Worth It:
String lights create a warm, inviting atmosphere, perfect for evening gatherings or relaxing outside after dark.
Installing string lights is an easy and affordable way to add charm to your backyard while improving its usability after sunset.
How to Do It:
1. Choose where to hang the lights:
Determine whether you’ll hang them from trees, poles, or along the perimeter of a fence or deck.
2. Install hooks or poles:
Attach sturdy hooks or poles where you plan to hang the lights.
Make sure they are secure enough to support the weight of the lights.
3. Hang the lights:
String the lights in a zigzag pattern, straight lines, or a circular arrangement, depending on your space.
4. Connect the power source:
Plug the lights into an outdoor-rated extension cord and make sure the wiring is properly secured and weatherproof.
Materials Needed:
- Outdoor string lights (preferably LED for energy efficiency)
- Hooks or poles
- Extension cords (outdoor-rated)
Benefit:
String lights transform your backyard into a cozy, ambient retreat, perfect for dinners, parties, or simply enjoying quiet evenings under the stars.
6. DIY Pergola
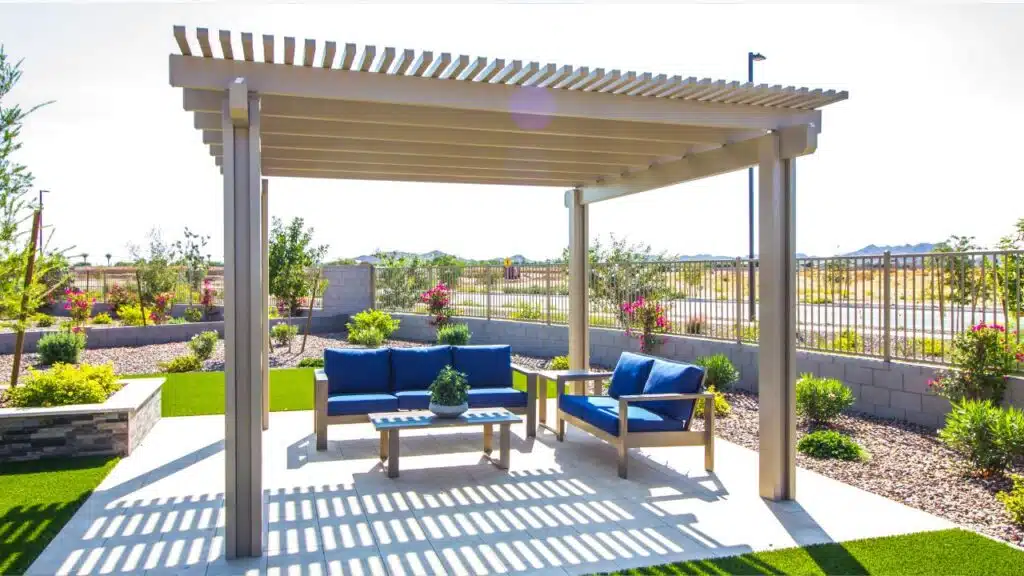
Why It’s Worth It:
A pergola provides shade and structure, turning a simple patio or seating area into a stylish, defined space.
It can support climbing plants, outdoor lights, or fabric for added privacy, giving your backyard an architectural focal point.
How to Do It:
1. Choose the location:
Decide where to build the pergola—over a patio, seating area, or garden space.
2. Construct the frame:
Use 4×4 posts for the vertical supports and 2×6 beams for the cross pieces.
Ensure the posts are evenly spaced and level.
3. Secure the structure:
Dig holes for the posts, set them into the ground, and secure with concrete footings.
4. Add cross beams:
Attach the cross beams across the top of the pergola for shade.
You can space them closer together for more shade or farther apart for a more open feel.
Materials Needed:
- 4×4 posts and 2×6 beams (wood or metal)
- Concrete footings
- Screws, nails, and tools for assembly
Benefit:
A pergola enhances your backyard by providing shade, creating an outdoor living space, and giving you a place to hang plants or lights for additional décor.
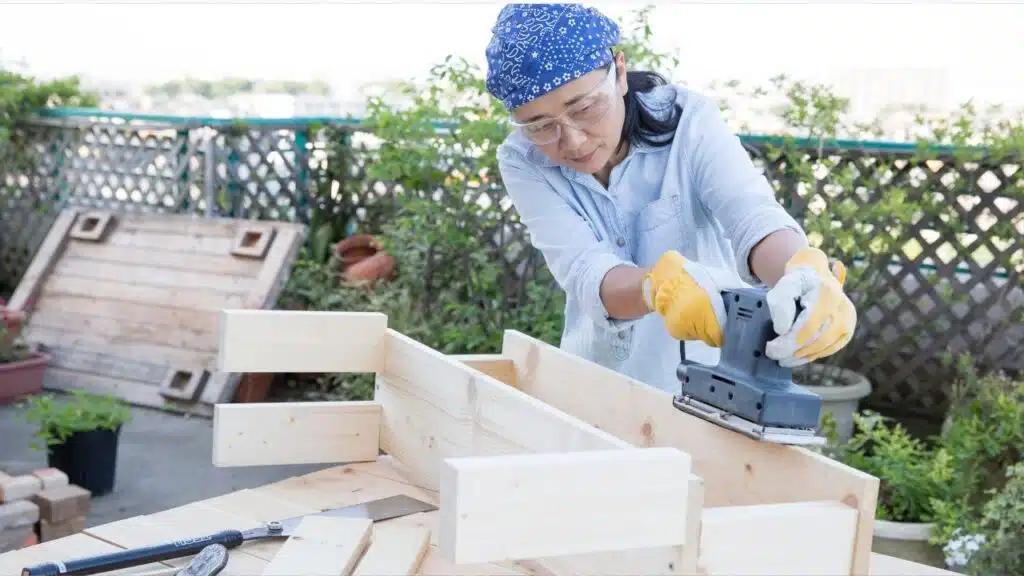
7. DIY Outdoor Bench
Why It’s Worth It:
An outdoor bench provides extra seating for your backyard while offering a place to relax and enjoy nature.
Building your own bench gives you the flexibility to customize the size, style, and materials to suit your outdoor space.
How to Do It:
1. Design the bench:
Decide on the dimensions and design, keeping in mind the space where it will be placed.
2. Build the frame:
Use 2x4s or reclaimed wood to create the structure of the bench.
Cut the wood to the appropriate lengths and assemble the legs, seat, and backrest.
3. Sand and stain:
Smooth any rough edges with sandpaper, then stain or paint the wood to protect it from the elements.
4. Add cushions:
For extra comfort, add cushions or throw pillows that complement your outdoor décor.
Materials Needed:
- 2x4s or reclaimed wood
- Screws and nails
- Sandpaper and wood stain
- Cushions (optional)
Benefit:
A DIY bench offers a personalized touch to your outdoor space, providing a cozy spot to relax, read, or enjoy a cup of coffee while soaking in the beauty of your backyard.
8. DIY Vertical Garden
Why It’s Worth It:
A vertical garden maximizes space by allowing you to grow plants, herbs, or flowers on a wall or fence.
It’s a great solution for small backyards or patios and adds a stunning visual element to your outdoor space.
How to Do It:
1. Choose a structure:
Build or buy a wooden frame that can be mounted on a wall or fence.
You can also repurpose old pallets or buy ready-made vertical planters.
2. Install planters:
Attach small planters, fabric pockets, or hanging pots to the frame.
Space them evenly for a balanced look.
3. Plant your greenery:
Choose a variety of plants that thrive in your climate, such as succulents, herbs, or flowers.
Make sure to water them regularly and check for sunlight requirements.
Materials Needed:
- Wooden frame or repurposed pallet
- Small planters or fabric pockets
- Potting soil
- Plants or herbs
Benefit:
A vertical garden adds greenery to your backyard without taking up valuable floor space, making it perfect for compact areas or for adding a lush backdrop to a seating area.
9. DIY Outdoor Pizza Oven
Why It’s Worth It:
Imagine hosting pizza nights with your friends and family in your backyard with a homemade pizza oven.
A DIY outdoor pizza oven gives you the ability to cook delicious, wood-fired pizzas at home while adding a unique feature to your backyard.
How to Do It:
1. Build the base:
Use bricks or cinder blocks to create a solid, heat-resistant base.
2. Construct the oven dome:
Use fire bricks and heat-resistant mortar to build the dome of the oven.
The dome should be arched to retain heat effectively.
3. Add ventilation:
Install a chimney at the top of the oven for ventilation and a small door to retain heat while cooking.
4. Finish and cure the oven:
Let the mortar cure fully before lighting the first fire.
You can add a decorative finish with stucco, stone, or brick.
Materials Needed:
- Fire bricks
- Heat-resistant mortar
- Bricks or cinder blocks for the base
- Chimney
Benefit:
A DIY outdoor pizza oven provides an interactive and fun way to cook delicious, authentic pizzas while creating a standout feature in your backyard.
10. DIY Outdoor Movie Screen
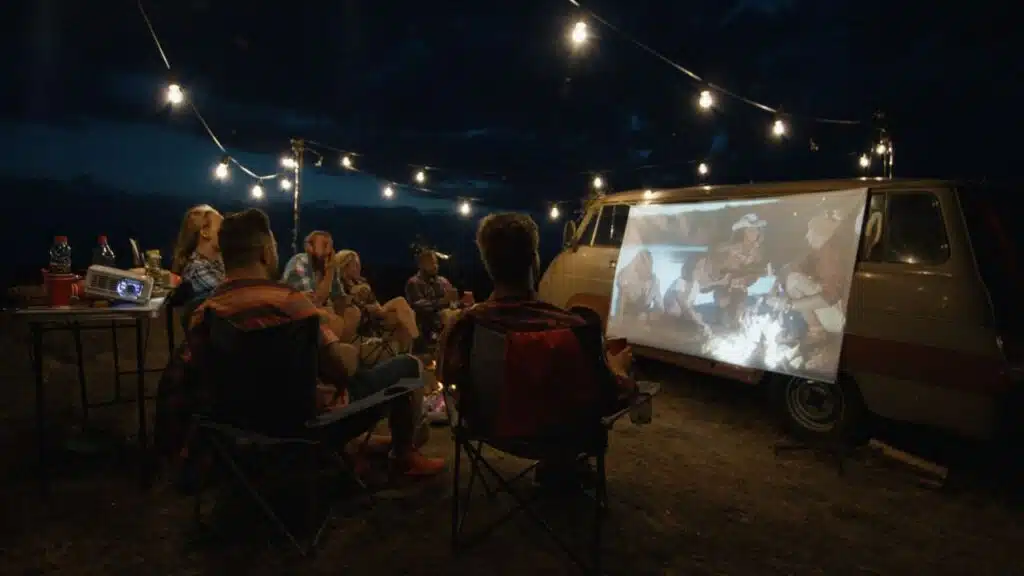
Why It’s Worth It:
Creating an outdoor movie screen brings a unique, cinematic experience to your backyard.
It’s perfect for family movie nights, gatherings with friends, or even a romantic evening under the stars.
How to Do It:
1. Build the frame:
Use PVC pipes or wooden poles to build a rectangular frame that can hold the screen.
2. Attach the screen:
Use a large white sheet, canvas, or blackout cloth as the screen material.
Attach it tightly to the frame, ensuring there are no wrinkles.
3. Set up the projector:
Place a projector at the appropriate distance from the screen and connect it to a laptop or streaming device.
4. Add comfortable seating:
Arrange blankets, pillows, or outdoor seating in front of the screen for a cozy movie-watching experience.
Materials Needed:
- PVC pipes or wooden poles for the frame
- White sheet, canvas, or blackout cloth
- Projector
Benefit:
Your backyard becomes a private cinema thanks to an outdoor movie screen, which is ideal for watching your favorite movies while taking in the surrounding scenery.
11. DIY Outdoor Dining Table
Why It’s Worth It:
An outdoor dining table provides a dedicated space for meals, gatherings, or outdoor crafts.
Building your own table allows you to customize the size and style to suit your needs, whether you’re dining with family or hosting a large gathering.
How to Do It:
1. Choose materials:
Use sturdy, weather-resistant wood like cedar or pressure-treated lumber.
2. Build the tabletop:
Cut wooden planks to your desired length and secure them together to form the tabletop.
3. Construct the legs:
Use 4×4 posts or thick planks for the table legs.
Secure them firmly to the tabletop to ensure stability.
4. Finish the table:
Sand the surface and edges to smooth out any rough areas.
Apply wood stain or paint to protect the table from the elements.
Materials Needed:
- Weather-resistant wood (cedar, treated lumber)
- Screws and nails
- Sandpaper and wood stain
Benefit:
A DIY dining table enhances your outdoor space by providing a practical, stylish area for family meals, social events, or casual afternoons in the fresh air.
12. DIY Hammock Stand
Why It’s Worth It:
A hammock stand allows you to set up a relaxing hammock anywhere in your backyard, even if you don’t have the perfect trees for hanging one.
It’s an easy project that provides a cozy spot for reading, napping, or simply enjoying the outdoors.
How to Do It:
1. Build the base:
Use thick, sturdy wood (like 4×4 posts) to create a rectangular base for stability.
2. Add vertical supports:
Attach two tall posts to the base at an angle, ensuring they are securely fastened and able to support the weight of the hammock.
3. Install hooks:
Drill holes near the top of each support post and install heavy-duty hooks or metal loops for hanging the hammock.
4. Finish the stand:
Sand and paint the wood for durability and weather resistance.
Materials Needed:
- 4×4 posts for the base and supports
- Heavy-duty hooks or loops
- Hammock
Benefit:
A DIY hammock stand offers a portable, flexible way to enjoy a hammock in your backyard, providing a peaceful retreat for relaxation without needing perfectly spaced trees.
13. DIY Garden Fountain
Why It’s Worth It:
A garden fountain adds a calming, soothing element to your backyard with the gentle sound of flowing water.
It also serves as a beautiful focal point, enhancing the aesthetics of your outdoor space while promoting relaxation.
How to Do It:
1. Choose a container:
Select a large ceramic pot or container that can serve as the fountain’s base.
2. Install the pump:
Place a submersible water pump inside the container, making sure it’s positioned correctly for optimal water flow.
3. Create the water feature:
Fill the container with water and position decorative stones, pebbles, or plants around the fountain to enhance its visual appeal.
4. Power the pump:
Plug the pump into an outdoor power source, ensuring the wiring is safely hidden.
Materials Needed:
- Large ceramic pot or container
- Submersible water pump
- Decorative stones or plants
- Outdoor-rated extension cord
Benefit:
A garden fountain adds tranquility and beauty to your backyard, creating a serene environment that’s perfect for relaxation or meditation.
14. DIY Outdoor Shower

Why It’s Worth It:
An outdoor shower is a luxurious and practical addition, especially for beachside or poolside properties.
It provides a convenient place to rinse off after swimming, working in the garden, or simply cooling down on hot summer days.
How to Do It:
1. Choose the location:
Pick a spot near a water source and ensure there is proper drainage.
2. Build the enclosure:
Use water-resistant wood, such as cedar, to build a simple frame for privacy.
You can add decorative elements like stone or bamboo for a spa-like feel.
3. Install the showerhead:
Connect a basic showerhead to your home’s outdoor water supply or use a portable hose setup for easier installation.
4. Add flooring:
Install a non-slip surface, such as pebbles, wood decking, or concrete, to create a safe and comfortable shower base.
Materials Needed:
- Water-resistant wood (cedar or teak)
- Showerhead and plumbing supplies
- Non-slip flooring materials (pebbles, decking, or concrete)
Benefit:
An outdoor shower offers a convenient and refreshing way to enjoy the outdoors while adding a touch of luxury to your backyard.
15. DIY Tree Swing
Why It’s Worth It:
A tree swing adds a nostalgic, playful element to your backyard.
It’s a fun project that’s easy to make and provides hours of enjoyment for both children and adults, making your backyard feel more inviting and whimsical.
How to Do It:
1. Find a sturdy branch:
Make sure the branch is strong and thick enough to support the weight of the swing.
2. Prepare the seat:
Use a wooden plank or an old tire as the seat. Drill holes in the plank to attach the rope securely.
3. Secure the rope:
Use durable, weather-resistant rope, tying it securely around the branch.
Ensure the swing is at a safe height from the ground.
4. Test for safety:
Give the swing a few test runs to ensure everything is secure and stable.
Materials Needed:
- Wooden plank or tire
- Durable rope
- Drill and screws (if using a wooden seat)
Benefit:
A DIY tree swing adds charm and fun to your backyard, creating a whimsical space where family and friends can relax and enjoy the outdoors.
Final Verdict
These 15 DIY outdoor projects provide a variety of ways to enhance your backyard, from creating functional spaces like dining areas and fire pits to adding aesthetic features like fountains and string lights.
Whether you’re looking to entertain guests, create a peaceful retreat, or add a touch of fun, these projects can transform your outdoor space into a beautiful and enjoyable area.
With a little creativity, effort, and planning, you can create a backyard that reflects your style and meets your needs for years to come.