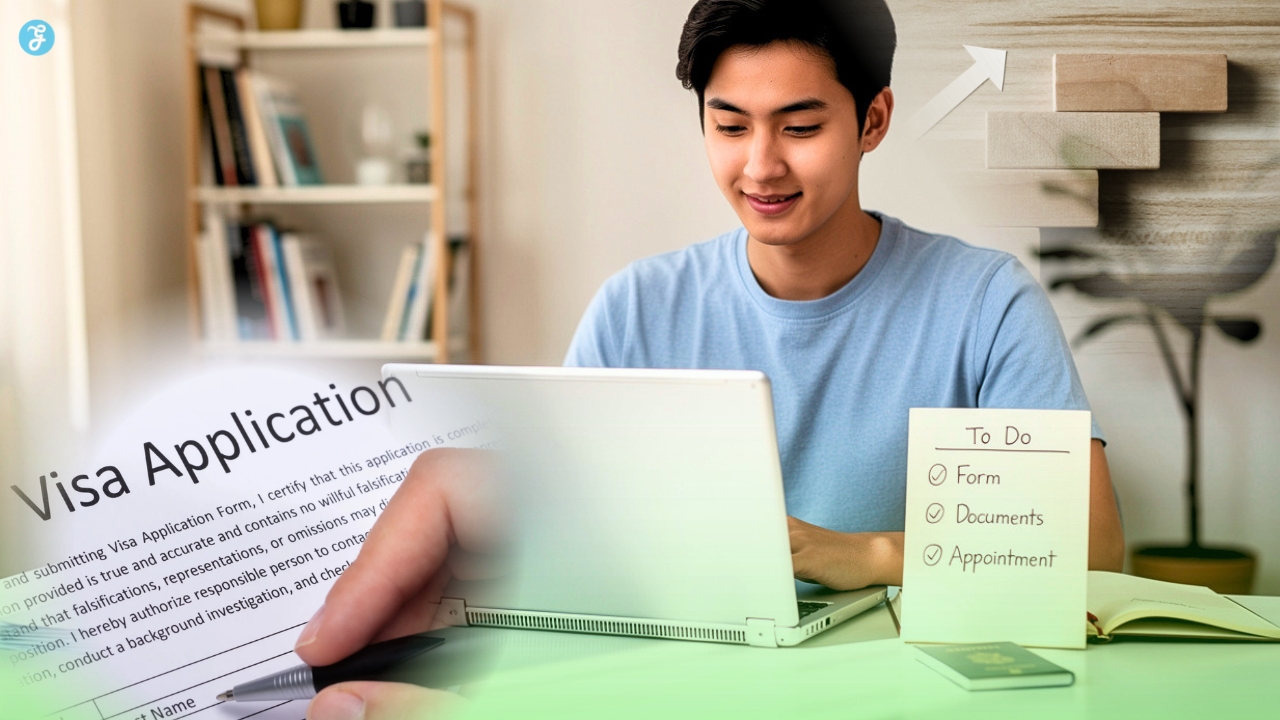
Dreaming of studying in the United States? Many international students feel overwhelmed when they apply for a student visa. Concerns about missing steps, preparing the right documents, or handling the visa interview at a U.S. embassy or consulate can make the process stressful. It often feels like solving a puzzle without all the pieces.
Foreign nationals typically need an F-1 visa for full-time academic programs or an M-1 visa for vocational studies. Understanding this is the first step toward success.
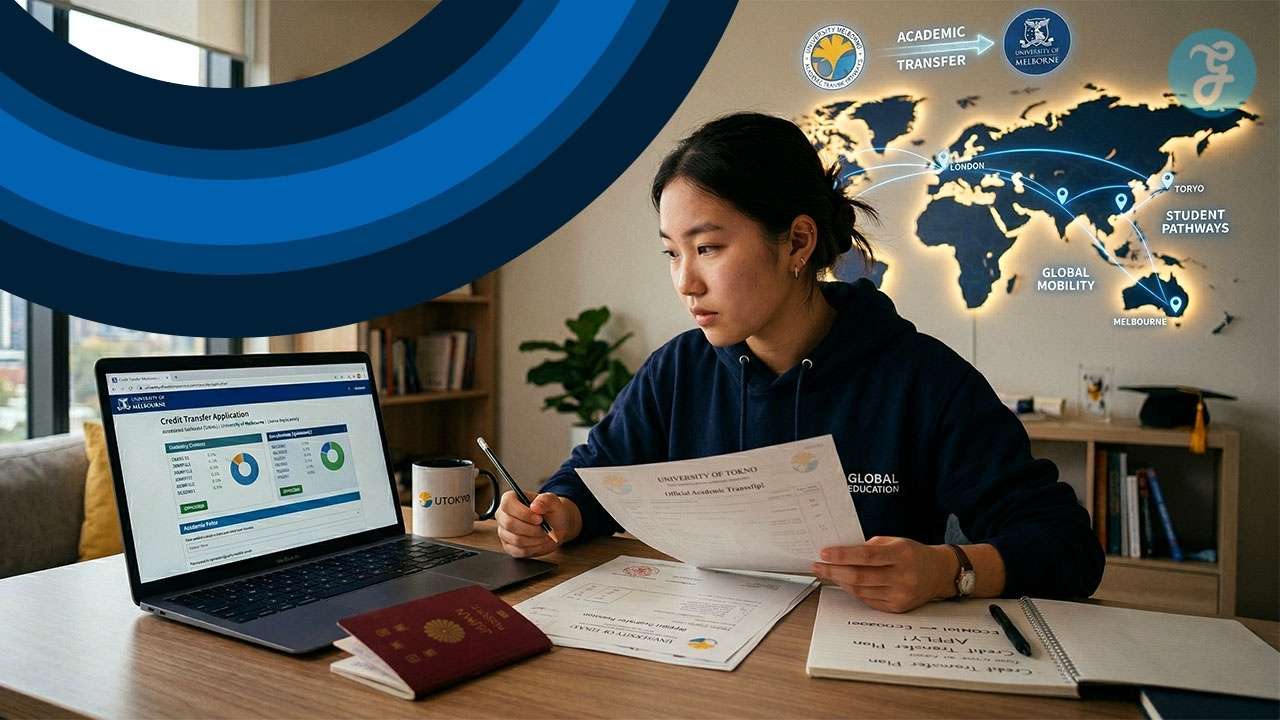
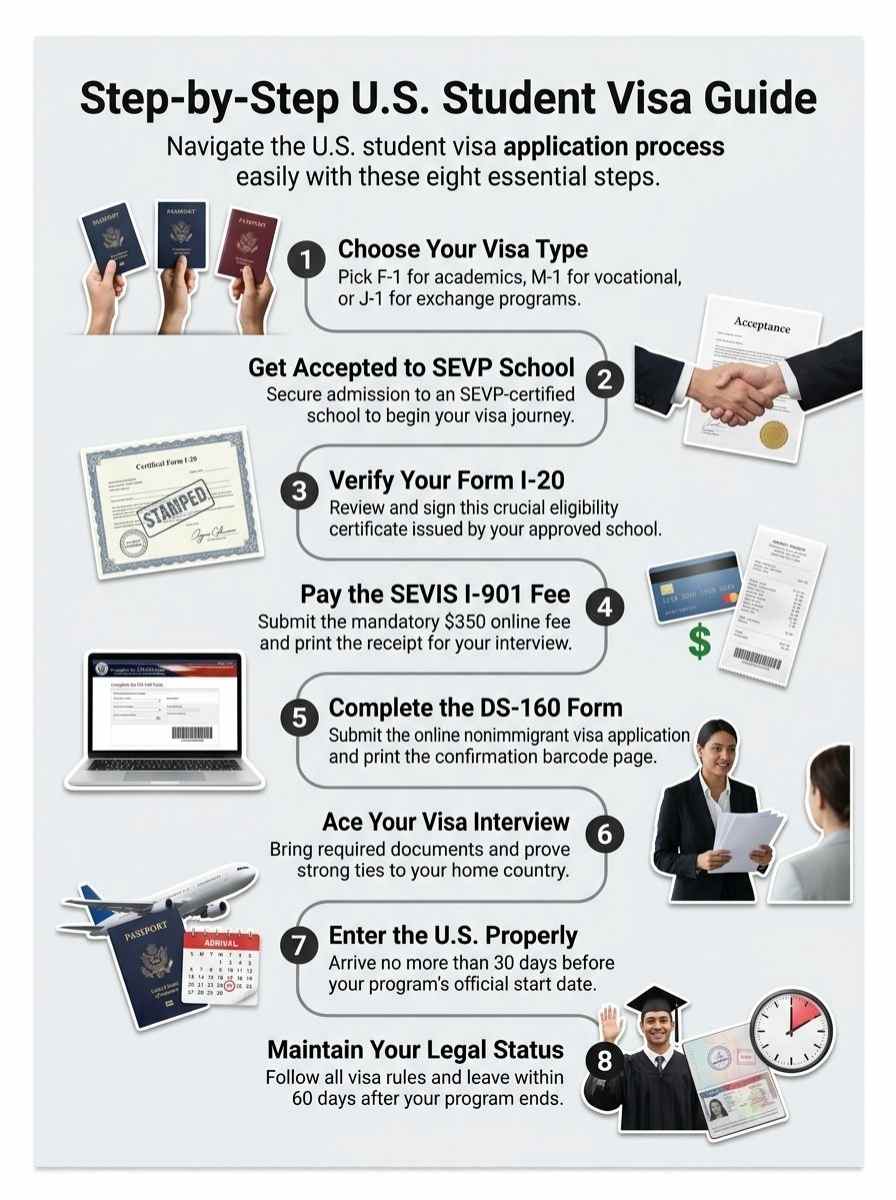
This guide explains how to apply for a student visa step by step—from choosing a SEVP-certified school and receiving Form I-20 to paying the I-901 SEVIS fee. It also covers completing Form DS-160, scheduling the visa interview, and avoiding common mistakes.
Start the journey with clarity and confidence.
Determine the Type of Student Visa You Need

Figuring out the right student visa feels like choosing the perfect outfit for a big event, you want it to match your goals just right. Think about your study plans, chat with school advisors, and pick from options like academic programs or exchange visits to get started on this adventure.
F-1 Visa for full-time academic students
The F-1 visa fits students who join full-time academic or language training programs in the United States. Schools certified by the Student and Exchange Visitor Program issue Form I-20 for this US student visa.
Imagine yourself as an eager learner, packing bags for that graduate degree at Northeastern University. You enter the U.S. up to 30 days before your program start date, no earlier.
“Hey, I finally get to study abroad,” you might say to friends back home.
The F-1 visa opens doors to education in the U.S., says an advisor from EducationUSA.
F-1 students leave the U.S. within 60 days after the program end date on Form I-20, which includes any authorized practical training. For Optional Practical Training, or OPT, you need Form I-20 endorsed for it.
Apply to U.S. Citizenship and Immigration Services for an Employment Authorization Document, known as EAD. Imagine wrapping up classes, then stepping into work experience that boosts your career.
Health insurance covers you during stays, and scholarships from places like MPOWER Financing help with costs.
M-1 Visa for vocational students
Dream of gaining hands-on skills like auto repair or culinary arts in the U.S.? Opt for the M-1 visa, perfect for folks heading to vocational or other recognized nonacademic institutions.
This m visa fits students in programs that build real-world trades, not the usual classroom grind. You need a Form I-20 designed for vocational students, issued by a designated school official at an SEVP-certified spot.
Imagine arriving with excitement, you can enter the U.S. up to 30 days before your program kicks off, giving time to settle in.
Grab that valid passport and meet student visa requirements through the U.S. Department of State. M-1 holders, listen up, you must leave the U.S. within 30 days after your program wraps, no lingering like a bad habit.
Check resources from Study in the States or USA gov for smooth sailing. If life throws curveballs, explore change of status options with U.S. Citizenship and Immigration Services. Stay sharp on visa regulations to avoid hiccups, and note that this path differs from f visa or j-1 visa tracks for academic or exchange visitor visa pursuits.
J-1 Visa for exchange programs
The J-1 visa opens doors for temporary exchange visitors. You join programs to teach, study, observe, or train. Think of it as a bridge to new skills and cultures, like swapping stories with folks from afar.
This visa fits au pairs, interns, and visiting scholars perfectly. It ties directly to programs the U.S. Department of State approves. That sets it apart from F-1 and M-1 options.
People use the J-1 for teaching, instructing, studying, observing, conducting research, consulting, demonstrating special skills, or receiving training. Exchange programs often link with groups like the Student Exchange and Visitor Program.
Check with US Citizenship and Immigration Services for details. Visit a US embassy to start your application. Unlike a visitor (B) visa, this one focuses on structured exchanges, not casual trips.
Apply to an SEVP-Certified School
You need to start your student visa journey with enrollment in a SEVP-approved school, folks. SEVP means Student and Exchange Visitor Program. This program certifies schools that can enroll foreign students.
Think of it like a golden ticket, opening doors to U.S. visas for your education dreams. Schools handle this through the Student and Exchange Visitor Information System, or SEVIS. They register you there once you get accepted.
U.S. Immigration and Customs Enforcement oversees this whole setup, keeping things smooth for international folks like you.
Get accepted to one of these schools before you even dream about applying for U.S. visas. SEVP certification covers undergraduate programs, and graduate ones too. Only these approved spots can issue your Form I-20.
Picture the University of Bridgeport as an example; it’s one such place ready for students chasing degrees. Skip this step, and your visa path hits a wall. Focus here first, and the rest falls into place like dominoes.
Receive and Verify Form I-20
Your school hands over the Form I-20 after they admit you. This document goes by the name Certificate of Eligibility for Nonimmigrant Student Status. SEVIS produces it, and it comes with a SEVIS ID that starts with an ‘N’.
Check every detail on the form for accuracy, then sign it. The school official signs it too. You need this form for your visa application, entry to the U.S., and even things like visa renewal down the line.
Families take note: each member who joins you gets their own individual Form I-20. Think of it like a golden ticket, proving you’re set for studies here, but double-check it to avoid any mix-ups.
Schools like Yale make this easy. Their Office of International Students and Scholars, or OISS, uploads the I-20 Form to the OISS Connect portal right after admission. Grab it from there, review it fast.
This step ties into paying the visa issuance fee later, and it sets you apart from folks in the visa waiver program who skip some paperwork. I once heard a student say, “That form felt like my passport to adventure,” but only if you verify it spot on.
Keep it safe; it opens doors to your U.S. journey.
Pay the I-901 SEVIS Fee
Students pay the SEVIS fee after a SEVP-approved school accepts them. This one-time payment, usually $350, happens online at the SEVIS website. You complete it before starting the visa application.
Think of it like buying a ticket to the big game, you need that receipt to prove you’re in. The SEVIS Fee Receipt acts as your proof, and officials require it with the visa application.
Keep a copy handy for any future needs, like F-1 visa renewals where proof comes in recommended.
Dependents, such as a spouse or children, skip this SEVIS I-901 fee. But each one still needs their own Form I-20. I once knew a guy who forgot his receipt copy and faced delays, don’t let that happen to you.
Submit the fee early to keep things smooth.
Complete the DS-160 Online Visa Application
Head to the Consular Electronic Application Center website right away. Fill out the online Nonimmigrant Visa Application, Form DS-160, with care. You need to upload a suitable photo that meets the Photograph Requirements.
Think of this step as packing your suitcase for a big trip, every detail counts to avoid mix-ups. Submit the form several days before your visa interview, give yourself that buffer like a safety net.
For the U.S. Address or Point of Contact field, plug in your department contact or OISS adviser’s information. That keeps things smooth and accurate.
Print the DS-160 confirmation page, it includes a barcode you must bring to the interview. Officials might ask for your social media accounts and a detailed CV that matches your online profiles.
Imagine them cross-checking like detectives in a fun mystery novel, so keep everything consistent. You handle this part well, and you’re one step closer to your studies abroad. Stay organized, it feels like juggling balls, but you got this.
Schedule Your Visa Interview
Students must set up a visa interview at a U.S. Embassy or Consulate. Go for the one in your home country, as that’s often the nearest spot. Schedule it where you live to keep things smooth; picking a different place could add headaches, like extra paperwork or delays.
Interview wait times change with location, season, and visa type, so apply early to beat the rush. New students can request F and M visas up to 365 days before their course kicks off, but they can’t step into the U.S. more than 30 days ahead of that start date.
Continuing students get more wiggle room and can enter the United States before classes begin. Imagine: you lock in that slot months ahead, dodging the stress of last-minute scrambles.
Early moves pay off big, especially with those varying wait times for spots. Appointments fit best at your local U.S. Embassy or Consulate, and starting soon means you stay ahead of the game.
Pay the Visa Application Fee
You need to pay the non-refundable visa application fee of $185 before your interview. This fee covers the Machine Readable Visa, or MRV, process, and it usually totals $185. Head over to the U.S. Embassy or Consulate website for exact payment instructions, like how to use a bank transfer or credit card.
Keep that receipt safe, folks, because proof of payment is a must at your visa interview. Imagine showing up without it, what a headache that would be.
If your visa gets approved, expect an extra visa issuance fee depending on your nationality. Officials base this on reciprocity rules, so check details ahead. Grab the application fee payment receipt if it applies, and bring it along to the interview.
Store all visa application fee receipts in your records, just in case questions pop up later.
Gather Required Documents for the Interview
Picture yourself as a detective piecing together clues for the big case, that’s you rounding up those key papers before your visa chat. Grab your travel ID, that school-issued certificate, the online form printout, payment slip, bank statements, and school transcripts, oh, and don’t forget to double-check everything to avoid any last-minute scrambles that could trip you up.
Valid passport
You need a valid passport for your student visa journey. It must stay valid for at least six months past your planned U.S. stay, unless your country gets an exemption. Check that detail early, folks, to avoid any last-minute scrambles.
Officials require this document for both the application and the interview. Think of it as your golden ticket, one that opens doors without expiring too soon.
Your passport can’t expire within six months of your program’s end date, so double-check those dates now. Got an old passport with a still-valid U.S. visa? Keep it intact; that visa stays good until its own expiration, as long as it’s not canceled or revoked.
Carry both the old and new passports when you travel, like a dynamic duo ready for adventure. Don’t even think about removing the visa from the expired one; that could mess things up big time.
Form I-20
Schools send you the Form I-20 after they accept you. This paper, called the Certificate of Eligibility for Nonimmigrant (F-1) Student Status, fits academic and language programs. Vocational paths need the M-1 version instead.
Check every detail on it, like your name and program dates, for mistakes. Sign the form right away, as if sealing a promise to follow the rules. You present this during your visa interview, and later at the U.S. border, like a golden ticket to entry.
Family members joining you each get their own Form I-20. Yale issues separate ones for dependents, complete with distinct SEVIS numbers, to keep things smooth. Post-admission, Yale uploads your I-20 to the OISS Connect portal.
Grab it from there, review for accuracy, and sign it. This step feels like double-checking your map before a big trip, making sure no wrong turns ahead.
DS-160 confirmation page
You complete the DS-160 form online before your visa interview. Fill it out several days ahead to avoid any rush. This form asks for your U.S. address, source of funding, and social media details.
Students upload a passport-size photo right in the application. Think of it as your digital handshake with the embassy, full of key facts about your plans.
Print the DS-160 confirmation page and bring it to the interview. It holds a barcode that officials need for processing. This page acts as a required document, just like your valid passport or Form I-20.
Your visa appointment confirmation might even reference the DS-160. Pair it with your SEVIS fee receipt and financial proof for a smooth chat with the consular officer.
SEVIS fee receipt
Pay the SEVIS I-901 fee before you submit your visa application. This fee costs $350 most of the time, and it works as a one-time payment for each student. Dependents skip this fee, but they need their own Form I-20.
Bring the SEVIS fee receipt to your visa interview; officials require it. Submit this receipt with your application too. Keep a copy of it in your files, just in case. For F-1 visa renewals, show proof of this payment to stay on track.
Think of the SEVIS fee receipt like a golden ticket in your student visa journey. It proves you handled the $350 charge upfront. Students often forget to copy it, leading to last-minute scrambles at the embassy.
One applicant I heard about dashed back home for his copy mid-interview, talk about a close call. Make sure you pay early and hold onto that receipt tight. This step keeps everything smooth for your big move abroad.
Financial proof
You need solid proof that you can pay for your studies, living costs, and travel. Show this with bank statements or scholarship letters. The consular officer might ask for it during your interview.
Think of it like proving you’re ready for a big adventure without running out of fuel midway.
List your funding source in the DS-160 form just as it appears on your I-20 or DS-2019. Students often provide evidence for tuition, living expenses, and more. If your spouse or children join you, they must prove their tie to you as the main visa holder.
Check out MPOWER Financing for loans that cover up to 100% of education costs, including living, meal plans, and health insurance. They skip the need for a cosigner or collateral. Plus, their Path2Success program gives free visa support letters to boost your application.
Academic records
Bring your academic records to the visa interview, folks. They count as a key part of the required documents. Consular officers often ask for evidence of your academic prep, like transcripts, diplomas, degrees, or certificates.
These items show you qualify for student status. Picture them as your ticket to proving you’re ready for U.S. studies, no shortcuts here.
If you’re a PhD student in STEM fields, pack extra. Submit your own CV with publications. Include your academic adviser’s CV with publications too. Provide a research plan for studies at Yale.
Officers might also request standardized test scores that your U.S. school needs. Students, get ready to hand over academic transcripts and certificates if asked; it’s like showing your homework to prove you’re serious.
Attend Your Visa Interview
Head to the U.S. Embassy or Consulate for your student visa interview, and stay calm like you’re chatting with a friend over coffee. A consular officer checks your qualifications right there, so answer questions about your academic plans and funding with honesty.
Expect the talk to last about five minutes, and get ready to explain why you picked a place like Yale, plus your career goals in real terms. They collect digital fingerprint scans as part of the process, so keep your hands steady.
Present every required document, such as your Form I-20, DS-160 confirmation page, SEVIS fee receipt, proof of finances, and school records, to show you’re set.
Some applications need extra administrative processing, which could add time, but don’t sweat it if that happens. Prep for possible denials by seeking clear reasons and knowing your next moves, like reapplying with fixes.
Check the U.S. Embassy or Consulate website for exact instructions to avoid surprises. Imagine acing this step as unlocking the door to your studies abroad; you’ve got this with solid prep.
Wait for Visa Processing and Approval
Visa processing takes several weeks or more in many cases. You applied early, good job on that. Officials review your details now. They might approve your visa, but no promise exists.
Pay the visa issuance fee if it applies after approval. Check the U.S. Embassy or Consulate website for updates on your status. Keep copies of your Form I-20, DS-2019, DS-160 confirmation page, and visa application fee receipts.
These help track things, like a safety net in a high-wire act.
Officials return your passport and visa after approval. Look over all info on the visa right away. Spot an error? Fix it at the issuing embassy or consulate. Delays or denials happen sometimes.
Email your OISS adviser at once if that hits you. Hold off on final travel plans until you hold the visa in hand. Think of it as waiting for the green light before hitting the gas.
Receive Your Student Visa
You get your passport back with the student visa inside after approval. This stamp lets you head to a U.S. port-of-entry, but border officials make the final call on entry. Feel the relief, like finding your keys after a frantic search, yet stay sharp because that visa is just the ticket to the gate.
Yale’s Office of International Students and Scholars, or OISS, wants you to reach out with questions. They help sort things out. Keep your Form I-20 safe; officials return it so you can use it for entry.
Contact OISS right away if you can’t arrive by the date on that form. Hold onto all original papers for your trip, folks. Check arrival steps on the CBP site to avoid surprises. Touch base with your local U.S. embassy or consulate for advice that fits your case.
See this as the home stretch in a relay race, where you pass the baton smoothly. Officials mail or hand over your documents post-approval. That visa opens doors, but keep in mind, it doesn’t promise a welcome mat at customs.
OISS stands ready to guide you through hiccups. Grab your I-20 back; it acts like your golden ticket for crossing borders. If dates clash, ping OISS for fixes. Pack those originals tight in your bag.
Read CBP’s online tips for smooth sailing. Local embassies offer spot-on pointers, so give them a call.
Prepare for Entry into the United States
Get your papers in order before you hop on that plane, folks. Students on F or M visas cannot enter the U.S. more than 30 days before their program starts. Keep copies of all key documents, including your visa and Form I-20, for entry.
Do not remove a valid U.S. visa from an expired passport, it remains valid. Students must enter the U.S. by the noted date on the I-20. Imagine landing smoothly, like a pro traveler avoiding turbulence, with everything handy.
At the port-of-entry, present your passport, visa, and Form I-20, and a CBP official will determine entry eligibility. Students should ensure all documents are readily accessible for inspection upon arrival.
An admission stamp or paper Form I-94 will be provided upon entry approval. Check the CBP website for arrival procedures and entry requirements, including restrictions on certain goods.
That quick review acts like a roadmap, keeping surprises at bay and your journey on track.
Enter the U. S. No Earlier Than 30 Days Before Start Date
F and M visa holders, you can’t enter the U.S. more than 30 days prior to the program start date on your I-20. Students get the green light for entry up to 30 days before that I-20 start date, no sooner.
Think of it like a strict curfew; show up too early, and you’re stuck at the gate. F-1 student visas might get issued up to 365 days before your program kicks off, but that entry rule still clamps down to just 30 days prior.
Continuing students, though, often slip in before classes start, as long as they play by the rules.
Need to arrive earlier? Apply for a visitor B visa on its own. Once you land on that B visa, file with USCIS for a change of status to student status before your program begins. Coursework stays off-limits until USCIS approves the switch, and that process can drag on for weeks or months.
Or, take the easy route: depart the U.S. and re-enter on your F or M visa when the time is right. It’s like hitting the reset button to avoid the hassle.
Maintain Legal Visa Status During Your Stay
You land in the U.S. as an F-1 visa holder, and now the real adventure begins. Students must keep their status intact, folks. Head to the SEVP website for extra details on that. Think of it like tending a garden; neglect it, and weeds take over.
F visa holders, you depart the U.S. within 60 days after your program end date on Form I-20. That includes any authorized practical training, like OPT. Miss that window, and you slip out of status.
Out-of-status folks might find future visas off the table. Imagine building a sandcastle only for the tide to wash it away; don’t let that happen to your dreams. Extensions? Request them through the USCIS website if you need more time.
Life throws curveballs, right? Say you marry a U.S. citizen; request a change of status via USCIS. No new visa needed while you’re here in the States.
Circumstances shift, and you adapt. But if you leave after a status change, apply for a new visa before returning. Imagine it as swapping outfits for different weather; you adjust to stay comfortable.
Employment during studies sparks interest for many. Check the USCIS website for info on options like OPT. It opens doors to real-world experience. Stay vigilant, my friend, like a hawk eyeing its prey.
Failure to leave on time voids your visa automatically. That sting hurts, but knowledge prevents it. Students, you juggle classes, friends, and rules. Tie it all together smoothly.
The SEVP site guides you further.
Tips for a Successful Visa Application Process

16. Tips for a Successful Visa Application Process: Kick off your student visa journey right by jumping in early to beat the rush, sort your papers like a pro so nothing slips through the cracks, and paint a clear picture of your deep roots back home to show you’ll head back after class—craving extra advice on dodging pitfalls? Stick around for the next section!
Apply early
Apply for your student visa as soon as you can, folks. You can start the process up to 365 days before your program kicks off, and that’s a smart move with all those potential delays lurking around.
Processing might drag on for several weeks, or even longer, especially during busy seasons when U.S. Embassies and Consulates see a spike in wait times for interview slots. Imagine: you get your acceptance letter, but a late application leaves you scrambling, maybe even missing your start date altogether.
Head over to your specific consulate’s website right away for the latest instructions, because visa procedures can shift without much warning. Early prep keeps you ahead of the curve, dodging those frustrating holdups that pop up from time to time.
Stay on top of it, and you’ll breeze through with less stress.
Organize documents thoroughly
Gather your passport, Form I-20, DS-160 confirmation page, SEVIS fee receipt, financial proof, and academic records. Keep copies of these items, plus your visa application fee receipts, in a safe spot.
You need to present all required papers at the visa interview. PhD students in STEM fields, add your CVs and research plans to the mix. Make sure every document stays signed and up-to-date.
For dependents, include a copy of your F-1 or M-1 visa and proof of relationship, like a marriage certificate.
Check the I-20 Form for accuracy, then sign it right away. Verify all info on your visa too; fix errors at the issuing embassy or consulate. Head to your school’s international office for help with prep and review.
They act like a trusty sidekick, spotting issues before you do. Stay organized, and you’ll breeze through this step, no sweat.
Demonstrate ties to your home country
Show strong ties to your home country, folks, because consular officers always check for that during your student visa interview. They want proof you plan to return after your studies.
Think of it like showing roots that pull you back home, you know, family, a job waiting, or property you own. Students must demonstrate nonimmigrant intent for these visas. Prepare to discuss your study intentions and your clear plan to head back to your home country once you finish.
Evidence of your intent to depart the U.S. after completing studies might come up, so gather what shows those bonds.
Get ready to explain realistic career goals and solid reasons for picking your specific school, as that ties into your return plan. A logical study and return plan can really boost your approval chances.
Consular officers look for those strong ties right in the interview. Watch out, though, misrepresentation or fraud in your application leads to permanent refusal or denial of entry into the U.S. If denied under Section 214(b), you can reapply with extra evidence of qualifications or changed circumstances.
Picture chatting with the officer like telling a friend why home calls you back; keep it honest and heartfelt.
Common Mistakes to Avoid During the Application Process
Steer clear of pitfalls that could derail your student visa dreams, folks. You want this process to go smooth as butter, so let’s spotlight those sneaky errors that trip people up.
- Folks often try to bend the truth on their applications, like faking details or hiding facts, and that leads straight to permanent refusal or even denial of entry into the U.S., no joke, it’s a one-way ticket to regret.
- Some applicants pick a third country for their visa interview instead of their home turf, which throws in extra hurdles and complicates everything, making the whole deal feel like herding cats.
- Skipping the I-901 SEVIS fee payment before you tackle the DS-160 form? That mistake sparks delays or flat-out denials, and trust me, you don’t want to hit that wall when time’s ticking.
- Rushing through your Form I-20 or DS-160 without double-checking leaves them incomplete or full of errors, and bam, you face visa denial or processing holdups that drag on forever.
- Showing up without solid financial proof, like bank statements or sponsor letters, often results in a quick visa denial, because officers need to see you can cover your costs without a hitch.
- Heading into the visa interview without a clear study plan or evidence of strong ties to your home country? Officers spot that right away, and it tanks your approval chances, leaving you in a tough spot.
- Forgetting to keep copies of every single document, from your passport to the SEVIS fee receipt, makes future renewals or status changes a nightmare, like searching for a needle in a haystack.
- Ignoring timelines hits hard too; apply late or miss that 30-day entry window before your program starts, and you risk blowing your shot at the whole adventure in the U.S.
Final Words
You’ve walked through picking the right visa like F-1 for academics or M-1 for job training, getting into an SEVP school, handling Form I-20 and SEVIS fees, filling out DS-160, and acing that interview with solid docs.
These steps keep things simple, you just follow them one by one without extra hassle, and they save time so you focus on your dreams. Landing a student visa opens doors to top education in the U.S., it boosts your career big time and solves worries about studying abroad.
Check out the USCIS site for more tips or chat with your school’s advisor if you need extra help. I recall my own visa chase, felt like juggling fire, but sticking to the plan made it smooth sailing.
Now grab that chance, apply today, and turn your study goals into reality.
Frequently Asked Questions (FAQs) About Applying for a Student Visa
1. What’s the first step in applying for a student visa?
Hey, I get it, starting this process feels like jumping into the deep end, but don’t worry. First, get accepted to a school abroad and snag that acceptance letter; it’s your golden ticket. Then, fill out the online application form right away to keep things moving.
2. What documents do you need for a student visa application?
You’ll need your passport, school acceptance letter, and proof of funds to show you can pay for tuition and living costs. Think of it as packing for a big trip, but with paperwork instead of clothes.
3. How do you prepare for the student visa interview?
Practice answering questions about your study plans and why you chose that school; it’s like rehearsing for a job chat, only with higher stakes. Dress neatly, stay calm, and bring all your documents, because showing up prepared makes you look like a pro. Remember, a smile goes a long way in easing those nerves.
4. What happens after you submit your student visa application?
You wait for approval, which can take weeks, so patience is key here. If approved, you’ll get your visa stamped in your passport.